How to set up a promotion Banner?
A promotion banner is an image tile you place across your store — in collection grids, search results, instant search, or the cart drawer — to push a campaign, a collection, or an announcement. Custom
A promotion banner is an image tile you place across your store — in collection grids, search results, instant search, or the cart drawer — to push a campaign, a collection, or an announcement. Customers click it and land wherever you point it.
Before you start
Sledge Core must be enabled on your theme. Sledge Core is the app embed that loads Sledge on your storefront — without it, nothing you configure here reaches your customers. You enable it during onboarding (Enable in theme), or any time via Online Store → Themes → Customize → App embeds → Sledge Core. Which pages actually show this feature is controlled by its own Surfaces section, explained below.
Create or edit a banner
Go to Sledge → Tools → Promotion, open Banner, and click Add banner (or click an existing banner to edit it — the example below is the store’s “Banner Cozy Knitwear”).
Banner title, content & behavior
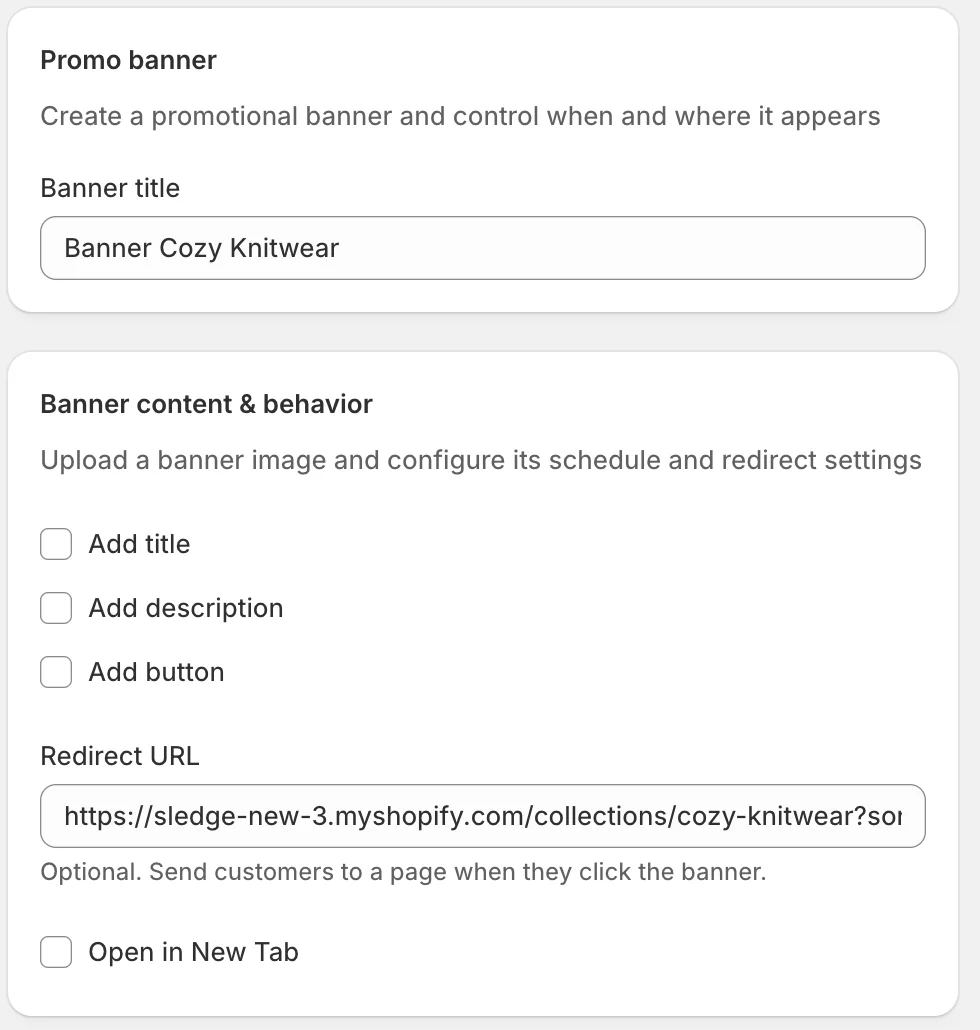
- Banner title — an internal name so you can identify the banner in your dashboard; customers don’t see it.
- Add title / Add description / Add button — optional text and a call-to-action button overlaid on the banner image. Leave them unticked for a purely visual banner.
- Redirect URL — where customers go when they click the banner (a collection, a page, a product…). Optional — with no URL the banner is not clickable.
- Open in New Tab — open the destination in a new browser tab instead of replacing the current page.
Upload image
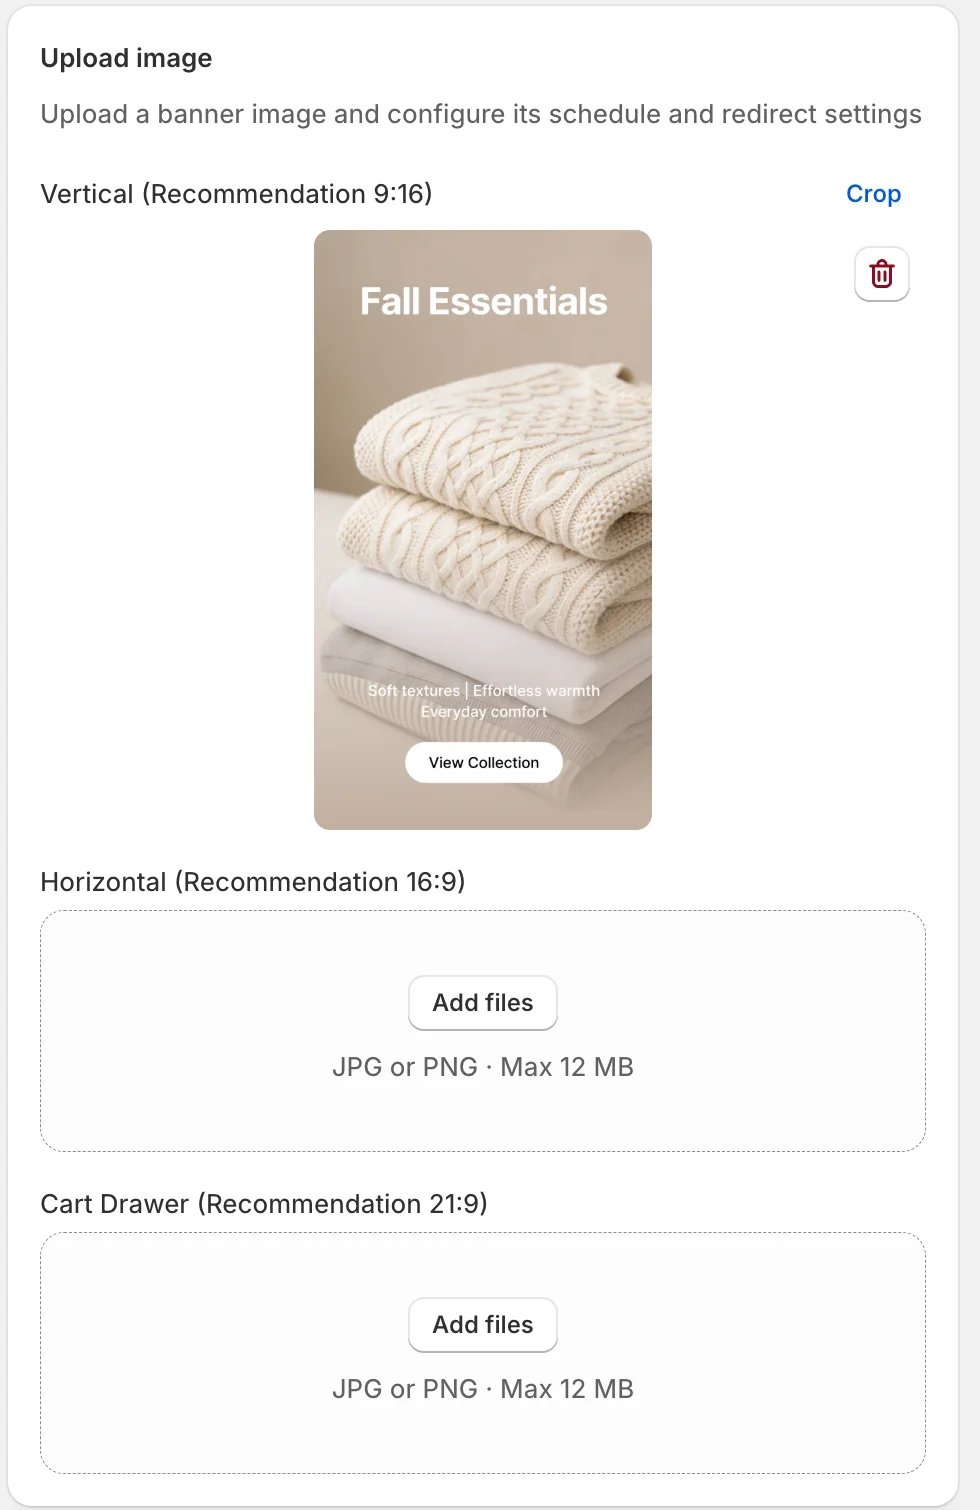
One banner can carry up to three image versions, each used where its shape fits best: Vertical (9:16) for tiles inside product grids, Horizontal (16:9) for wide placements, and Cart Drawer (21:9) for the drawer. JPG or PNG up to 12 MB; the Crop link lets you adjust the framing after upload.
Country and Active dates
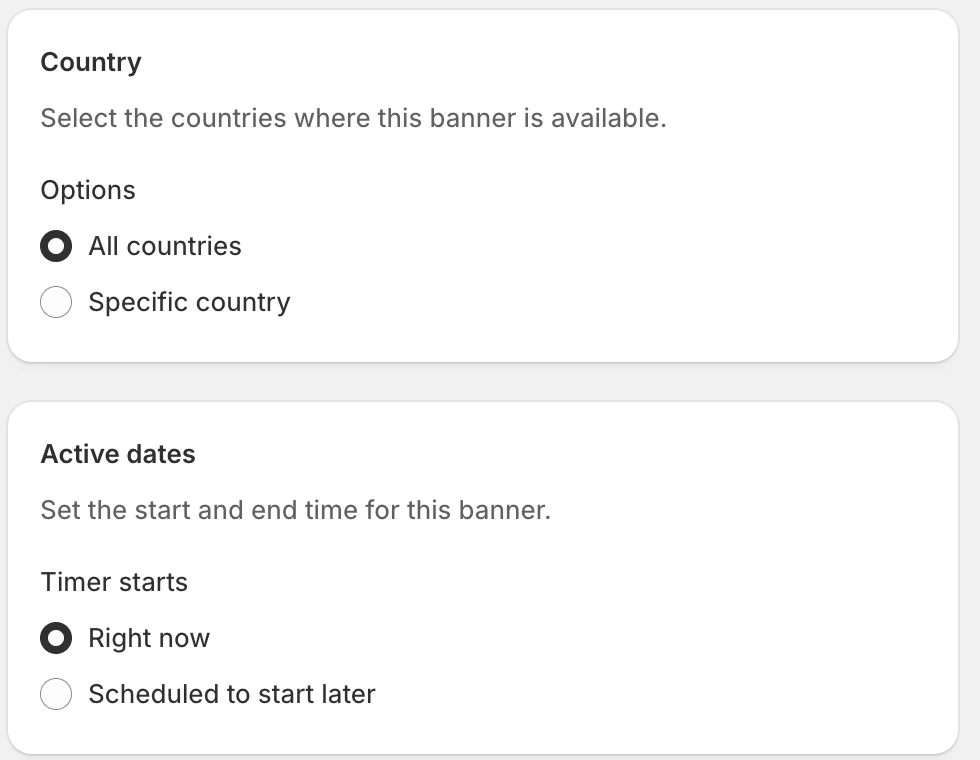
Country limits the banner to specific countries, or all. Active dates controls scheduling — Right now runs it immediately, Scheduled to start later lets you set start (and end) times, useful for campaigns prepared in advance.
Surfaces
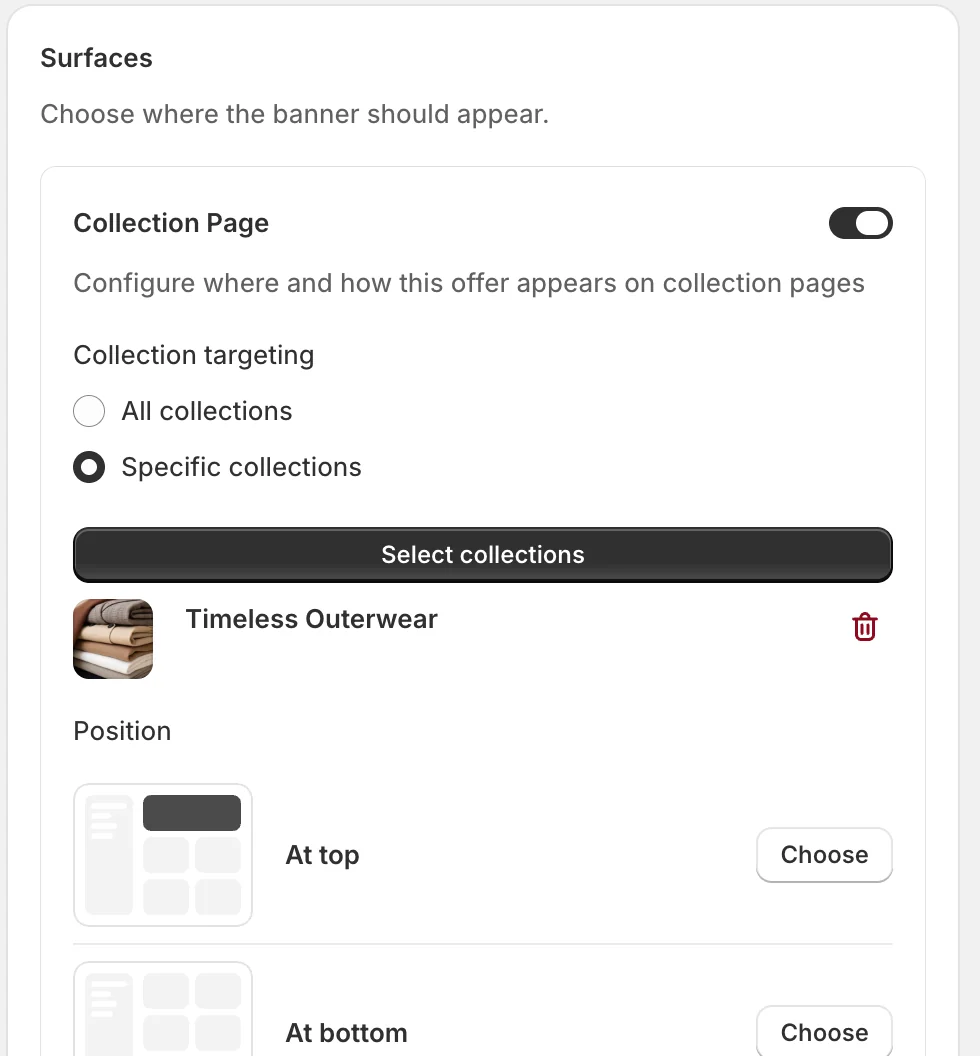
Each surface has its own switch and placement controls. On Collection Page you choose the Collection targeting (all collections or specific ones — the example targets Timeless Outerwear) and the Position: At top, At bottom, First item, or Last item (page 1) — the item positions place the banner as a tile inside the product grid itself. Search Page and Instant Search add a keyword list so the banner only shows for matching searches, and Cart Drawer uses the 21:9 image. A Custom layout option lets you set an exact grid position.
Status and Preview
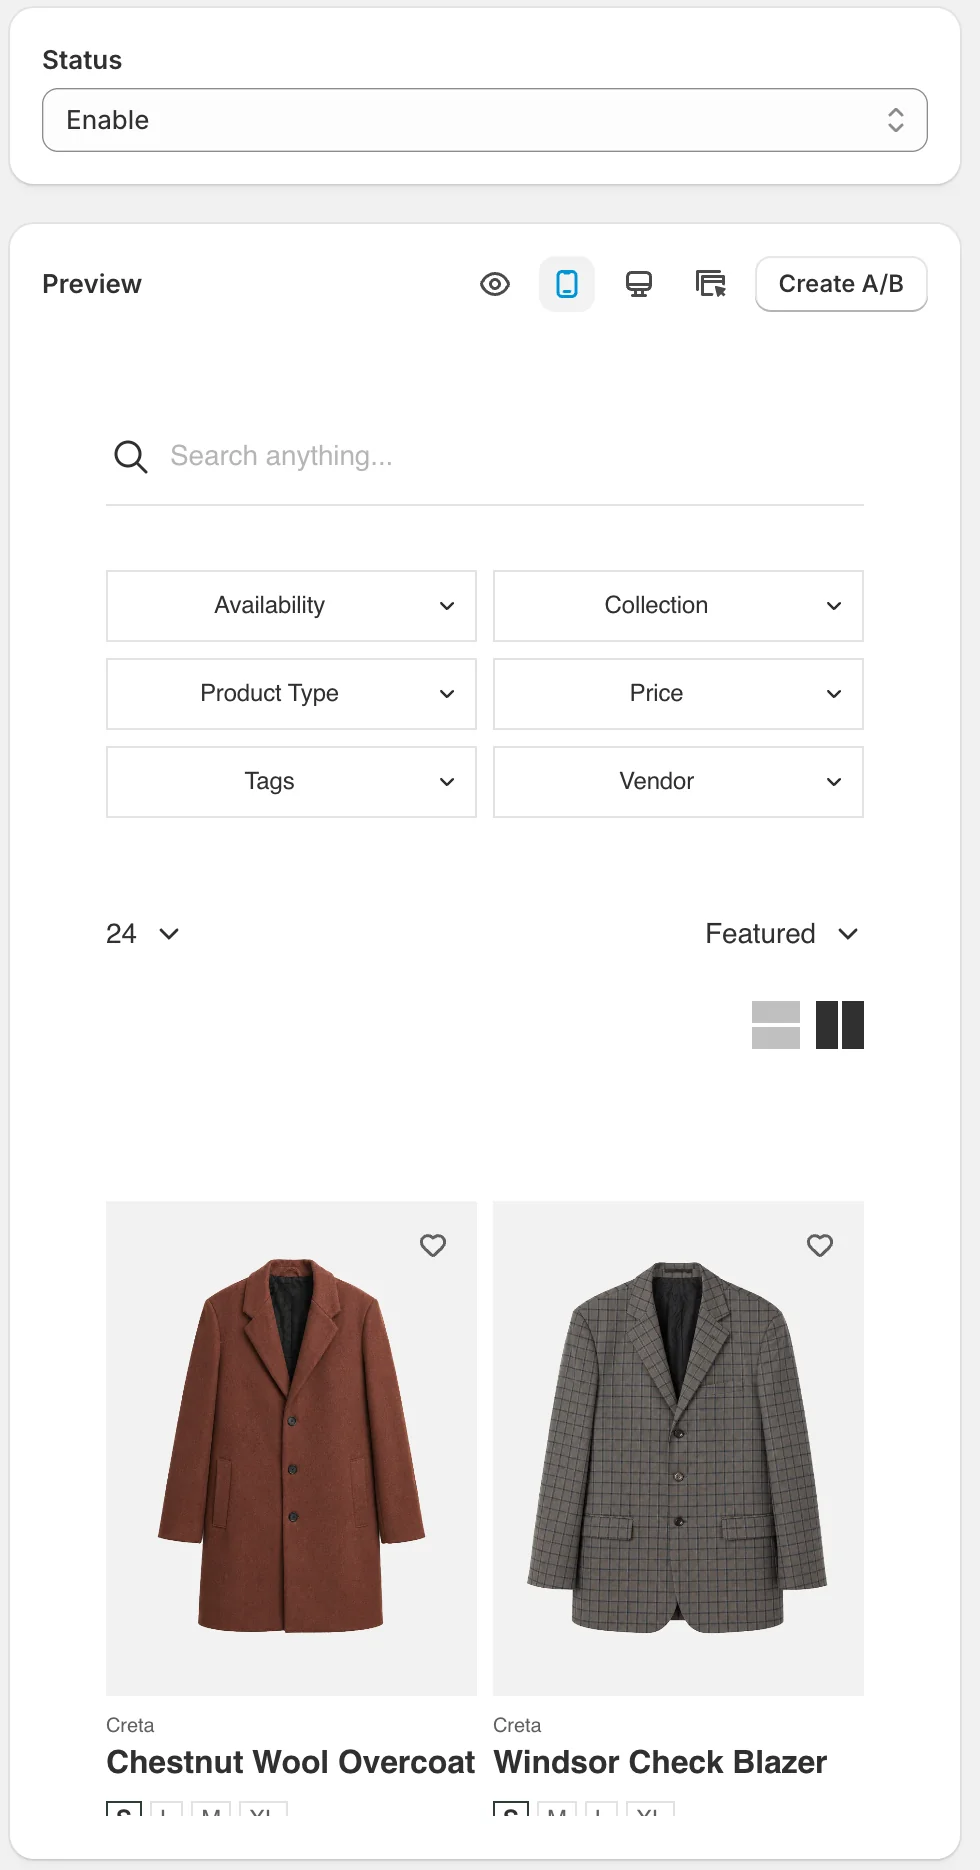
Status (Enable / Disable / Draft / Archive) controls whether the banner is live. The Preview panel renders the target surface with your banner in place, with mobile and desktop toggles — and Create A/B starts an A/B test of this banner (covered in its own guide). Click Save in the save bar to apply changes.
Result
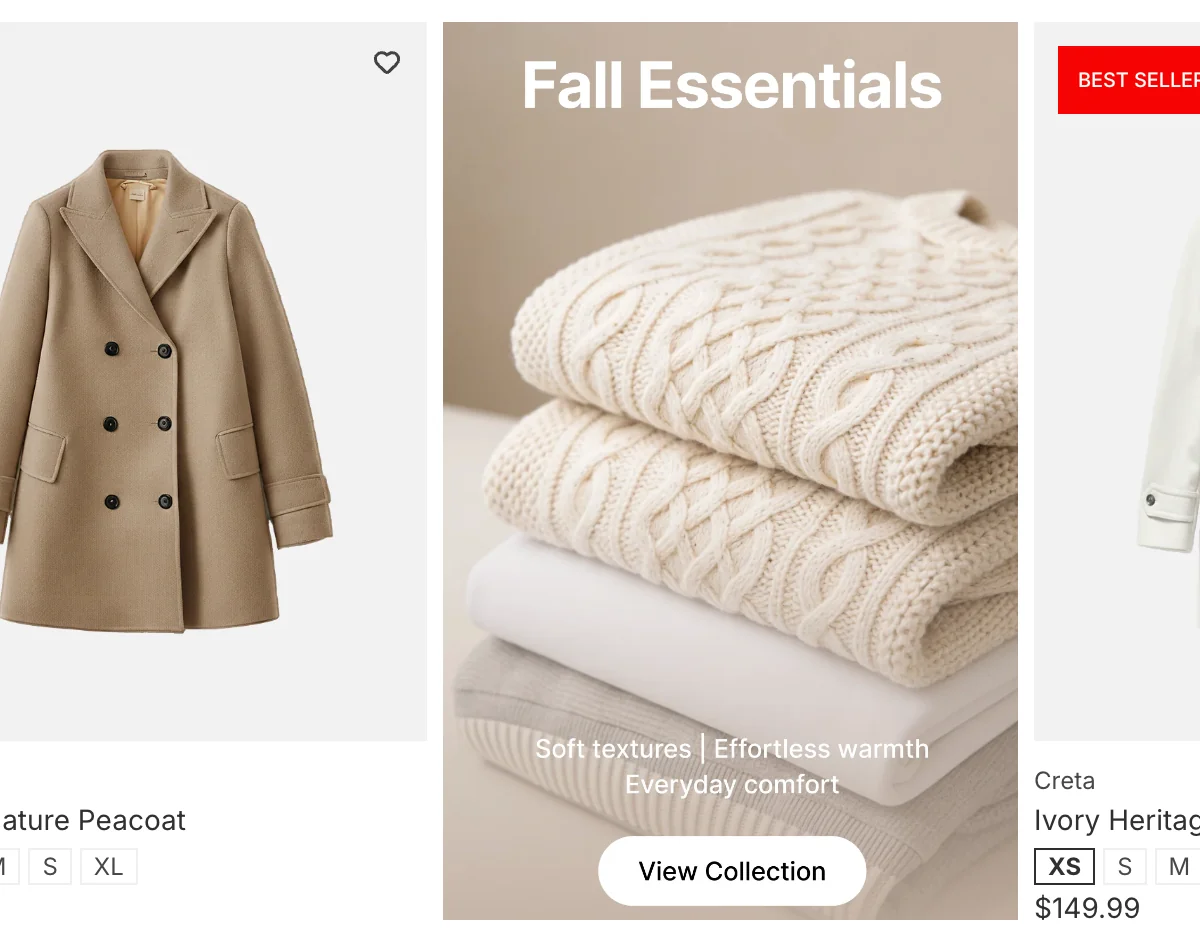
On the storefront, the banner appears as a tile inside the targeted collection’s grid — here the “Fall Essentials” banner sits among the products of Timeless Outerwear, linking to the knitwear collection:
Not showing up? Give the change a minute to sync, then reload the page. Also confirm the campaign’s Status is Enable, the surface you expect is switched on in Surfaces, and Sledge Core is enabled as described above.
Related
Last updated on
How to Set Up A/B Testing for Product Countdown?
A/B testing lets you run two versions of the same Product Countdown at once and split live traffic between them, so the winner is decided by what customers actually do rather than by opinion.
How to set up Global Countdown?
The Global Countdown is a slim countdown bar shown across your storefront — “Black Friday Sale! Sale ends in 16:39:22” — building urgency for a store-wide campaign. It runs everywhere Sledge is active