
How to Create a Volume Discount in Sledge?
Volume Discount lowers the unit price as the quantity goes up — buy one and save a little, buy more and save more.
Volume Discount lowers the unit price as the quantity goes up — buy one and save a little, buy more and save more.
It's the gentlest way to lift order value, because the customer chooses to spend more in exchange for a better rate. Nothing is forced on them and nothing is given away free. It suits consumables and basics, where buying ahead is rational.
Like Buy X Get Y, the products you pick are the condition and the offer lives in the tiers. The difference is what the customer gets: a better price rather than free units.
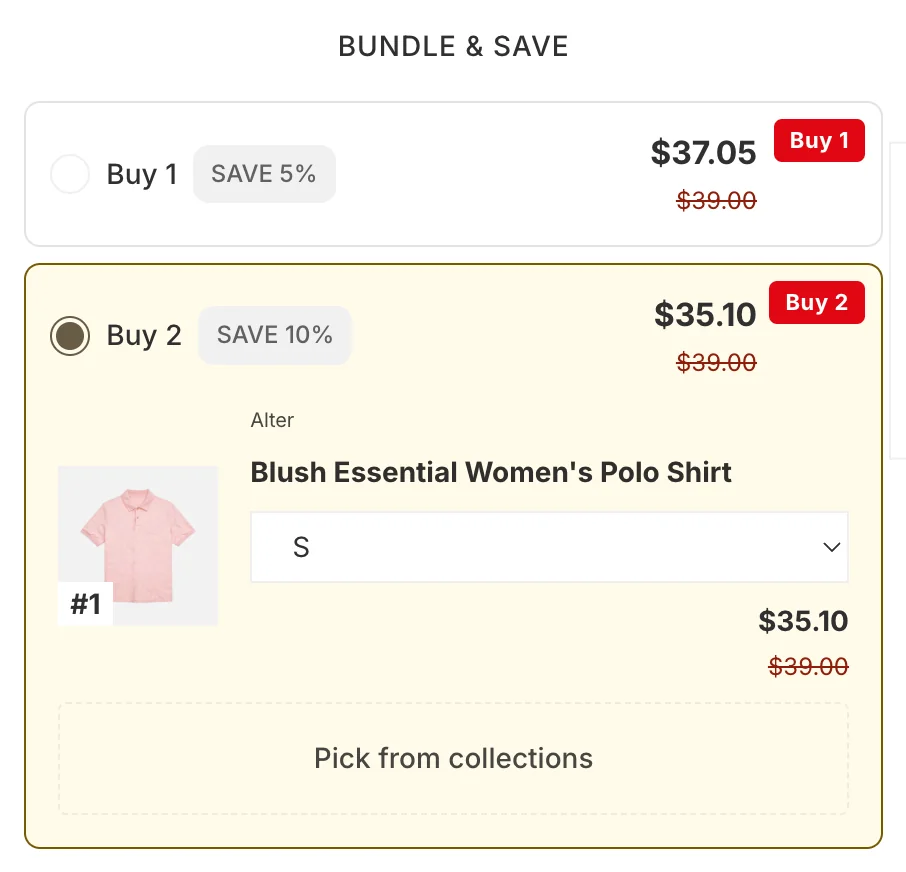
Before you start — Sledge must be active on your theme. Decide what the offer is and what it costs you before you build it. The example throughout this guide is a Blush Essential Women’s Polo Shirt with two tiers — Buy 1, save 5% and Buy 2, save 10%.
Step 1 — Name it and choose where it applies
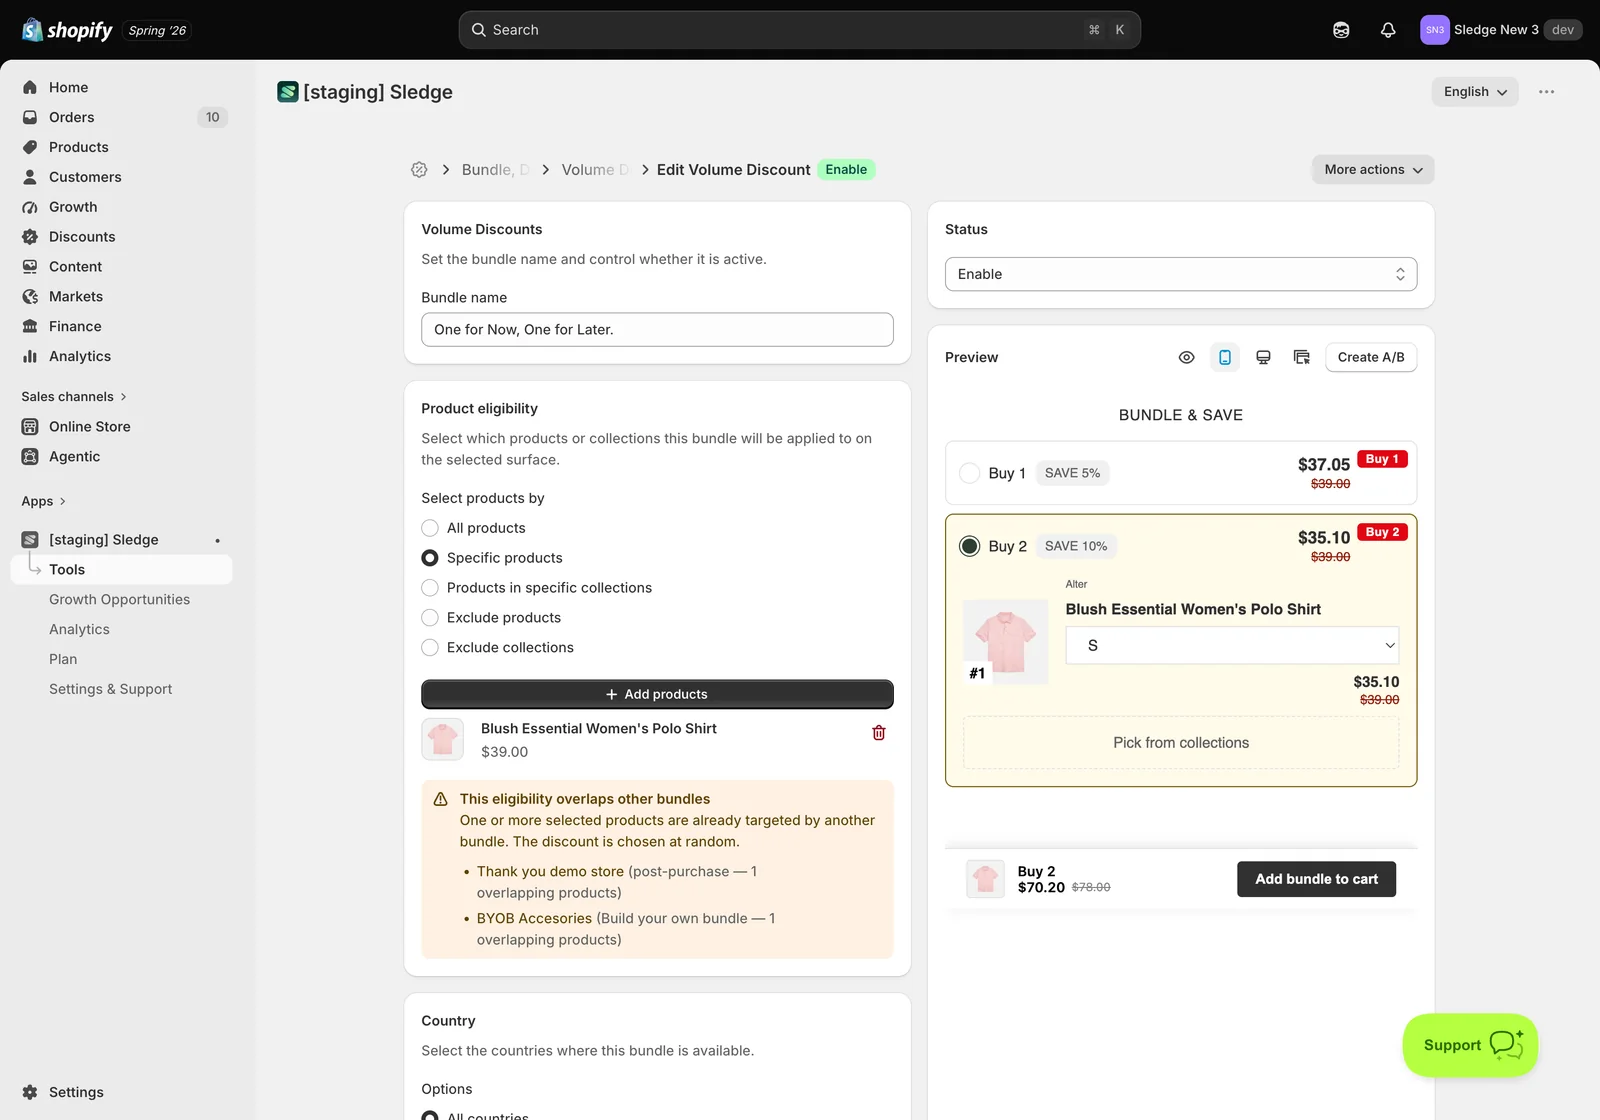
- Go to Tools → Bundle, Discount & Upsell → Volume Discounts and open the bundle you want to edit, or create a new one.
- Bundle name — customer-facing, so write it as a shopper would read it.
- Product eligibility decides which product pages the offer appears on. Choose All products, Specific products, Products in specific collections, or one of the two exclude options. Then add the products with Add products.
- Optionally set Country to limit markets, Active dates to schedule a run, and Countdown to add urgency. Leave all three alone for an evergreen offer.
If you see an overlap warning — another bundle already targets one of these products, and Shopify picks between the competing discounts at random. It won’t stop you saving, but the customer may not get the offer you intended. Narrow one of the two bundles if the overlap wasn’t deliberate.
Step 2 — Build the offer
The Volume bundle section is where this bundle type does its real work.
Each tier sets a quantity and the discount that unlocks at it:
- Quantity — how many units the customer must buy.
- Discount type and value — percentage or fixed amount, per tier.
- Tier title and badge — how the tier reads, and which one you mark as best value.
- Extra Offer — per-tier upsell products, so a bigger tier can also unlock a related item.
Space the tiers so each step is worth taking. If buying two saves 5% and buying three saves 6%, nobody moves up.
There is also a Volume discount with other product section, which extends the offer to a second product — in the example, Modern Men’s Shirt. Use it when the volume deal should span a small range rather than a single item.
Variant lets customers pick size or colour per unit.
Under Surfaces, switch on where the offer should render. At least one surface must be on — Product Page is the usual home.
Step 3 — Customise how it looks
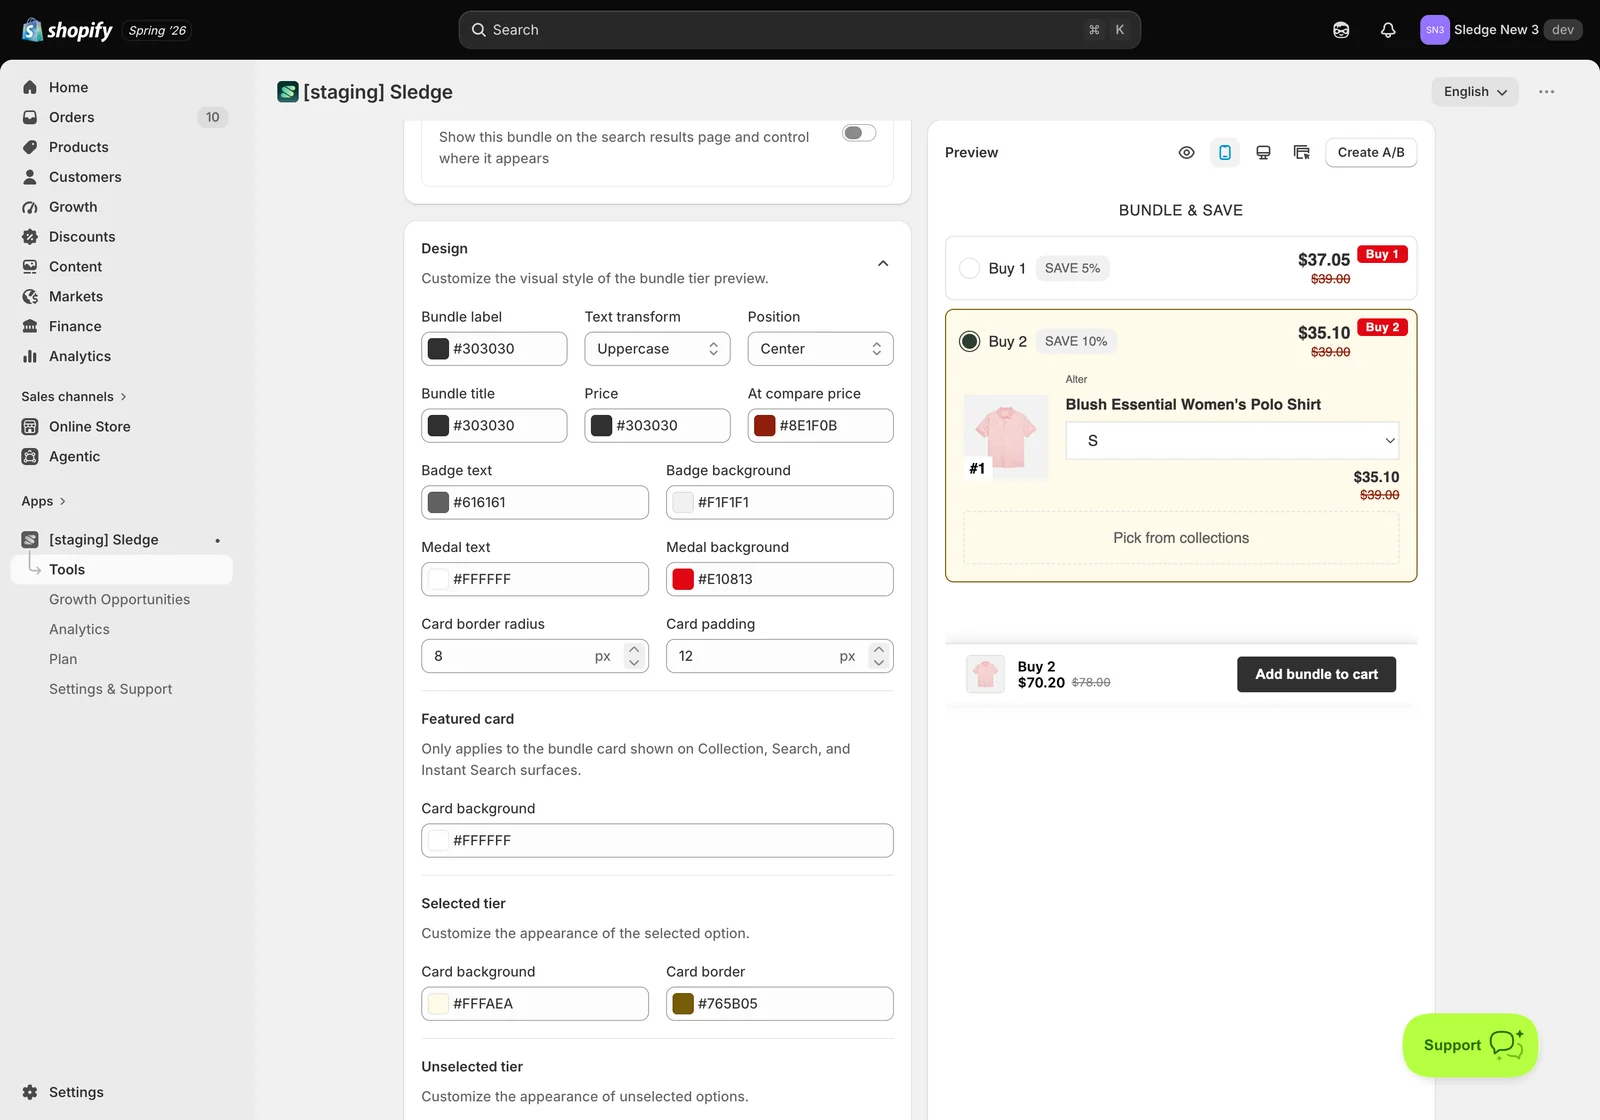
The Design card is what makes the offer look like part of your theme rather than an app bolted onto it. It’s optional, and it’s the difference between an offer customers trust and one they scroll past.
- Bundle label, price and compare-at price colours — the text customers read first.
- Badge (and, on tiered types, medal) colours — the flag carrying your savings message. Give it contrast; it does the selling.
- Card background, border, border radius and padding — the panel itself. Radius and padding are what match it to your theme’s other cards.
- Featured card — a separate colour used only where the bundle appears as a card in a product grid on Collection, Search and Instant Search.
Watch the Preview as you edit — it re-renders live, so you can judge the real thing instead of guessing from hex codes.
Step 4 — Save and publish
- Check the Preview, then click Save.
- Set Status to Enable. A saved bundle that is still disabled won’t appear for anyone.
Result
Done. The offer is now live. Below is the example on the storefront — the quantity tiers as customers choose between them on the product page.
Not showing up?
- Status must be Enable, and the relevant surface switched on.
- Make sure you’re looking at a product that’s actually in Product eligibility.
- Every product involved must be active and in stock — an unavailable product takes the offer down with it.
- If a different discount applies, look for the overlap warning — another bundle is competing for the same product.
- If you set Active dates, confirm today falls inside the window.
- Storefront changes take about a minute to sync.
Related
Last updated on
How to Create Product Add-ons in Sledge?
Add-ons suggest related products underneath the one a customer is already looking at, each available at a discount if they take it now.
How do I create a Build Your Own Bundle offer?
Build Your Own Bundle hands the choosing to the customer. You define the steps and the reward; they pick what goes in.