
How to Set Up Product Boosting Based on Selected Filters?
A custom rule lets you run a merchandising strategy only when a shopper applies a specific filter on a collection page. For example, when a shopper filters the Modern Bottoms collection by Product Typ
A custom rule lets you run a merchandising strategy only when a shopper applies a specific filter on a collection page. For example, when a shopper filters the Modern Bottoms collection by Product Type: Chinos, you can show a chosen product at the top of the filtered results, while the normal (unfiltered) collection keeps its default order.
In this guide we create a custom rule for Product Type = Chinos and pin one product for that filter.
Step 1: Open Merchandising Strategy
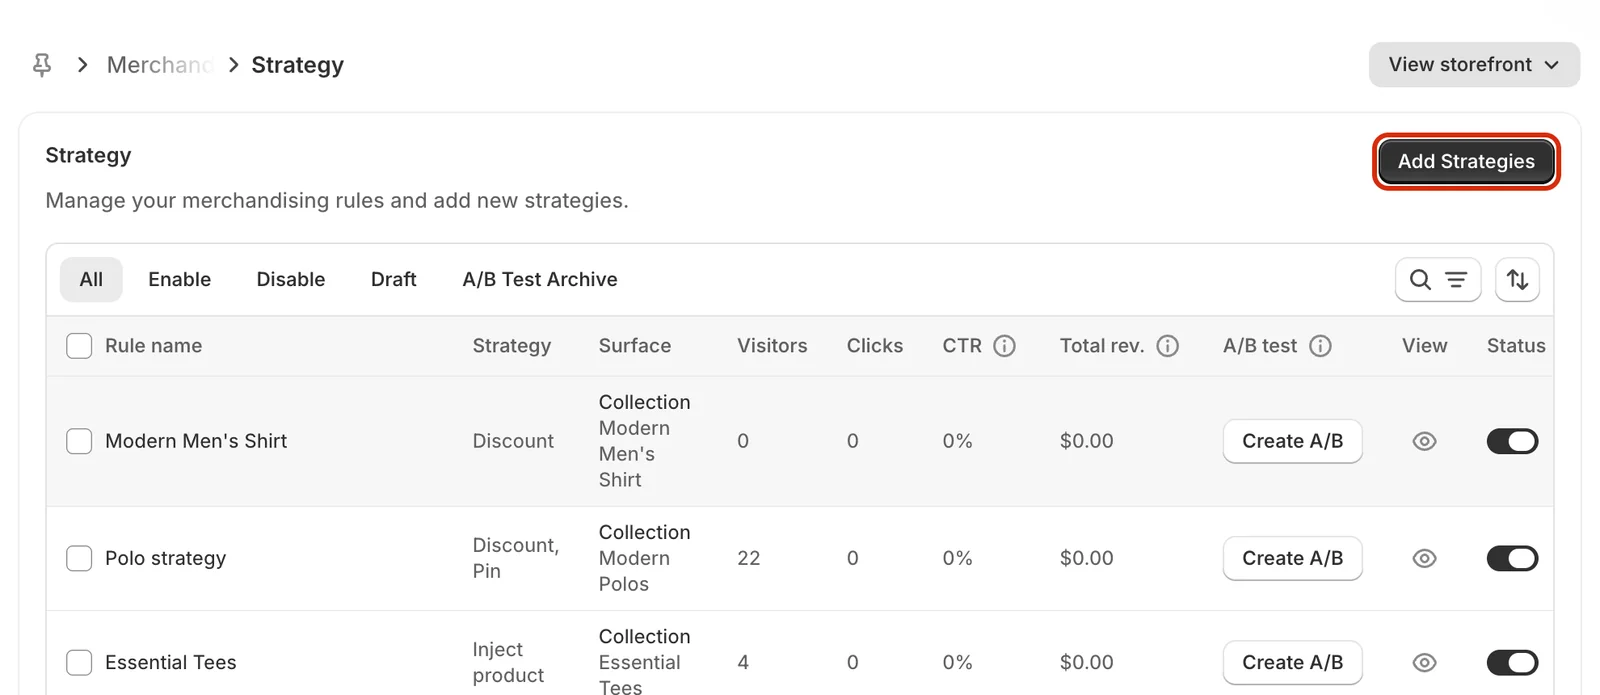
In your Shopify admin, go to Apps > Sledge > Tools > Merchandising > Strategy, then click Add Strategies.
Step 2: Set the rule name and turn on Collection Page
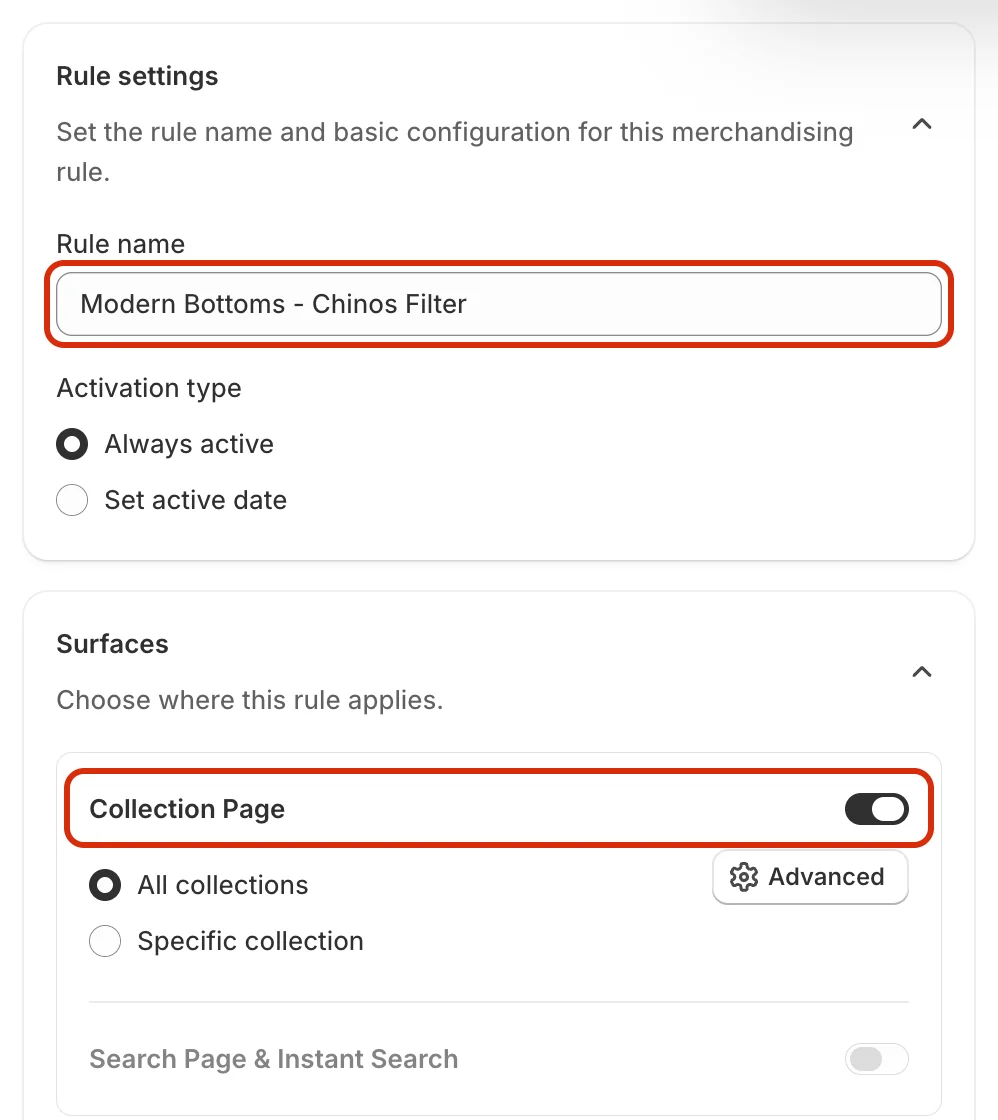
Enter a Rule name, for example Modern Bottoms - Chinos Filter, and choose the activation type (Always active or Set active date). Under Surfaces, turn on the Collection Page toggle.
Step 3: Choose a specific collection
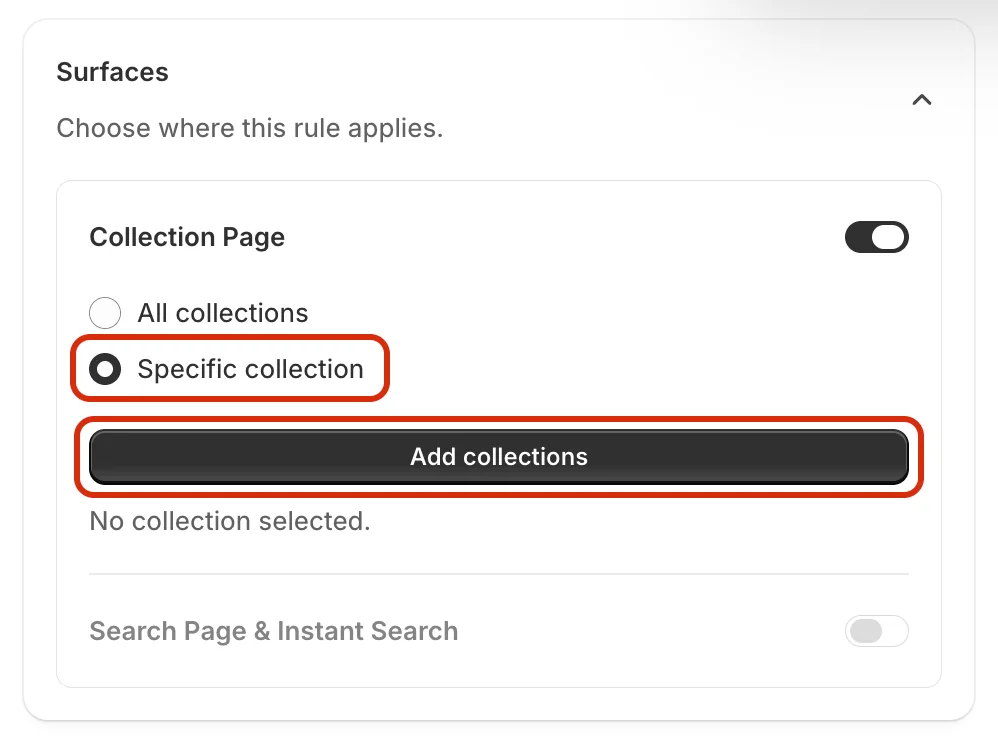
Select Specific collection, then click Add collections.
Step 4: Select the collection
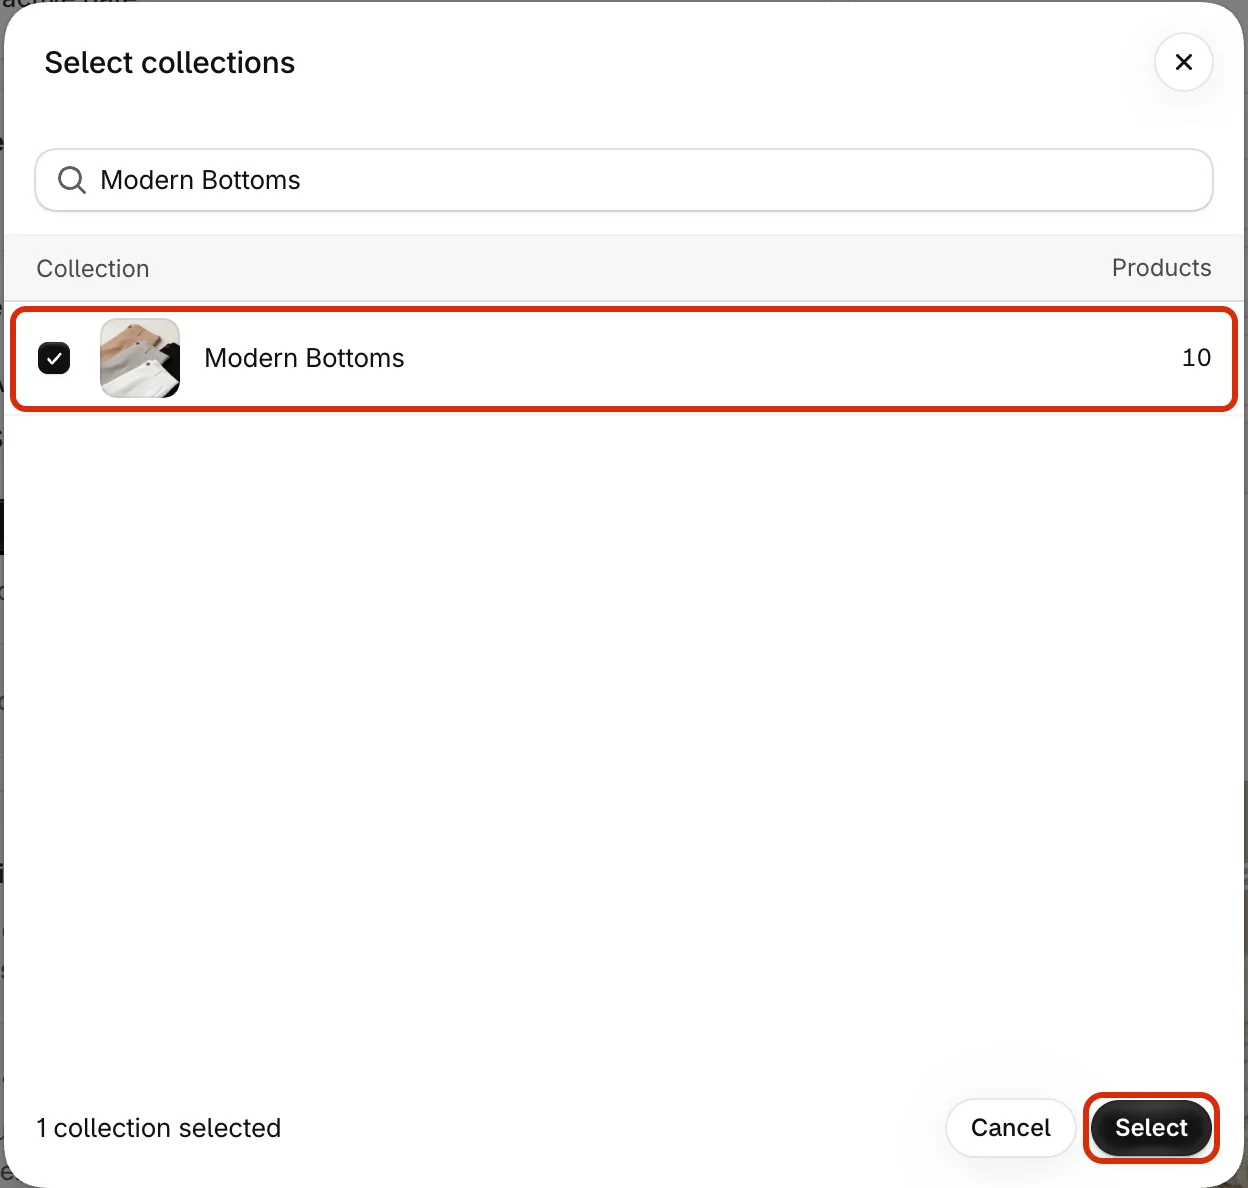
Search for the collection (here, Modern Bottoms), tick it, and click Select.
Step 5: Open Advanced and create a custom rule
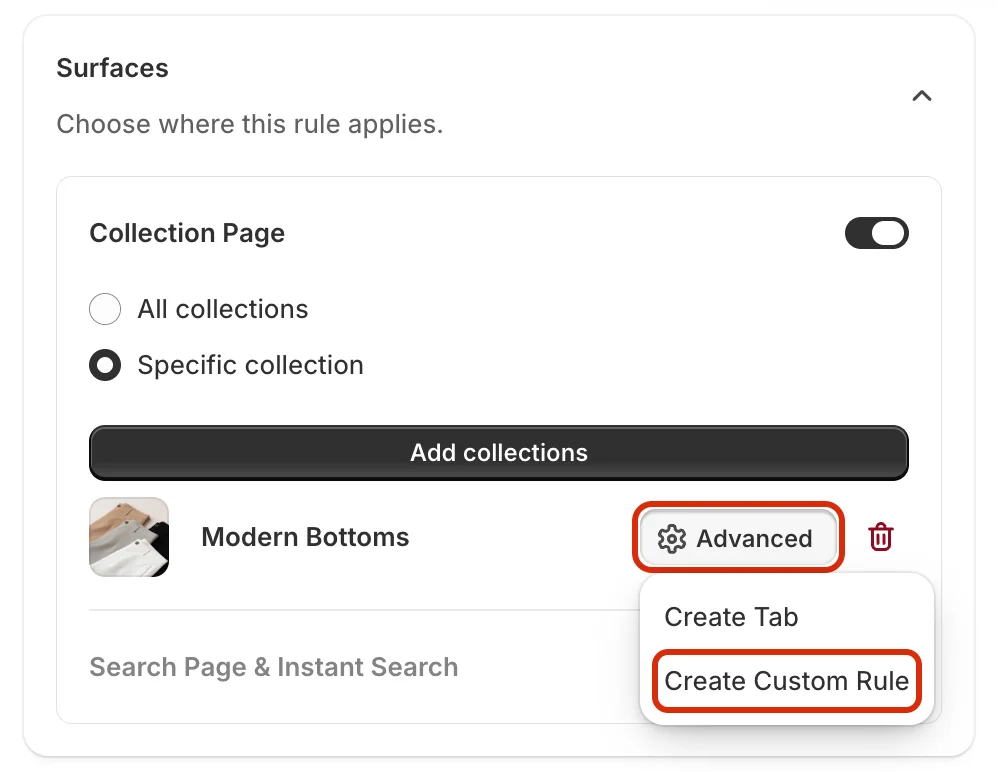
Next to the selected collection, click Advanced, then choose Create Custom Rule. A Filter #1 section appears with an empty condition.
Step 6: Set the filter condition
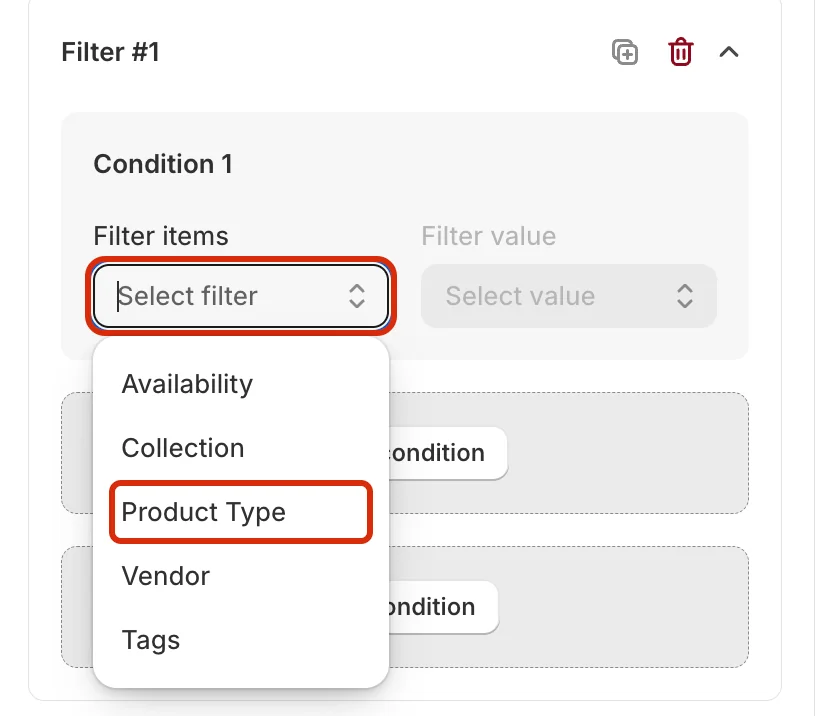
In Condition 1, open the Filter items dropdown and choose the filter type that should trigger the strategy. The available options are Availability, Collection, Product Type, Vendor and Tags. In this example, choose Product Type.
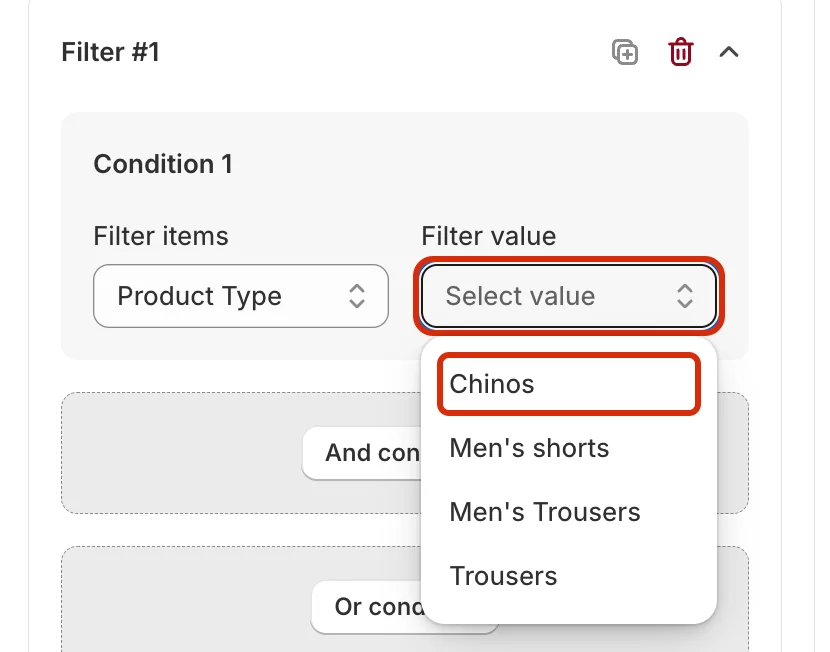
Then open the Filter value dropdown and choose the value, for example Chinos.
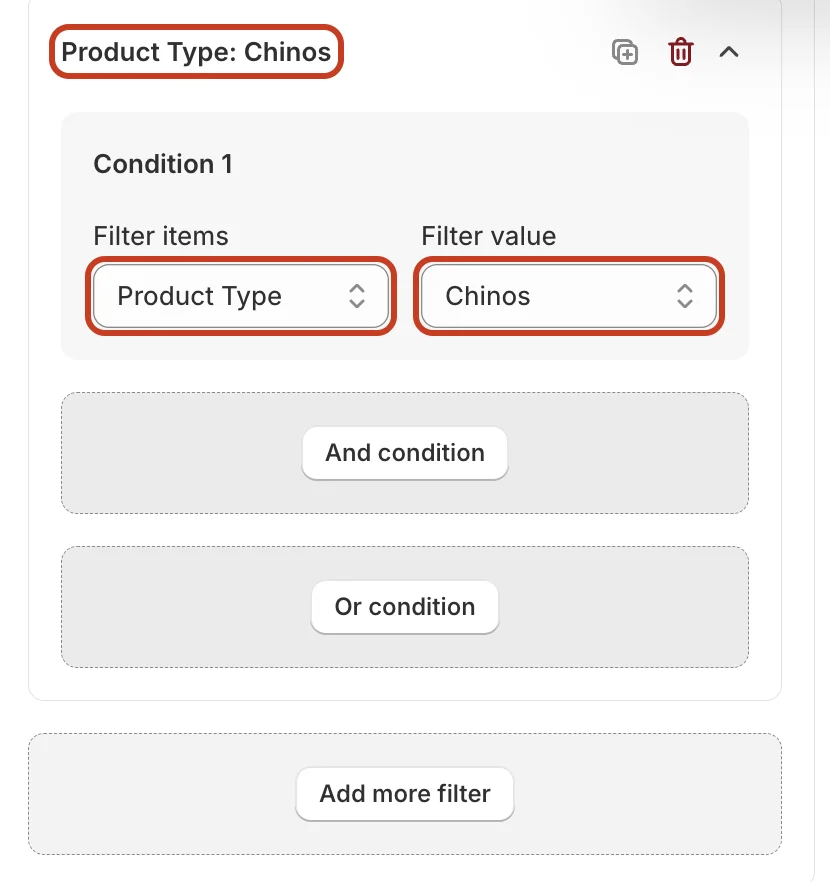
The filter is now named after its condition (Product Type: Chinos). If needed, use And condition to require several conditions at once, Or condition to accept any of several conditions, or Add more filter to create another custom rule.
Step 7: Choose the custom rule in Strategies
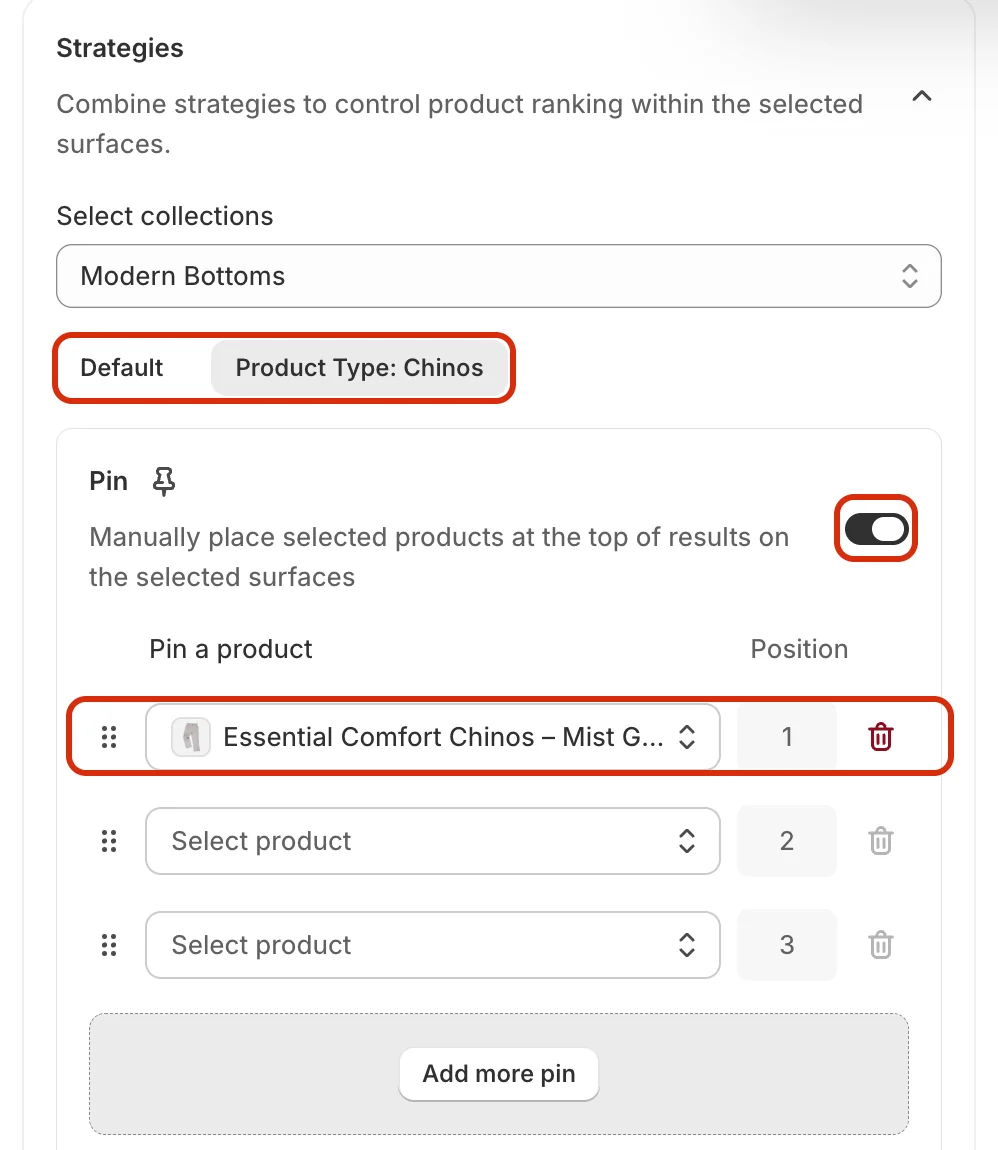
Scroll down to Strategies and make sure Modern Bottoms is selected under Select collections. You will now see two buttons:
- Default – strategies used when the shopper has not applied the filter.
- Product Type: Chinos – strategies used only when the shopper filters the collection by Product Type = Chinos.
Click Product Type: Chinos to set up the strategy for this filter.
Step 8: Pin a product for the filter
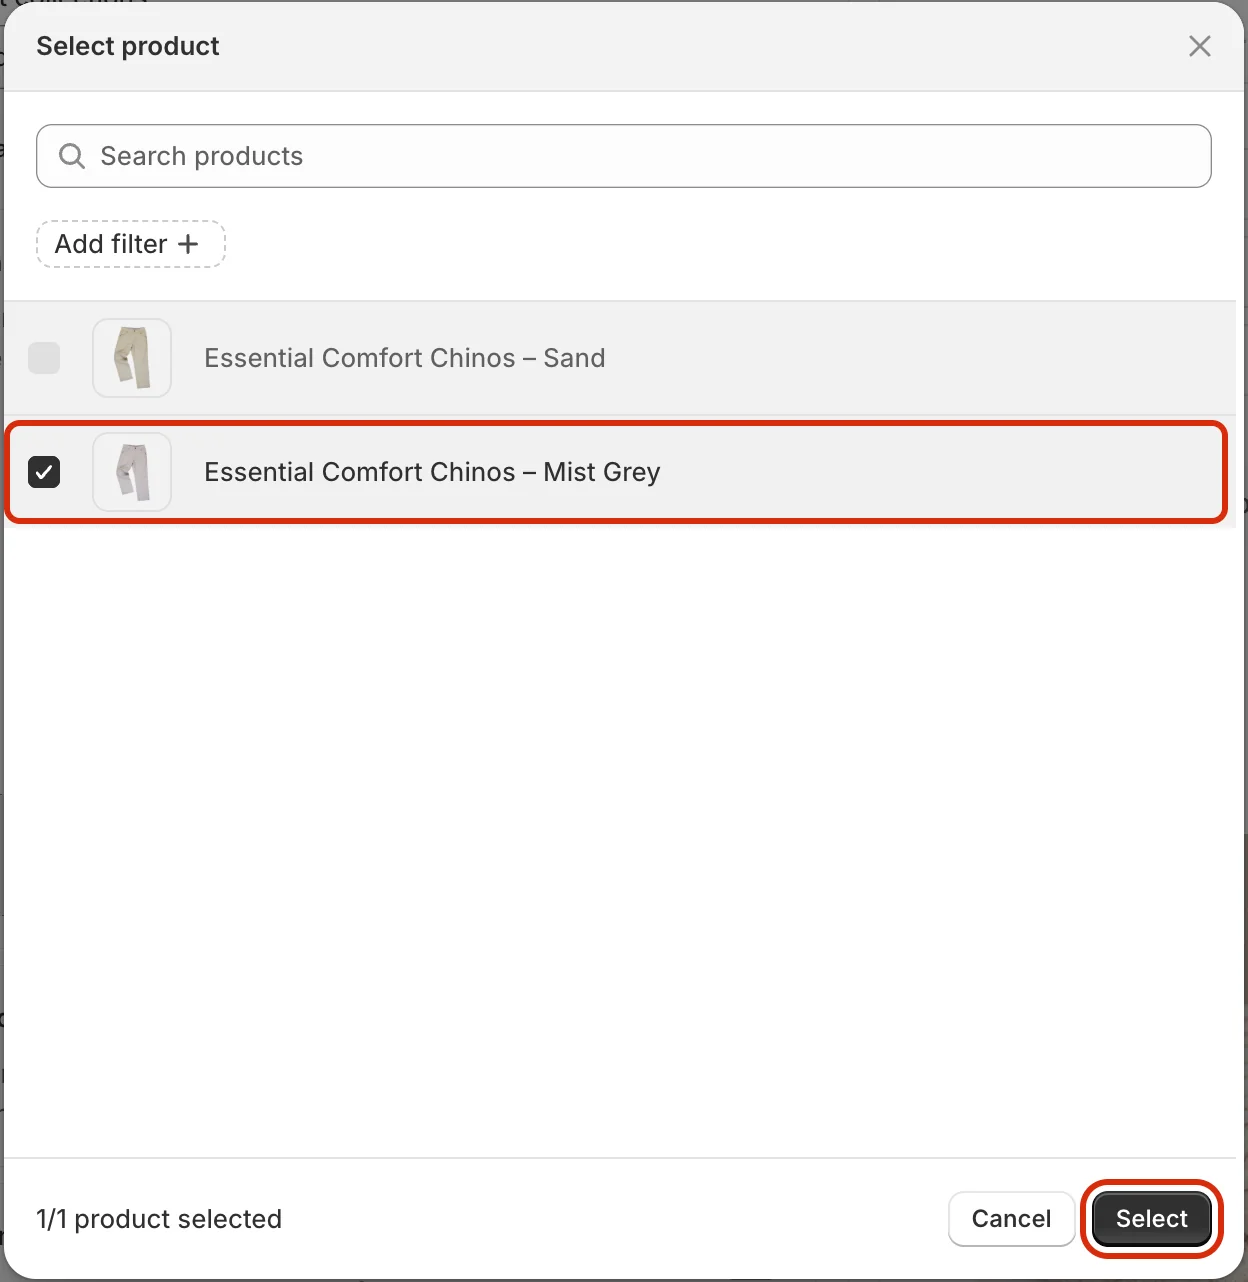
With Product Type: Chinos selected, turn on the Pin toggle and click the first Select product field. The product picker only lists products that match the filter. Tick one product (for example Essential Comfort Chinos – Mist Grey) and click Select.
The product is pinned at Position 1, so it appears first whenever a shopper filters Modern Bottoms by Chinos. Use Add more pin to pin more products.
Step 9: Save the strategy
Make sure Status is set to Enable, then click Save in the bar at the top of the page. To check the result, open the collection on your storefront, apply the Product Type: Chinos filter, and confirm the pinned product appears first.

Related
- How to Set Up Product Boosting for Search Page & Instant Search?
- How to Set Up Product Filters for Search Page & Instant Search?
- How to Pin Products on Search Page & Instant Search?
- How to Create Collection Tabs and Pin Products in Each Tab?
- How to set up boost product?
- How to Set Up A/B Testing for Merchandising Strategy?
Last updated on
How to set up pre order (single / multiple products)?
Pre-order lets customers buy selected products before they are available, typically when stock has run out and a restock is coming. The Add to cart button becomes a pre-order button, optionally with i
How to Set Up Product Boosting for Search Page & Instant Search ?
Boost lets you push selected products higher in your store's search results. In this guide, you'll create a Boost rule that applies to the Search Page & Instant Search surface for All searches, using