Instant Search Widget
To Access the Product Filter Widget, Follow These Steps:
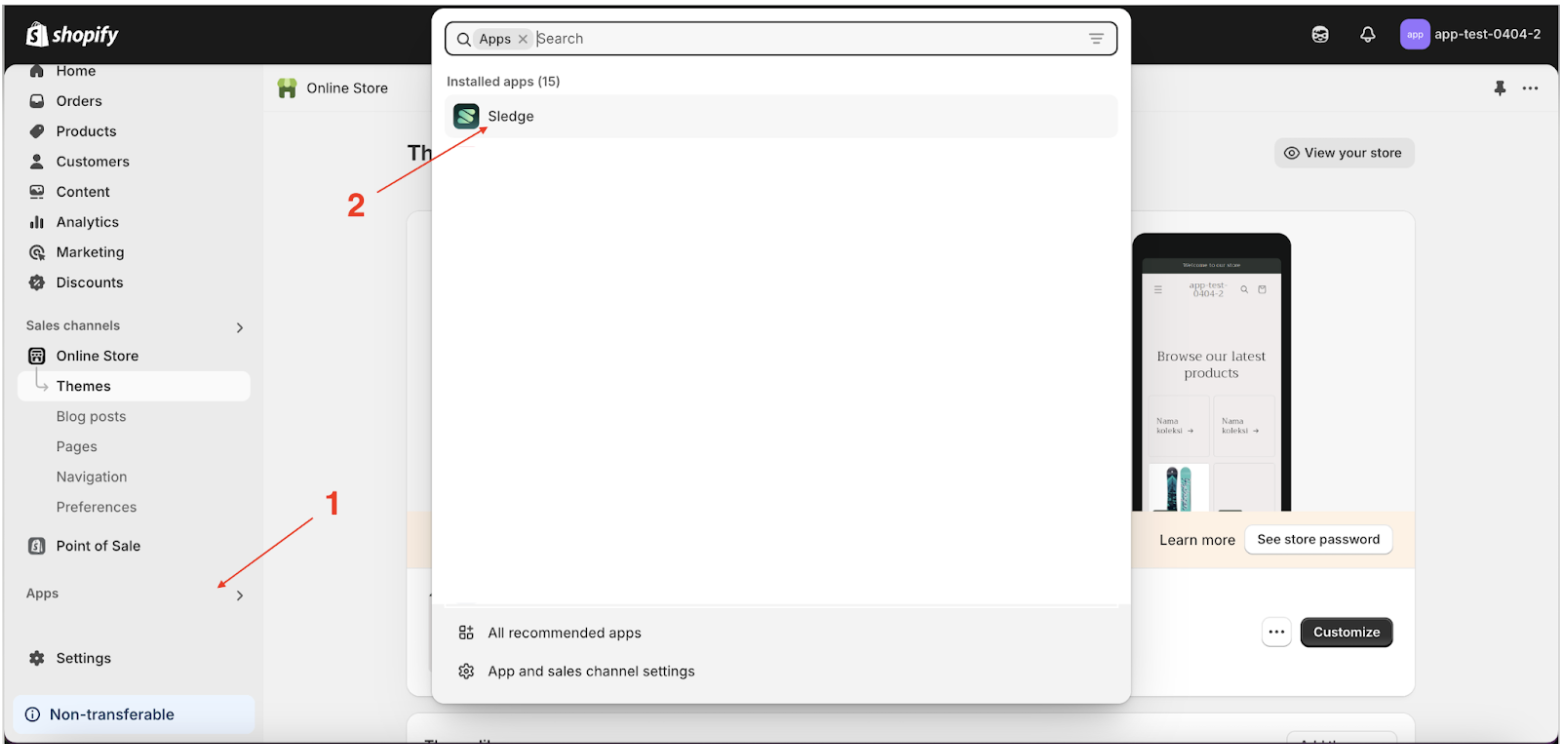
- Go to the Apps Sledge.
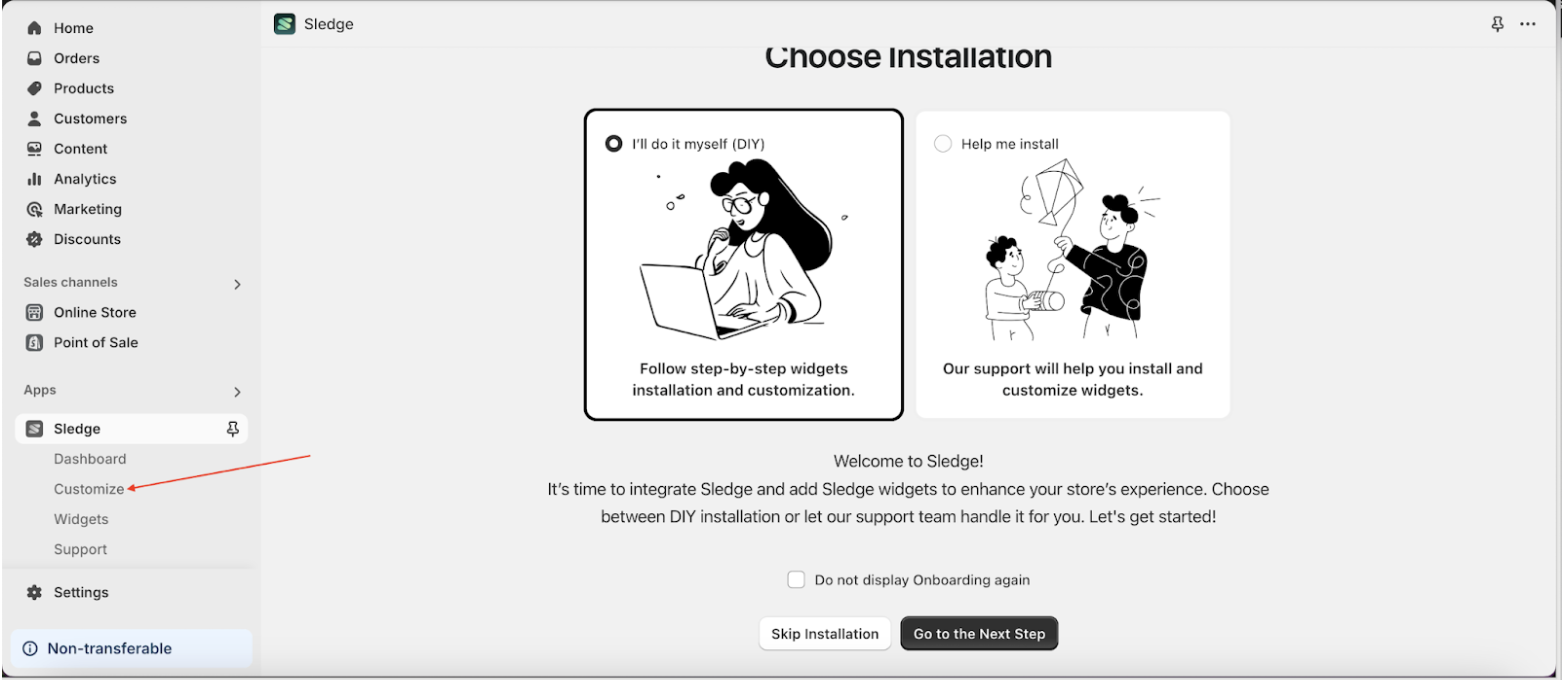
- Select the Customizer menu.
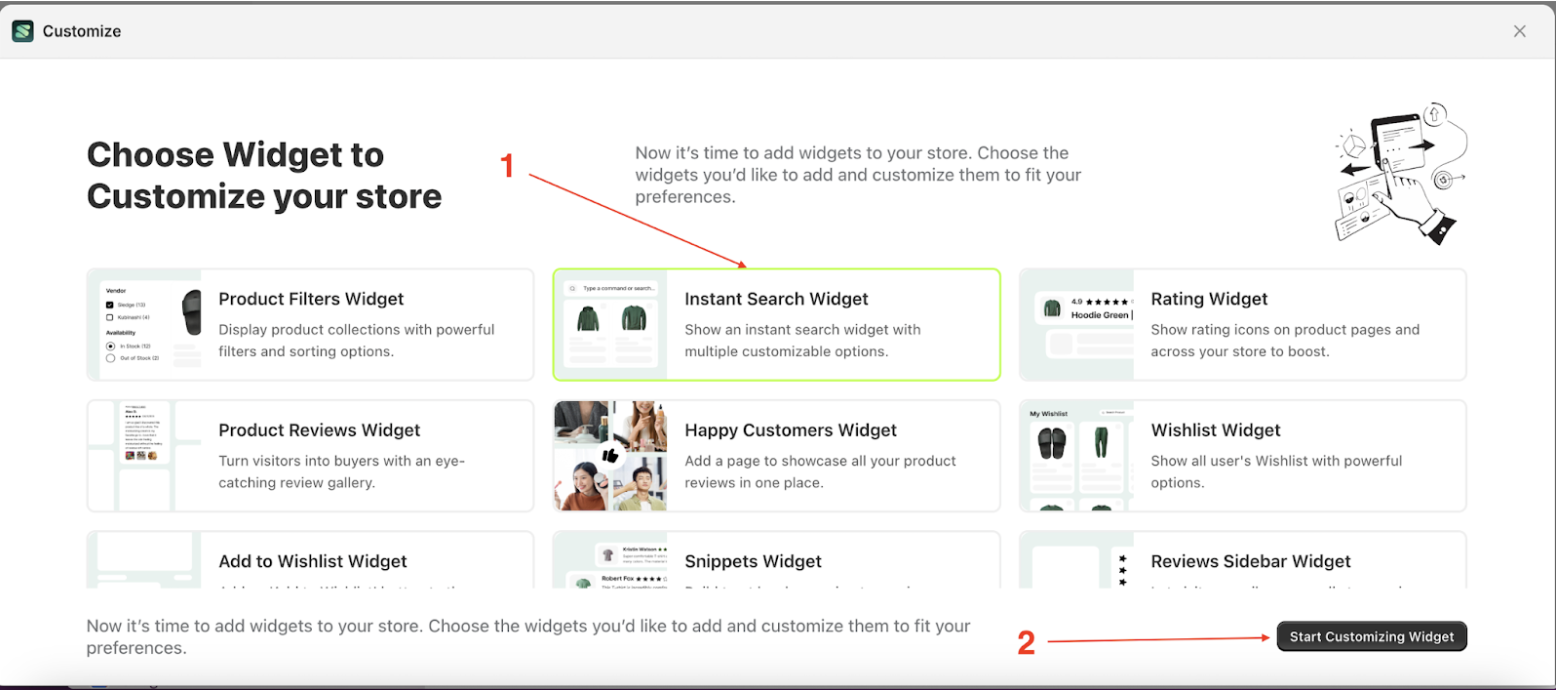
- Choose instant search widget and click the Start Customizing Widget button.
Skeleton
Available settings:
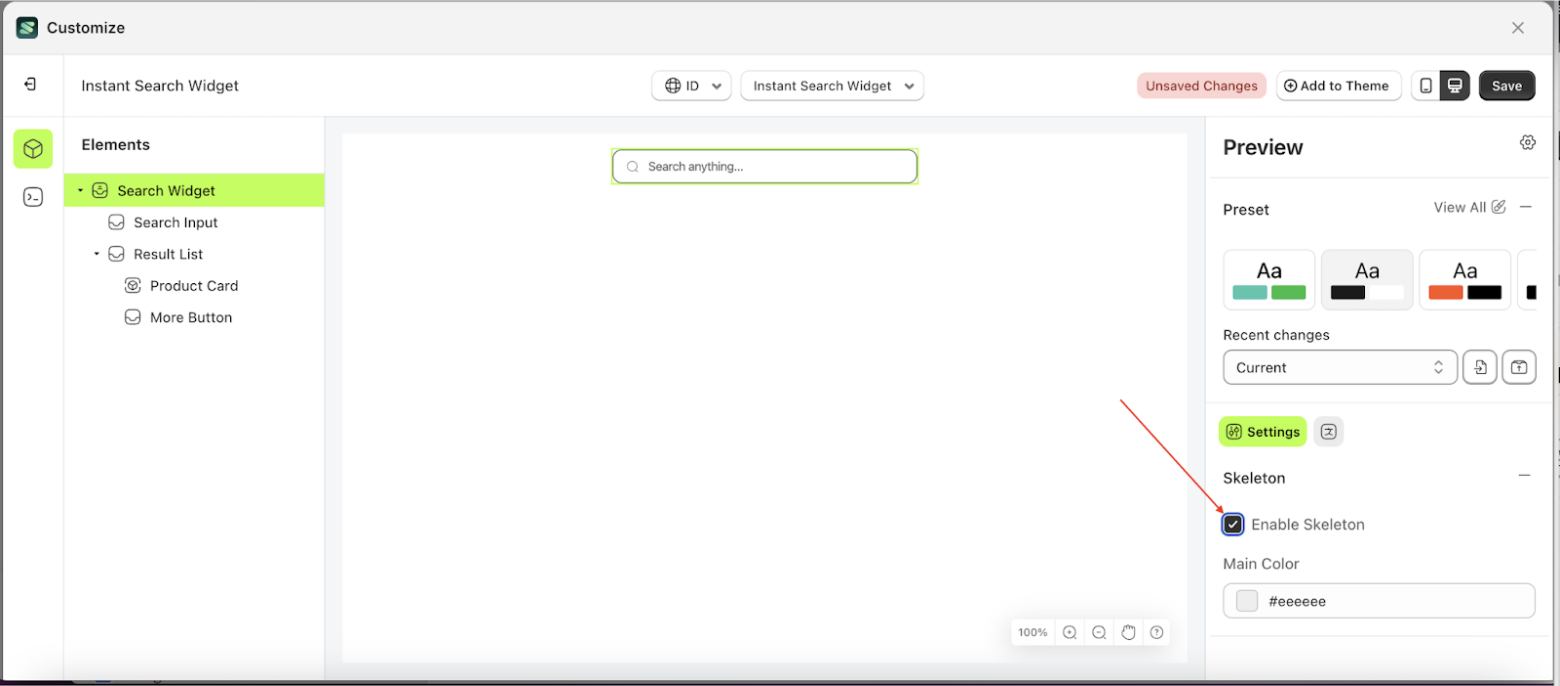
Enable Skeleton
Enable Skeleton is a feature used to activate or deactivate the skeleton loader while data is being processed and has not yet been received.
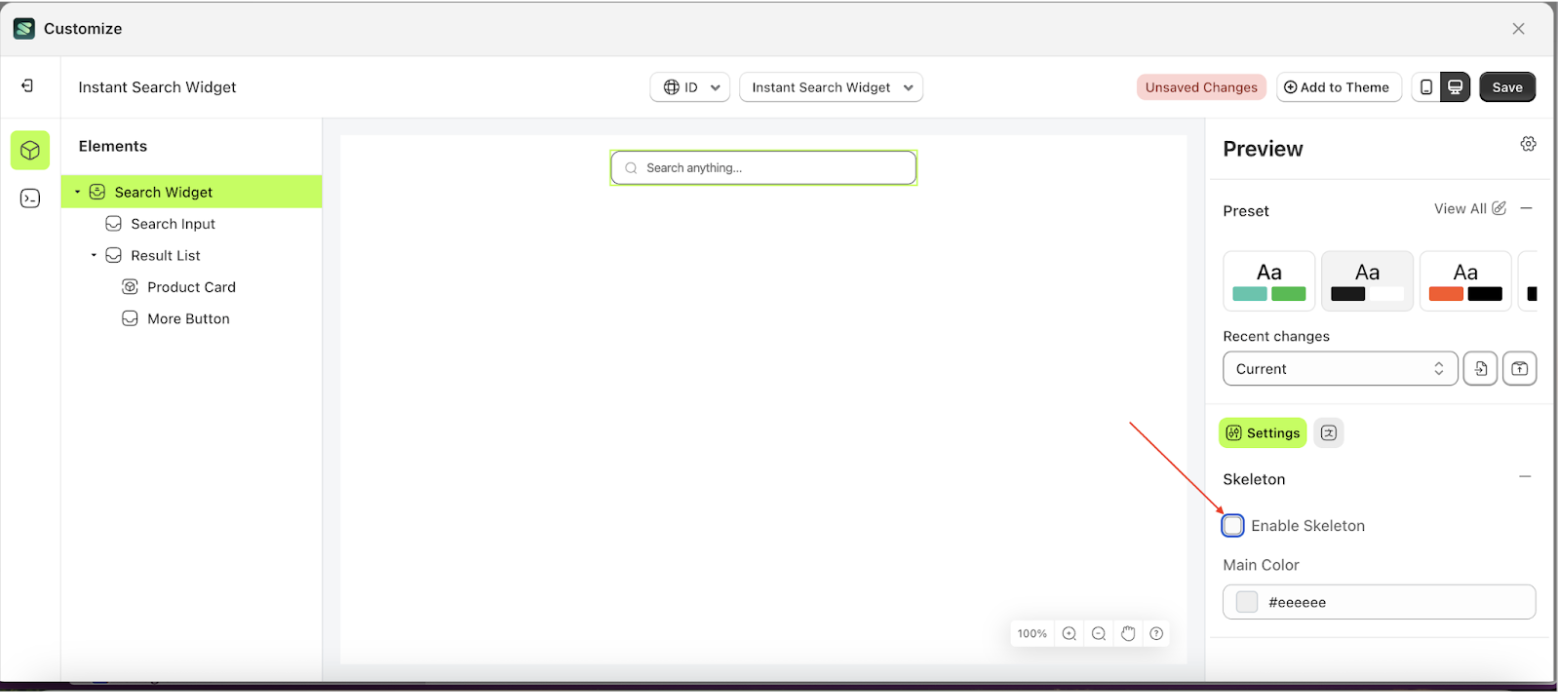
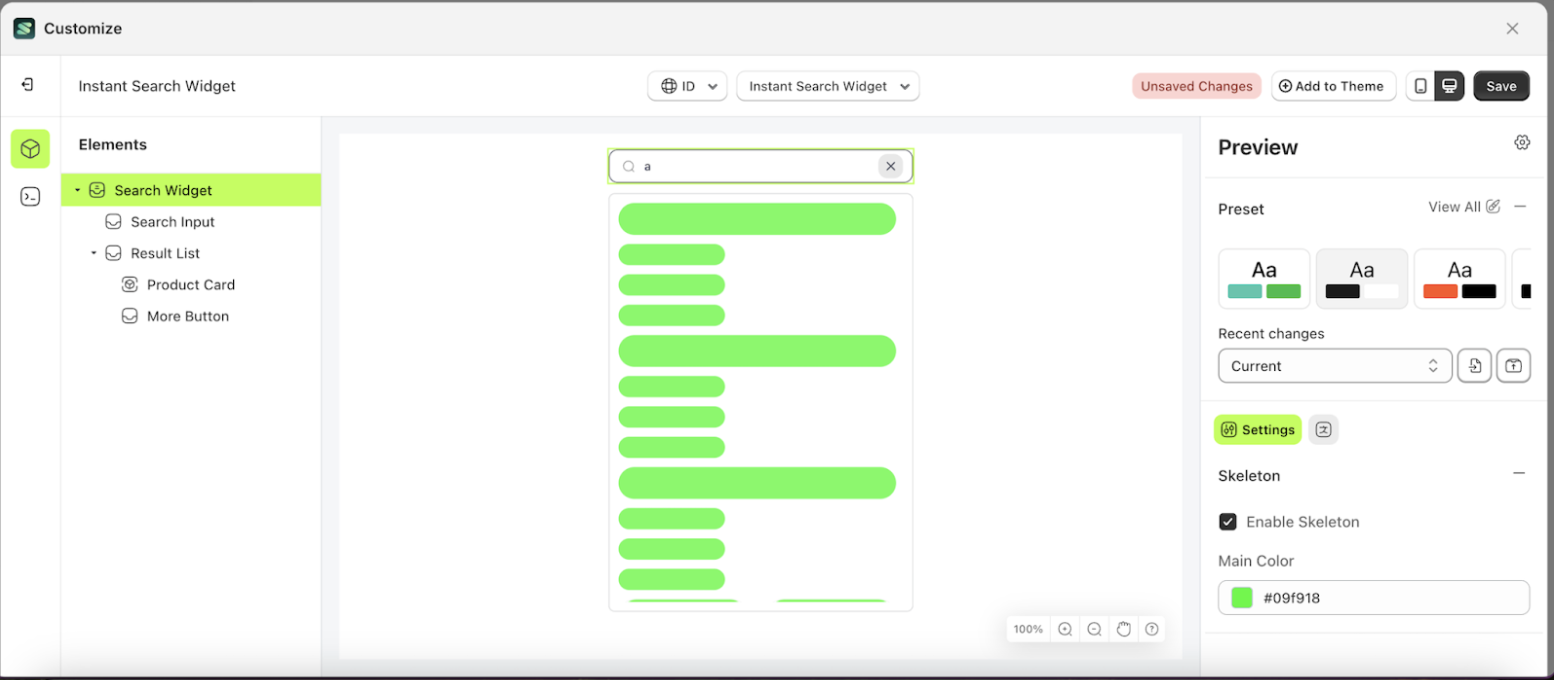
How to Enable Skeleton:
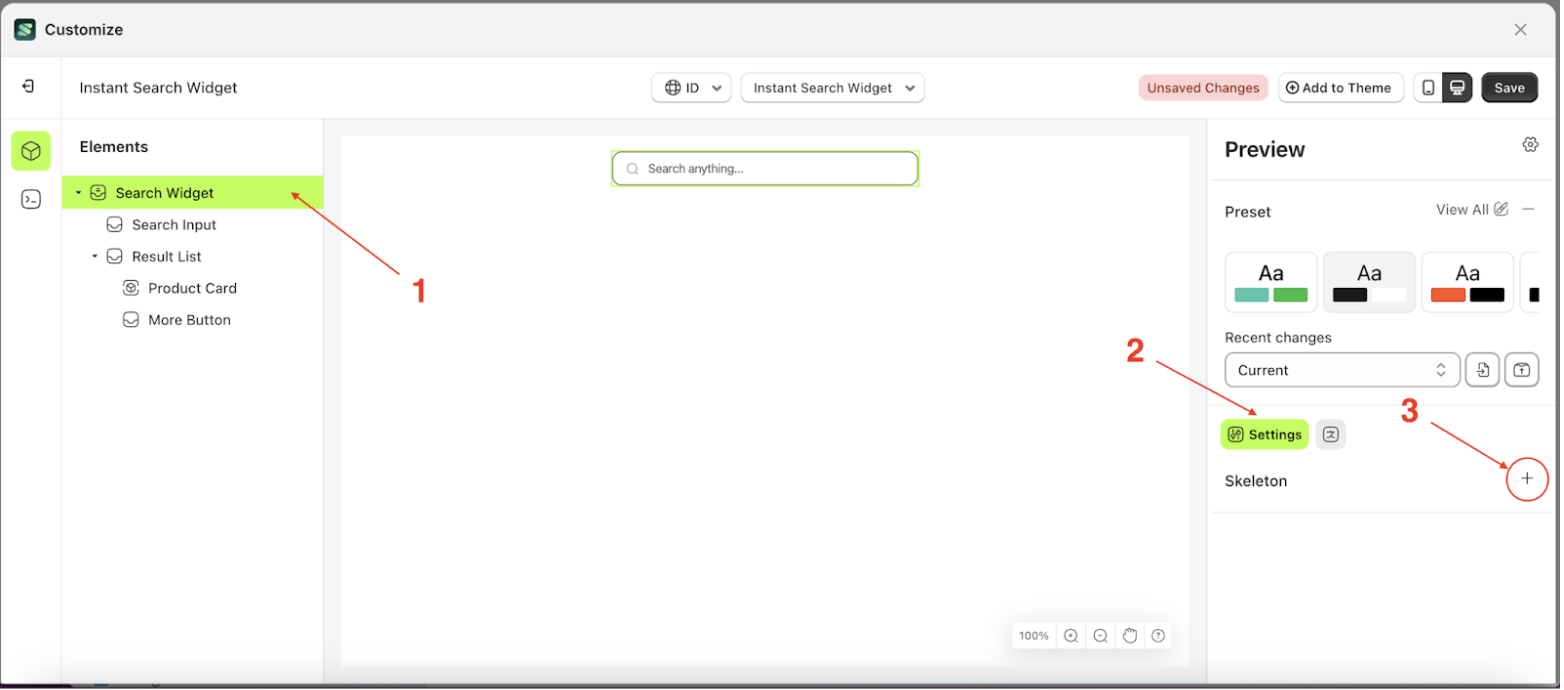
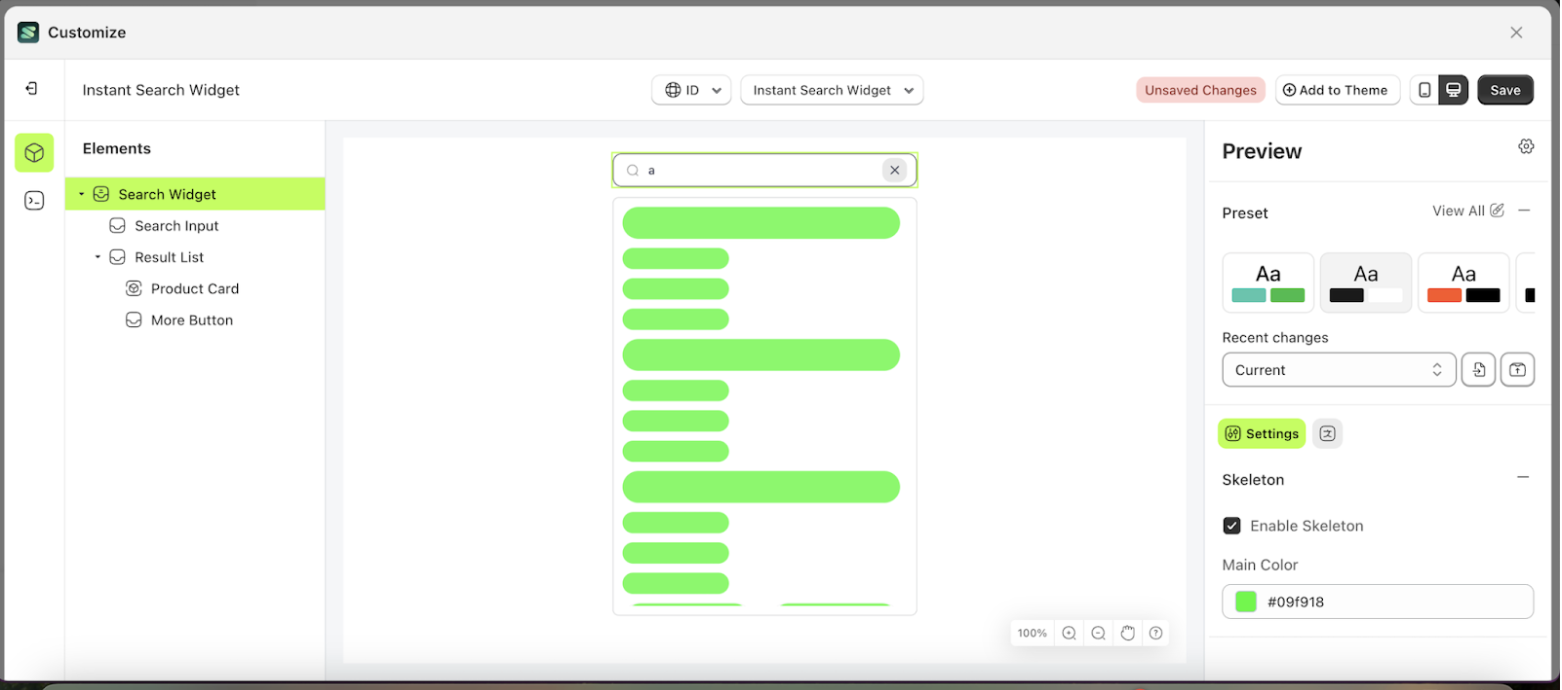
- Select the Search widget element on the right, then click the Settings tab and click the icon marked with a red arrow
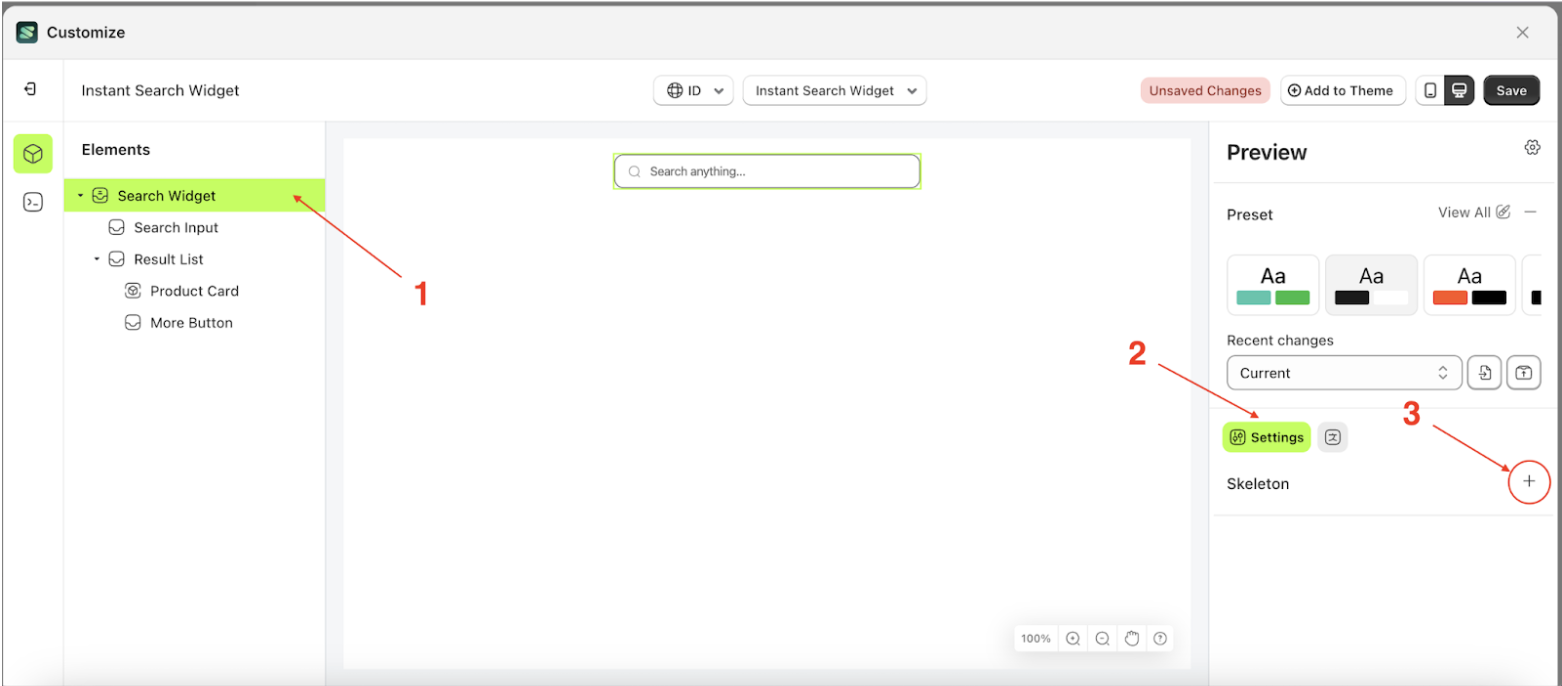
- Activate Enable Skeleton to display the skeleton loader when search data is still being retrieved.
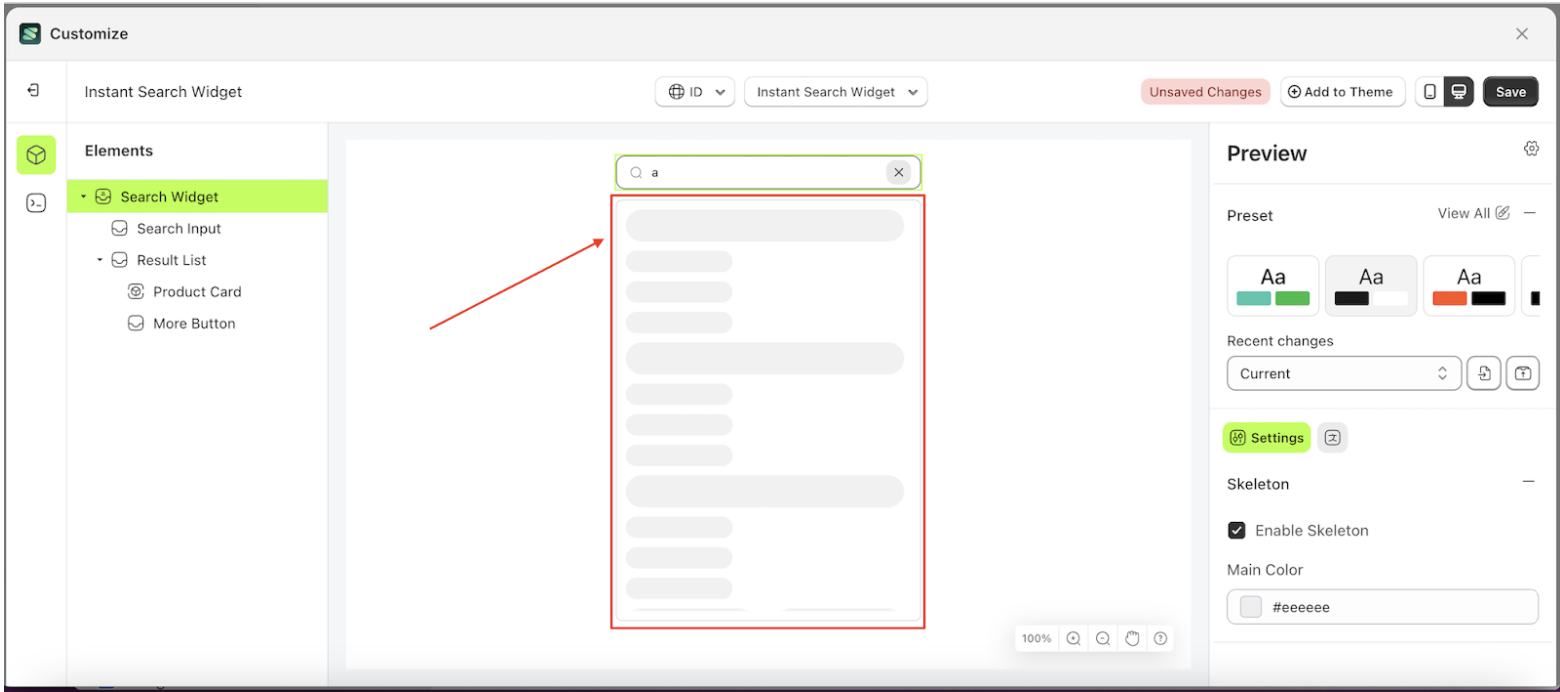
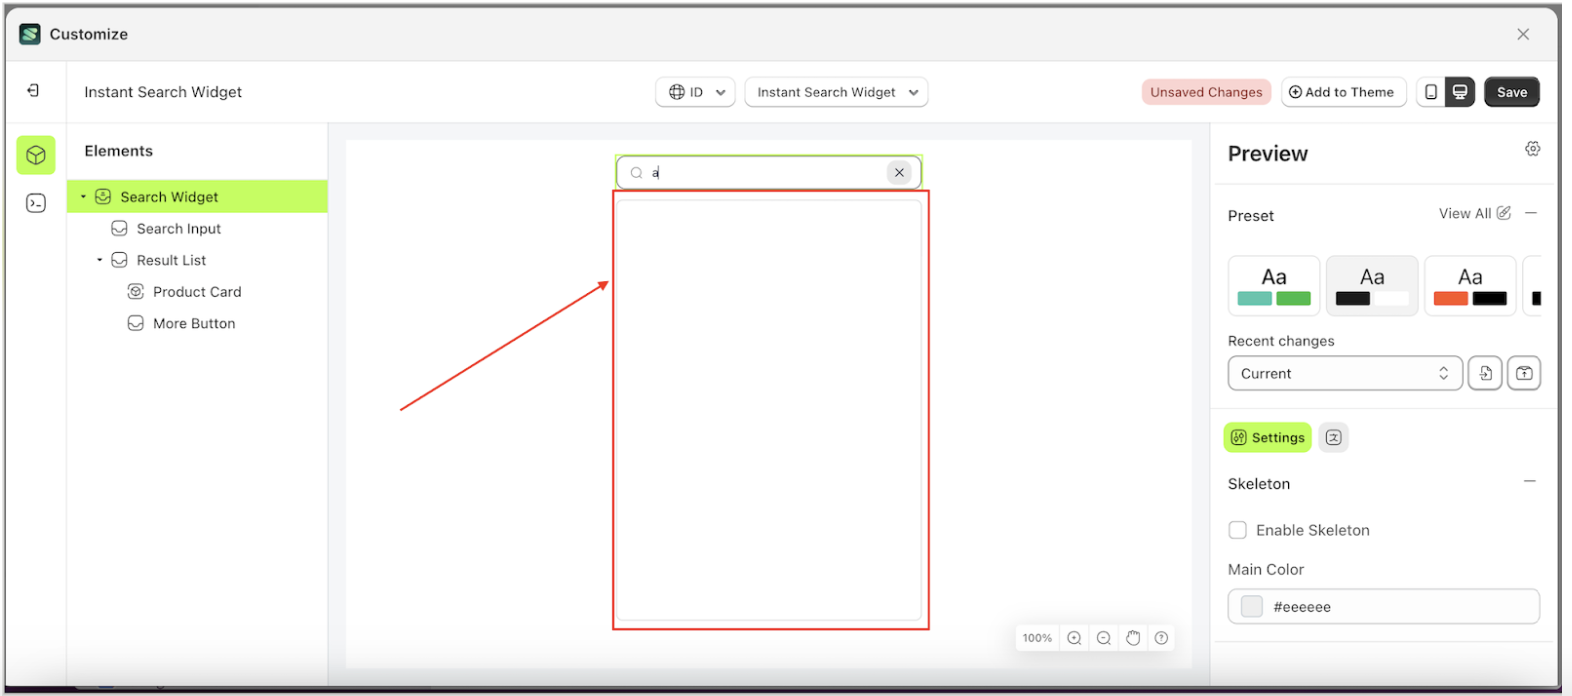
- Below is an example where a search using the keyword a triggers the skeleton loader, indicated by the red arrow.
Disabled Skeleton
How to Disable Skeleton:
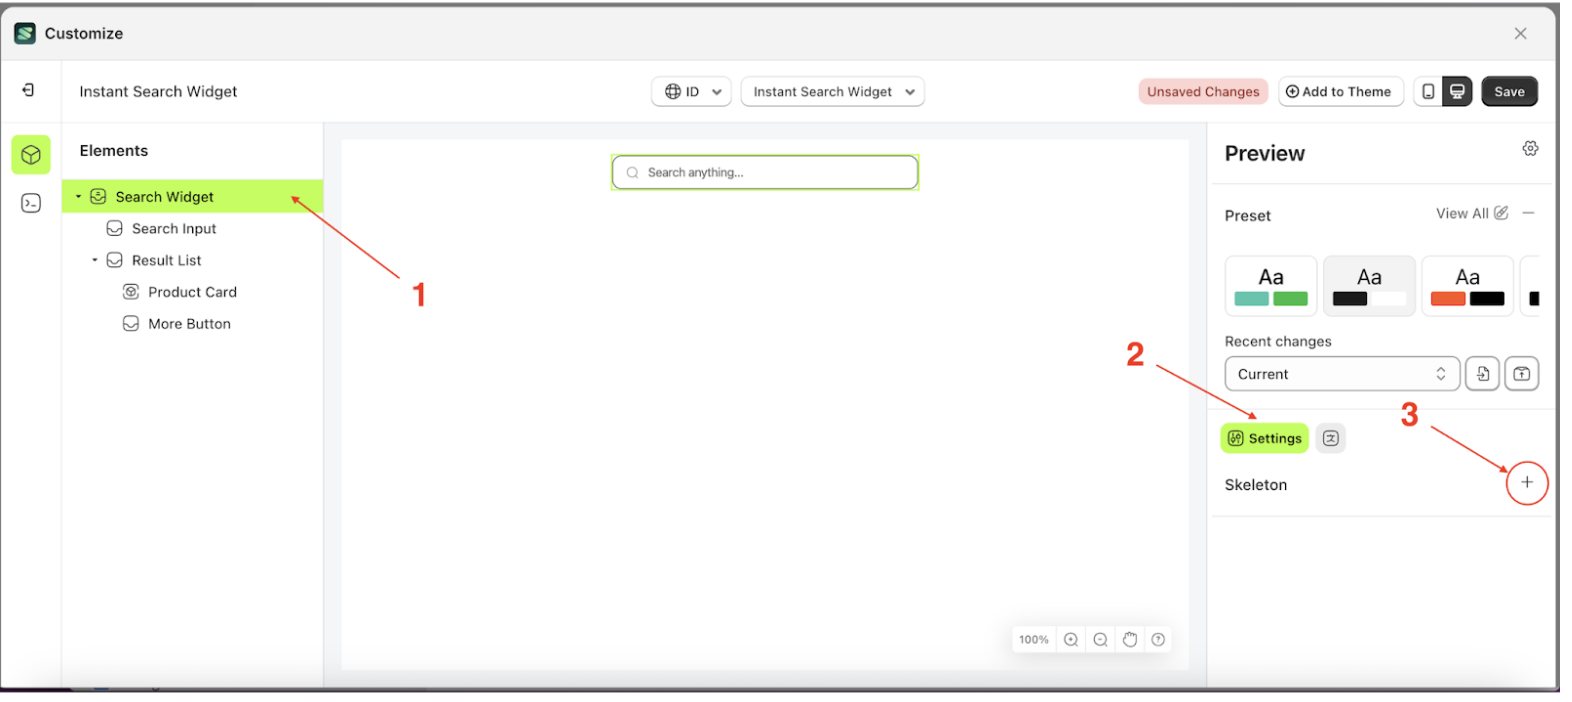
- Select the Search widget element on the right, then click the Settings tab and click the icon marked with a red arrow
- Deactivate Enable Skeleton to hide the skeleton loader while search data is being retrieved.
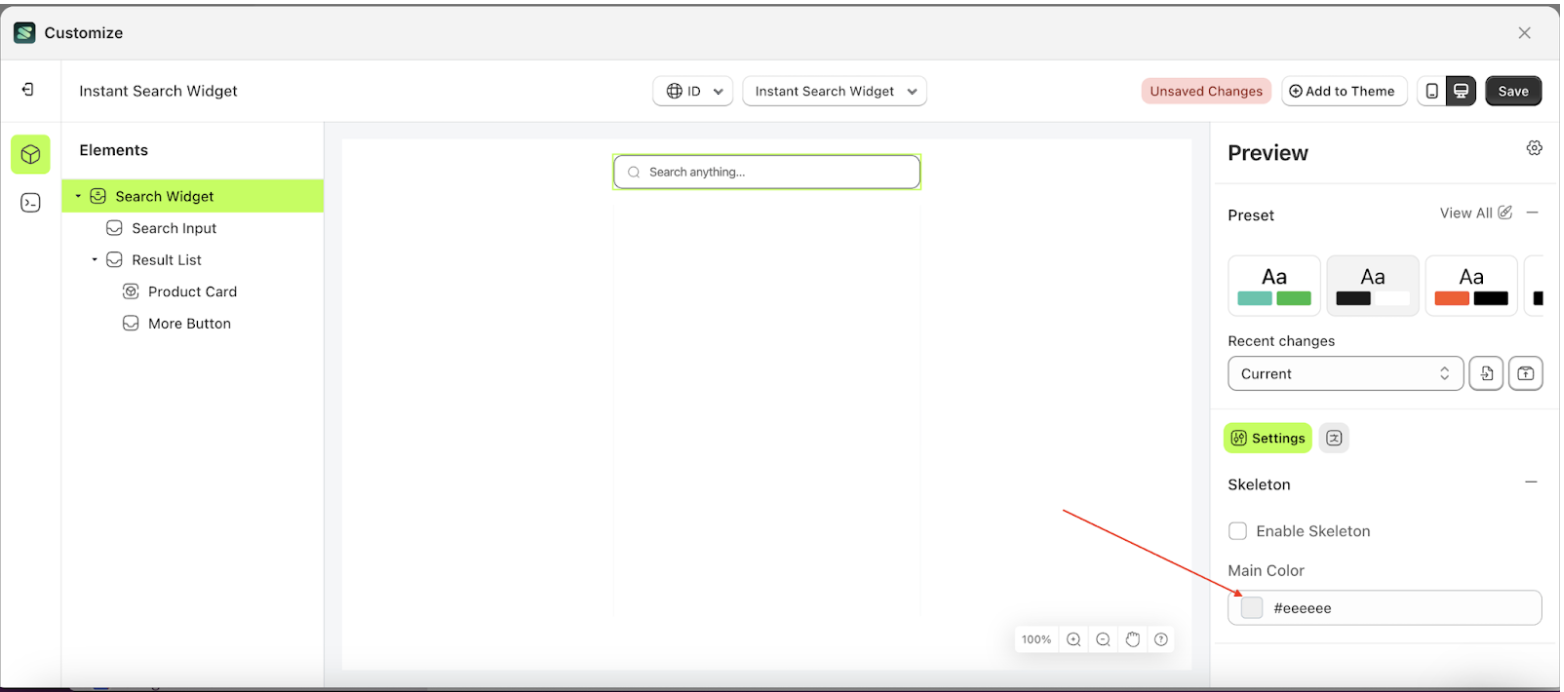
- Below is an example where a search using the keyword a does not trigger the skeleton loader, as indicated by the red arrow
Main Color Skeleton
This feature is used to adjust the skeleton loader color using a color palette.
How to Change the Color with the Color Palette:
- Select the Search widget element on the right, then click the Settings tab and click the icon marked with a red arrow.
- Click the area marked with a red arrow in the bottom right corner
- When the color palette appears, first click the right side of the palette to choose the base color, then click the left side to select a specific shade. Follow the red arrow indicators in the image below.
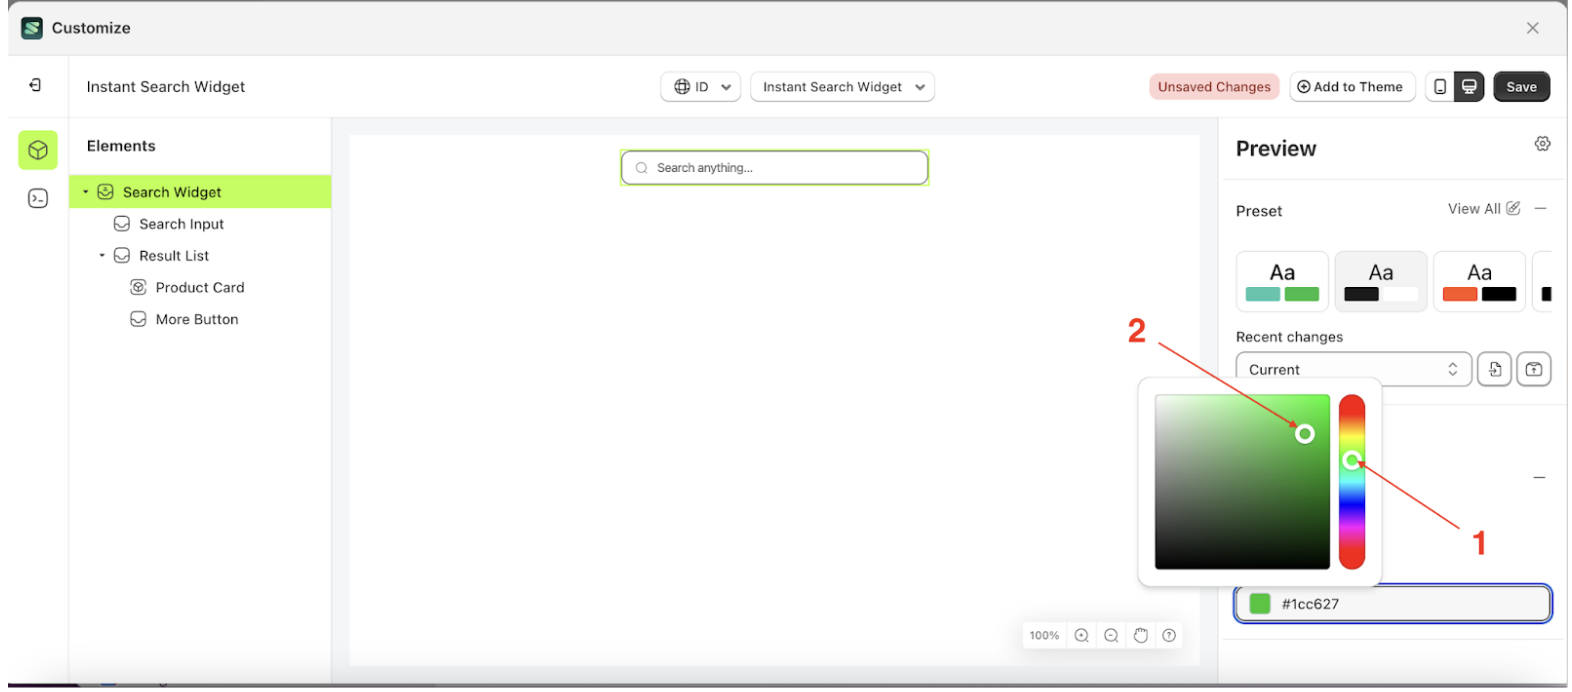
- Once you have selected the color, save the settings so the storefront can apply the changes
- Let's try displaying the skeleton.
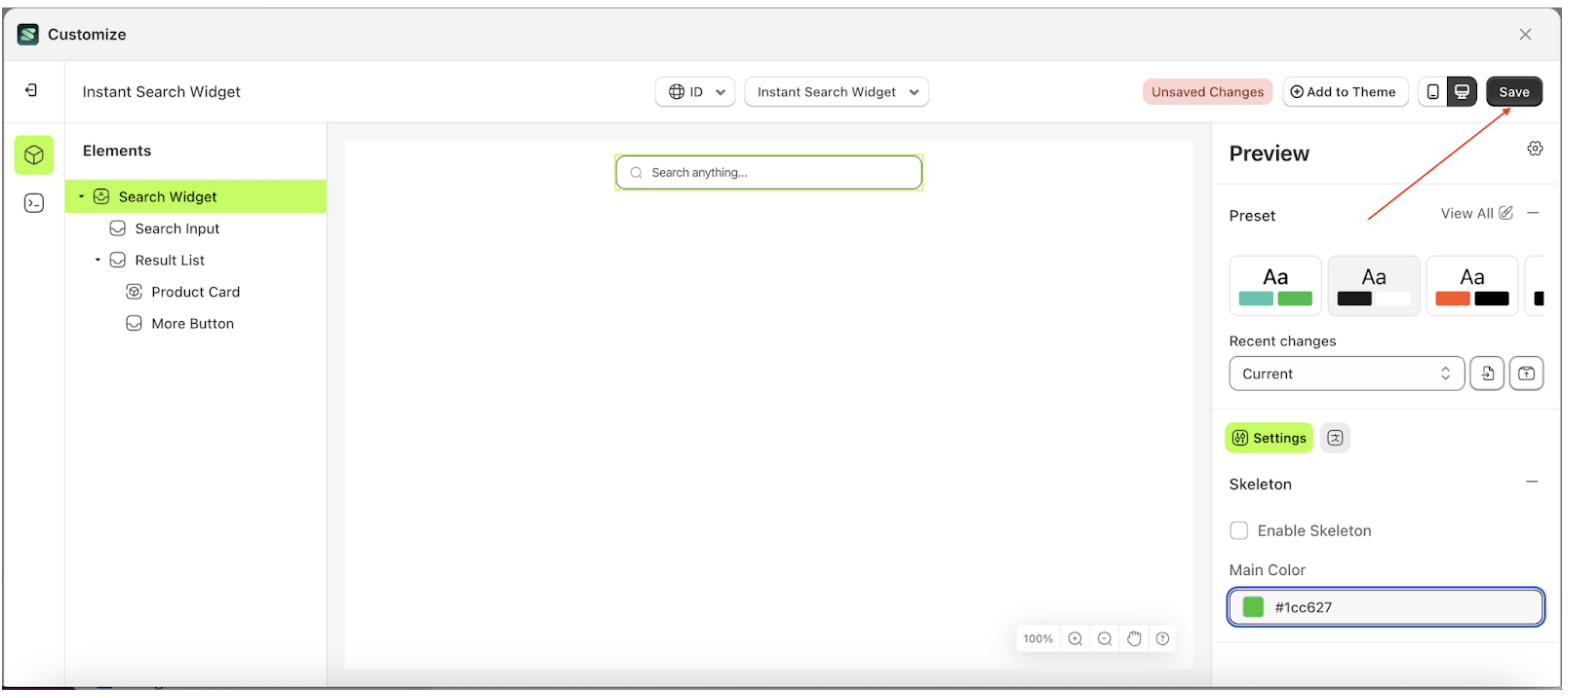
Main Color Hex Code
This feature is used to adjust the skeleton loader color using a HEX code.
How to Change the Color with the hex code:
- Select the Search widget element on the right, then click the Settings tab and click the icon marked with a red arrow.

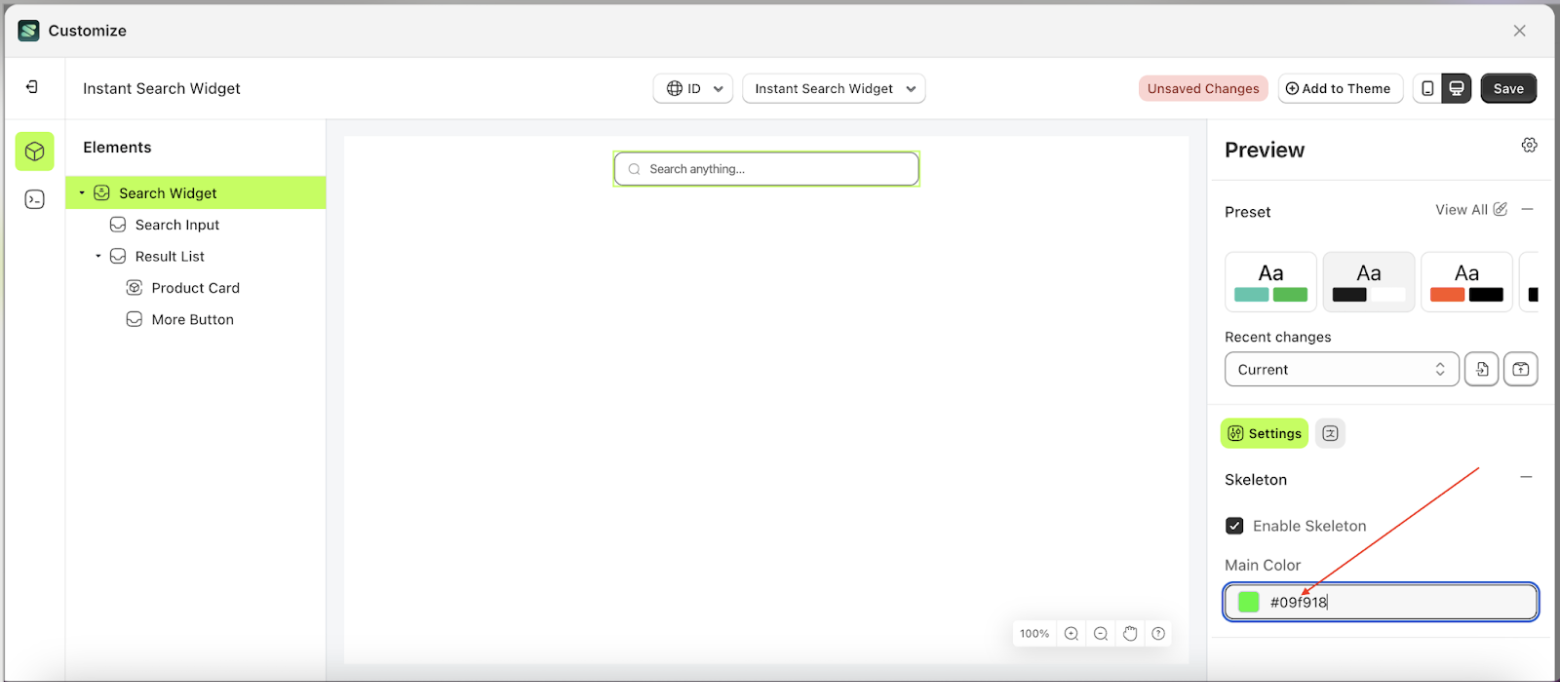
- Block the hex code so we can replace it with the desired hex code. For example, the hex code we will use is #09f918
- Let's try displaying the skeleton.
Search Ranking Rules
Available settings:
Search Ranking Rules
Each source has a list of ranking rules that are stored with the index settings. For each search query, Instant Search uses a sorting order to rank documents. The first ranking rule is applied to all documents, while each subsequent rule is applied only to documents that are considered equal according to the previous rule (i.e., as a tiebreaker).
Follow the steps below:
- Once the menu is open, select the Search Input element on the left side, then click the icon on the right side, marked with a red arrow, to access the search ranking rules settings.
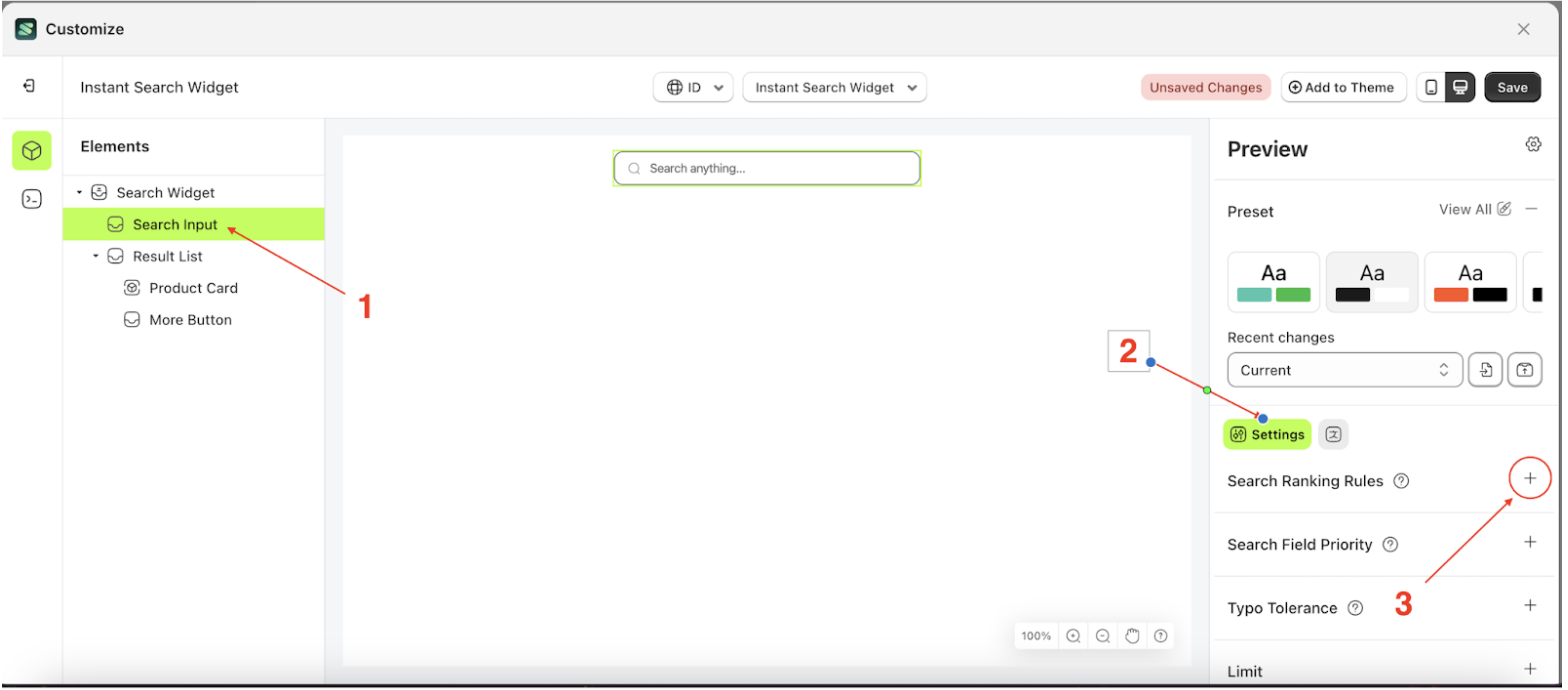
- This feature allows users to define the sorting order at query time using a sorting search parameter. In general, sorting is highly useful when you want to let users decide what type of results they want to see first.
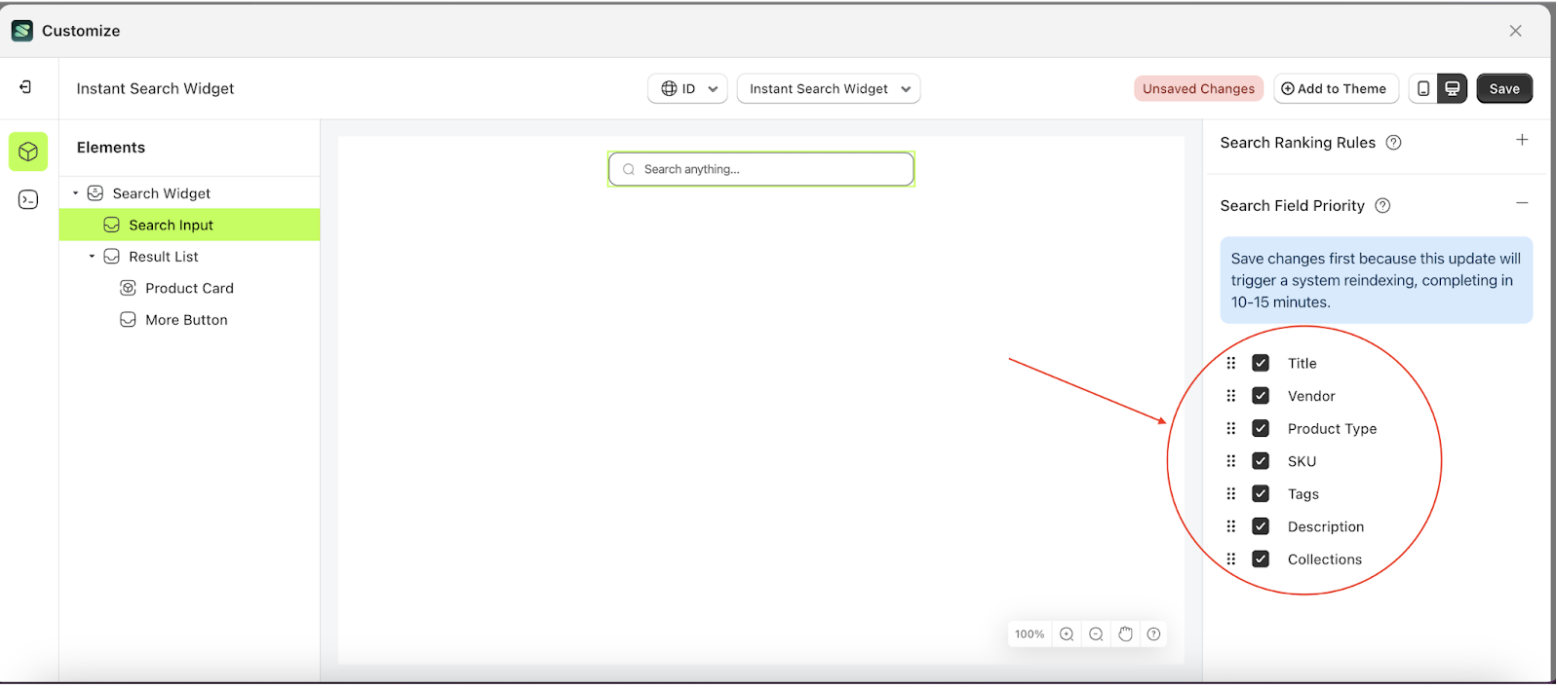
Search Field Priority
Available settings:
Search Field Priority
Search field priority is a setting designed to manage searches based on a ranked field order. For example, if "title" is set as the highest priority and its status checkbox is active, products with matching titles will be displayed first. Once those results are processed, the system will continue to the next prioritized field with an active status checkbox.
Follow the steps below:
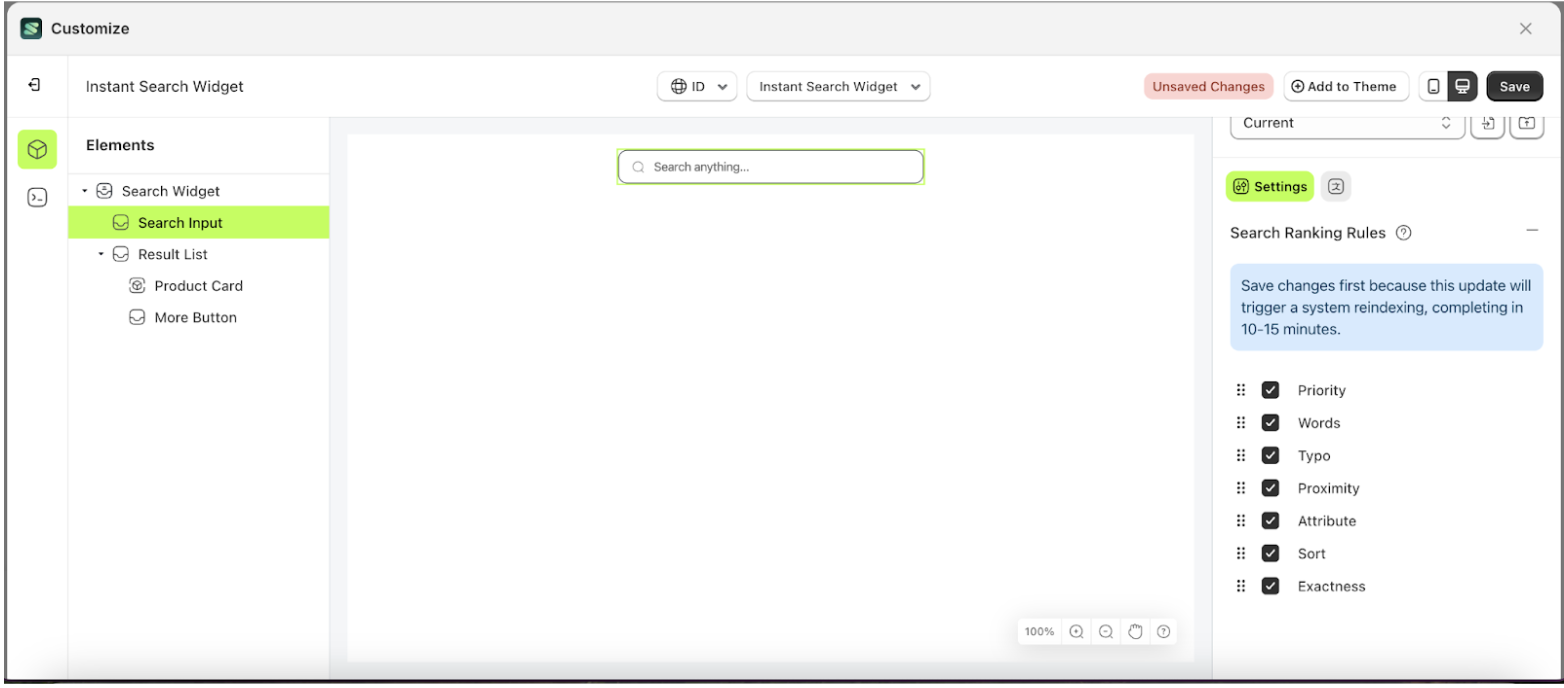
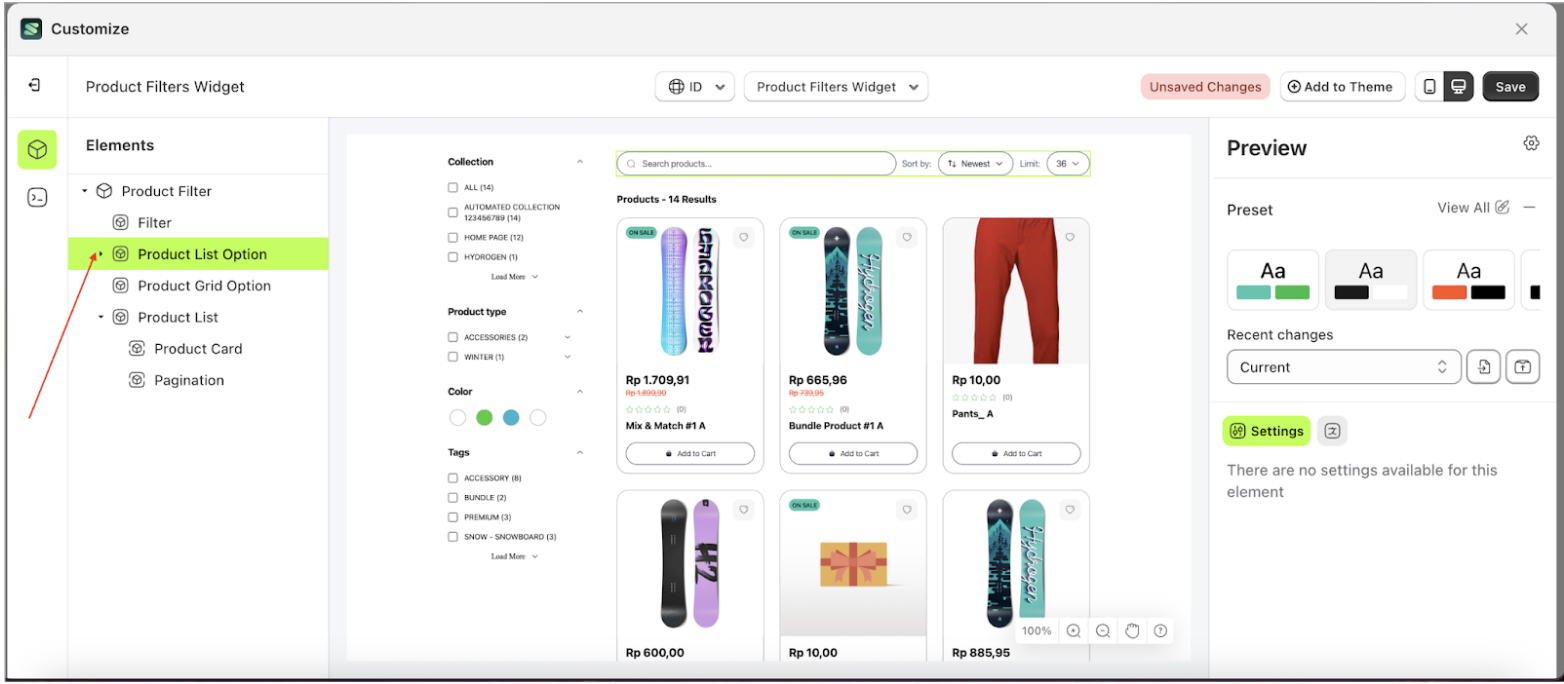
- Select the Product List Option element, then click the icon marked with a red arrow to open the menu within that item
- Select the Search Input element on the left side, then click the icon on the right side, marked with a red arrow, to access the Search Ranking Rules settings..

- Set the desired order by dragging items up or down in the list marked below
- Note: Save changes first because this update will trigger a system reindexing, completing in 10-15 minutes
Typo Tolerance
Available settings:
Typo Tolerance
By default, this feature allows one typo for query terms with five or more characters and up to two typos for terms with at least nine characters.
For example, if your dataset contains "seven," searching for "sevem" or "sevan" will still match "seven." However, "tow" will not match "two" because it has fewer than five characters.
You can override these default settings using the minWordSizeForTypos object. The code sample below sets the minimum word size for one typo to 4 and for two typos to 10.
Follow the steps below:
- Select the Search Input element on the left side, then click the icon on the right side, marked with a red arrow, to access the Typo Tolerance settings.
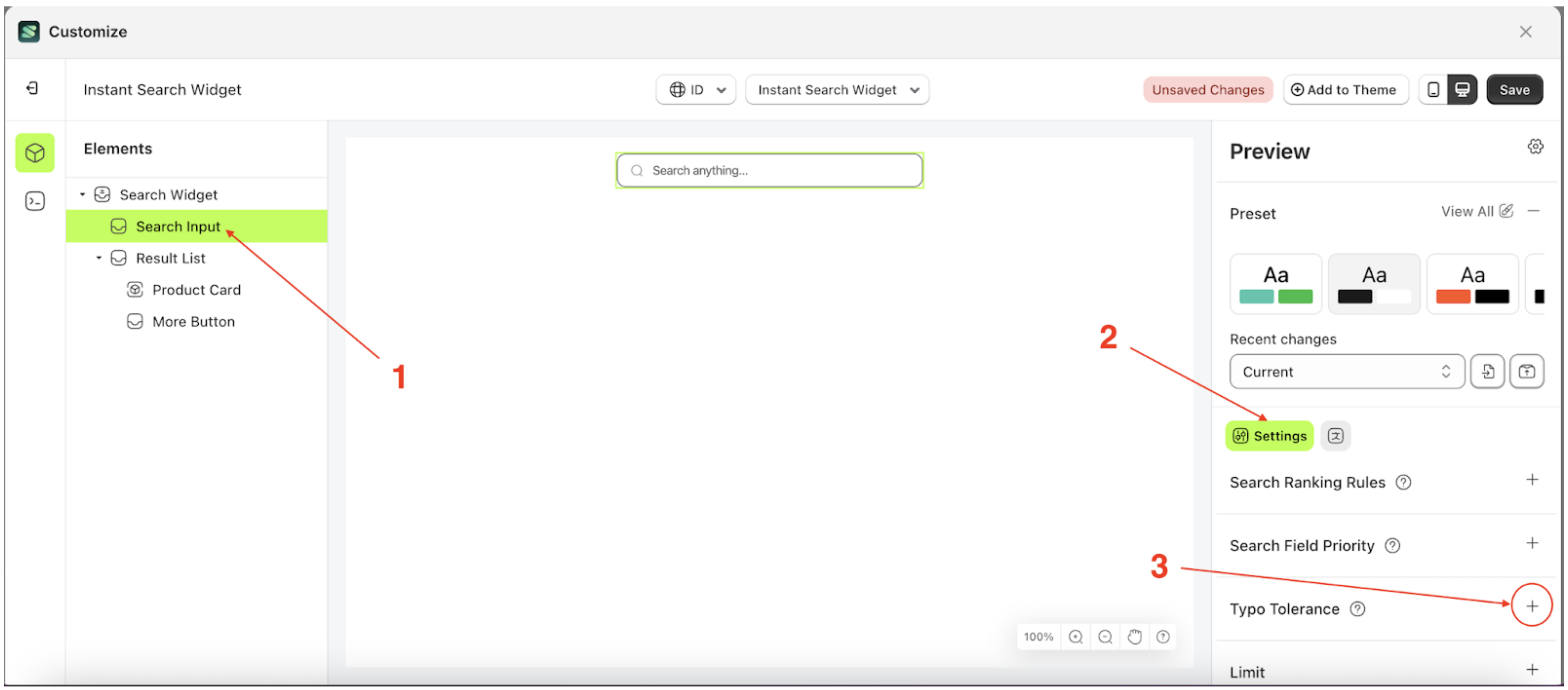
- Activate Enable Typo Tolerance.
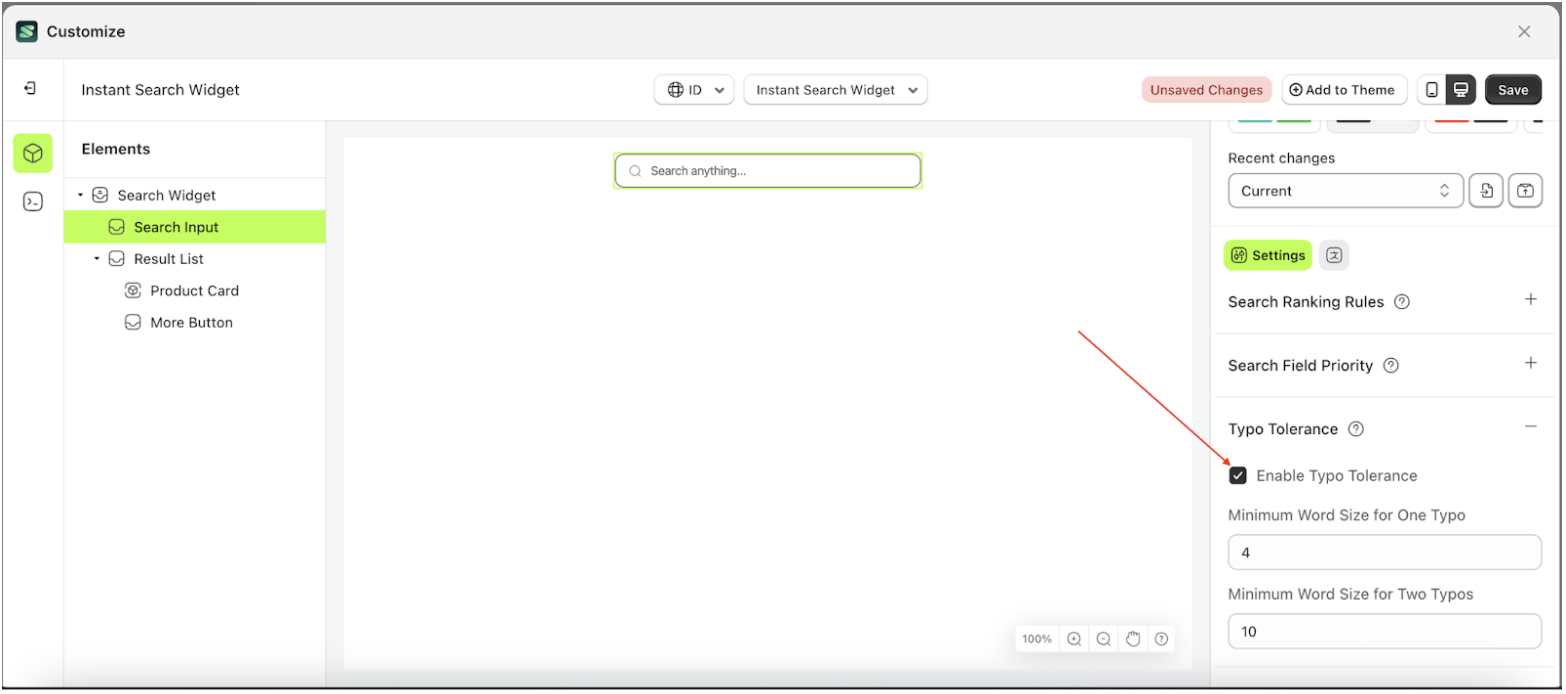
- Then, configure the typo settings according to your needs.
- Note: Save changes first because this update will trigger a system reindexing, completing in 10-15 minutes
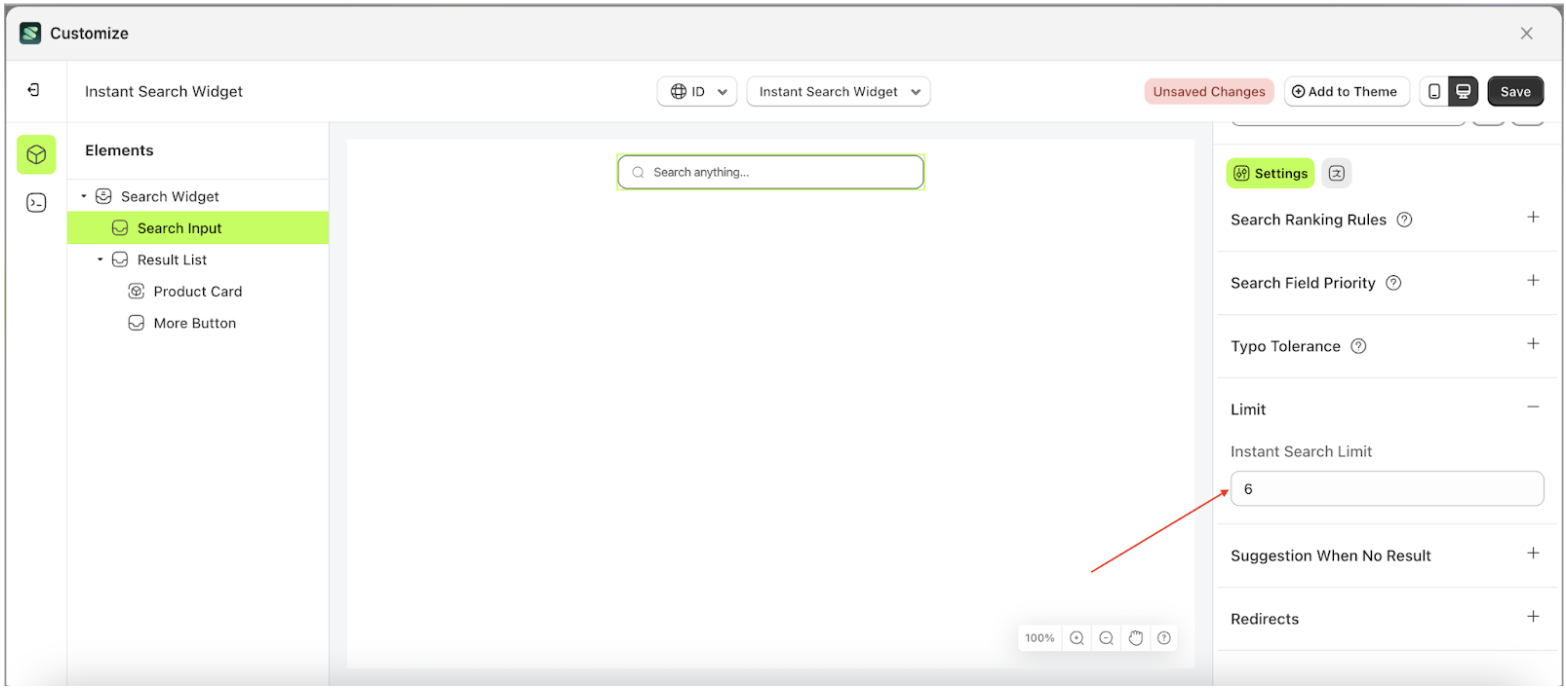
Limit
Available settings:
Limit
This feature is designed to manage the number of products displayed when search results are successfully retrieved.
Let's go through the explanation below:
- Select the Search Input element on the left side, then click the icon on the right side, marked with a red arrow, to access the Typo Tolerance settings.
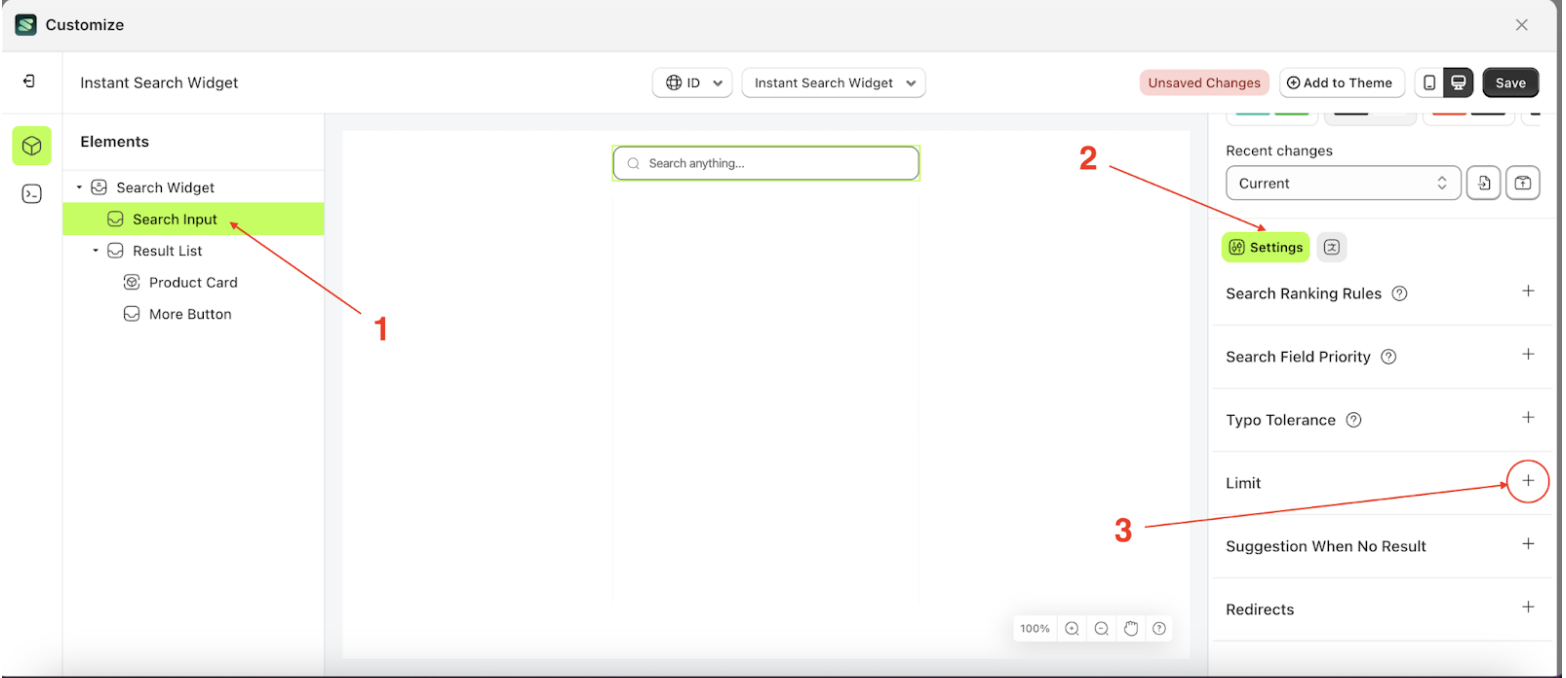
- Set the Instant Search Limit input according to the number of products you want to display.
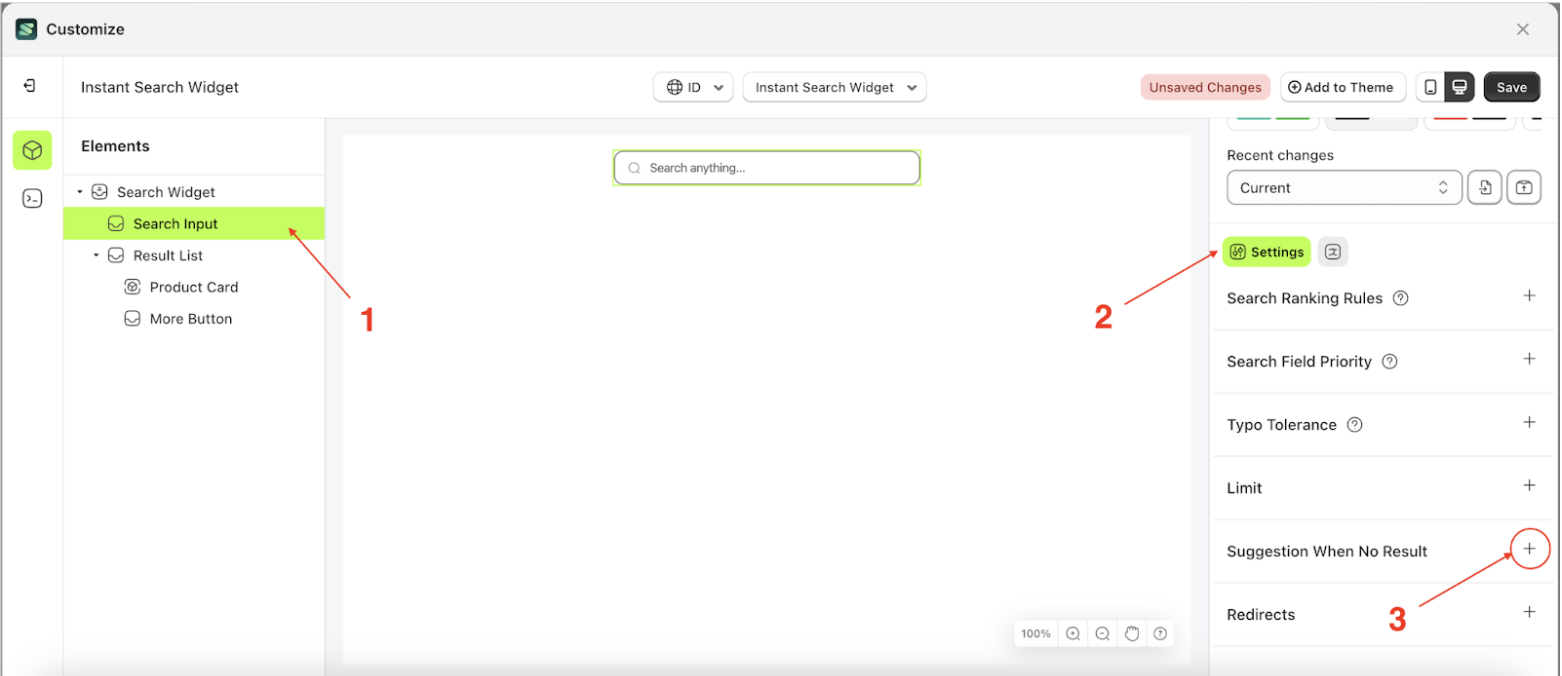
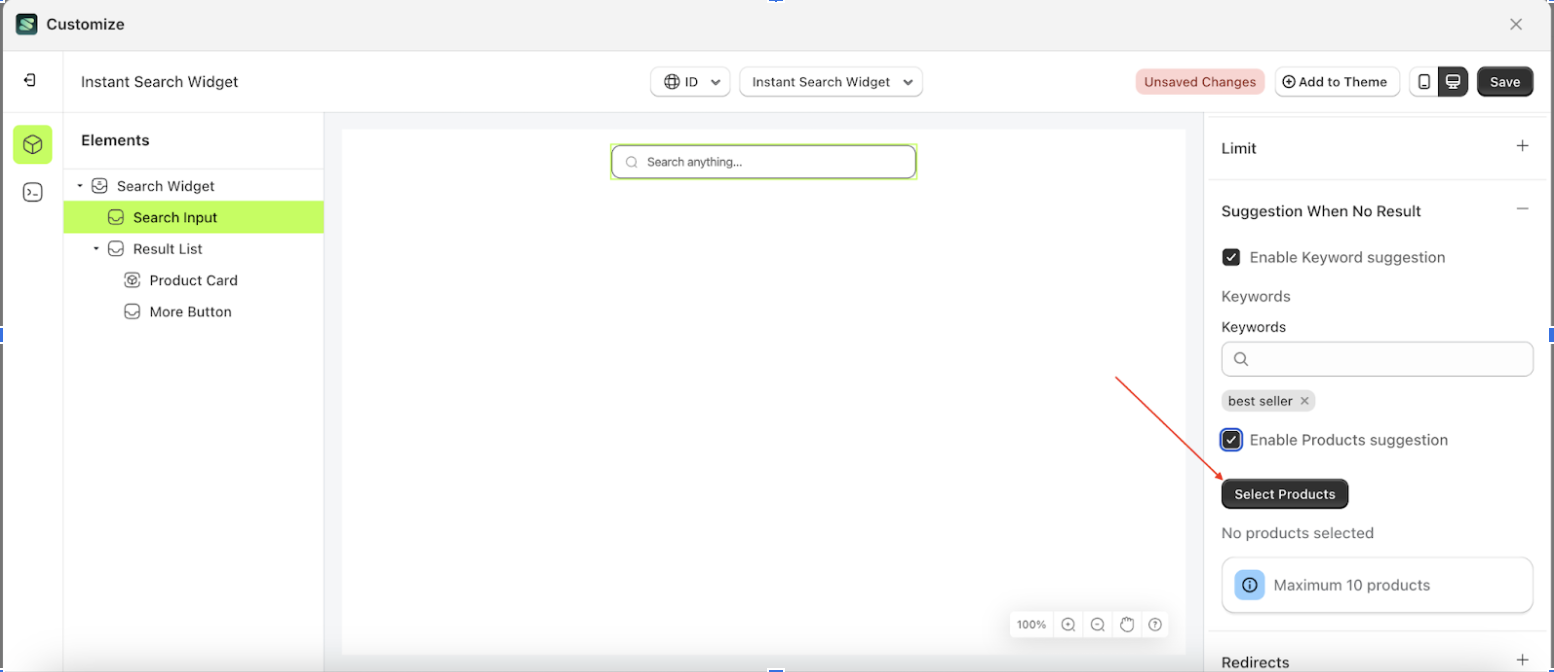
Suggestion When no Result
Available settings:
Suggestion When no Result
This element has four settings:
- Enable Keyword Suggestion
- Keywords
- Enable Product Suggestion
- Select Product
Let's go through them one by one.
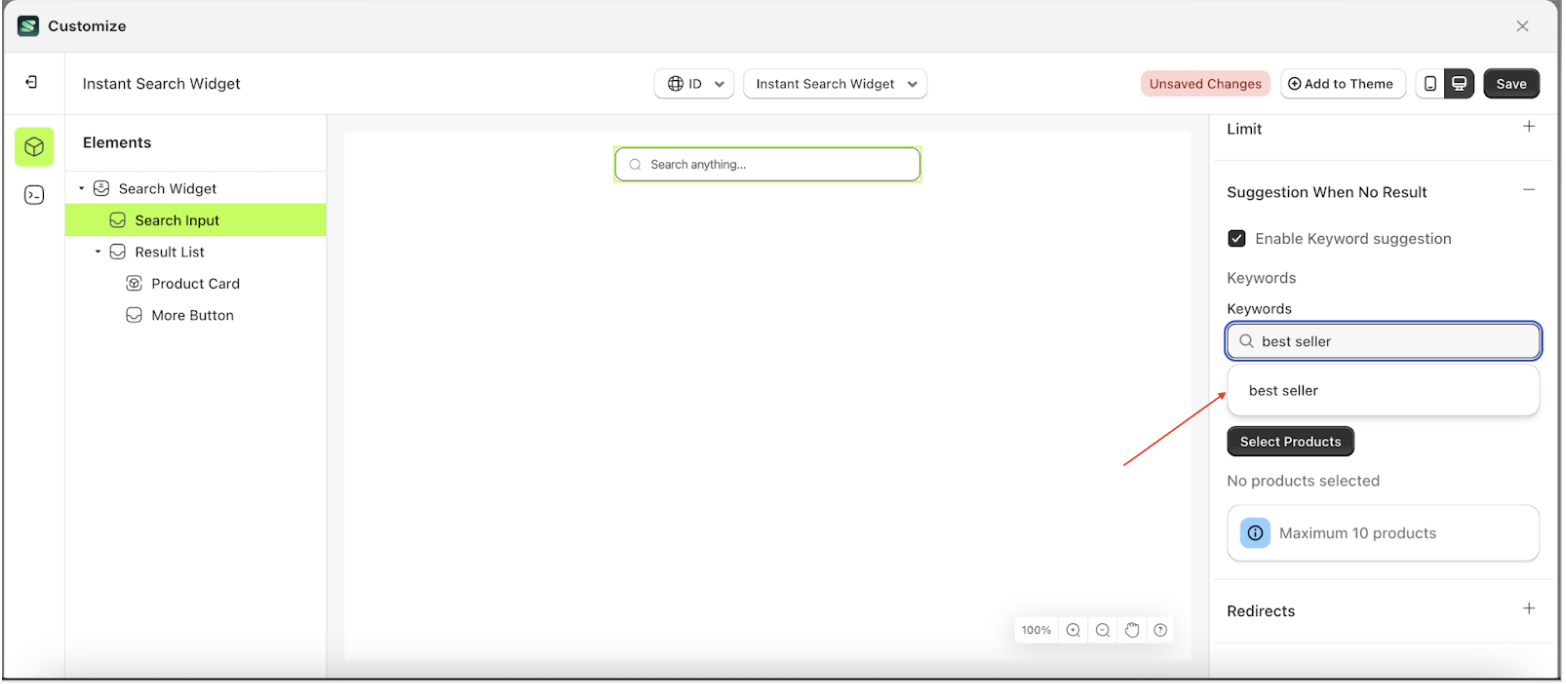
Enable Keyword Suggestion
This feature allows you to enable or disable keyword suggestions. Follow these steps to use it.
- Select the Search Input element on the left side, then click the icon on the right side, marked with a red arrow, to access the Typo Tolerance settings.
- Check the Enable Keyword Suggestion checkbox to activate the feature
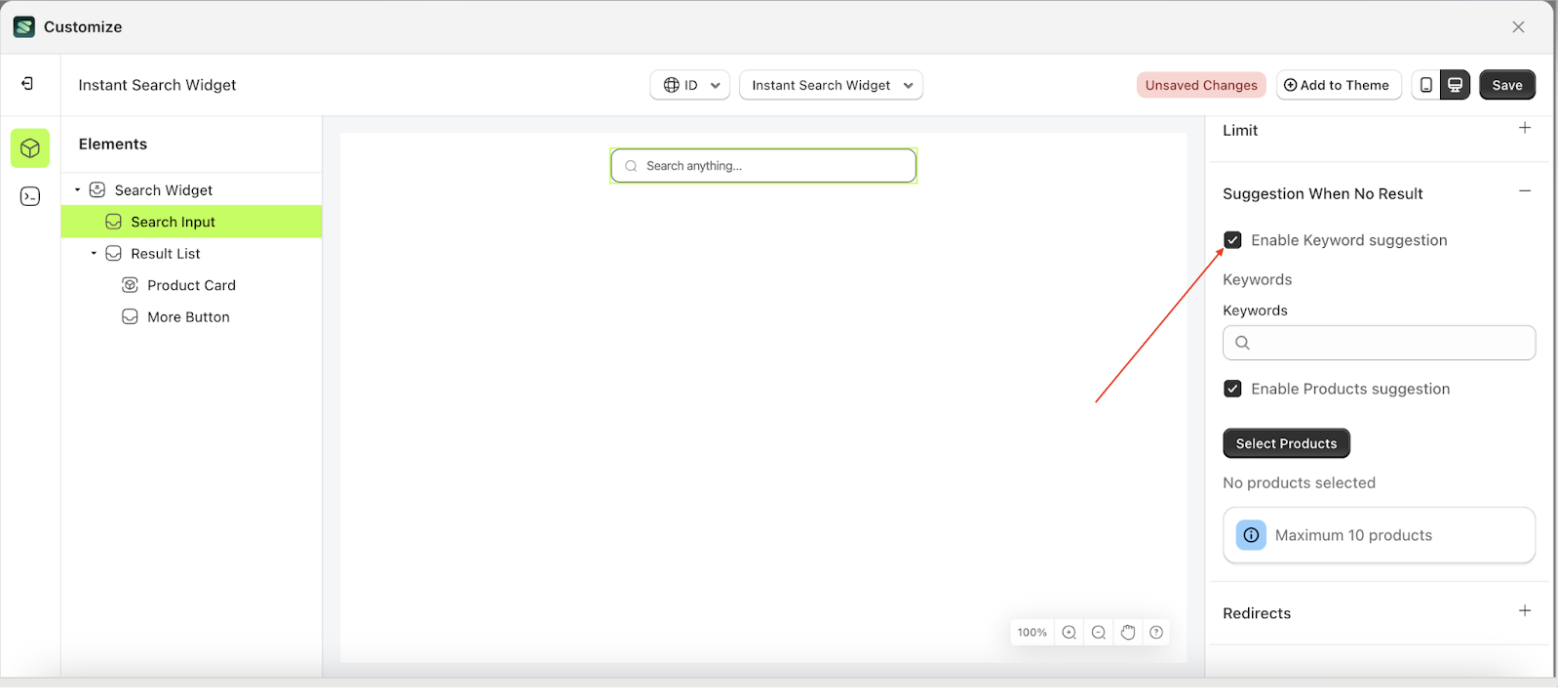
- Enter the keywords you want to display as suggestions
- Click the highlighted area marked in red
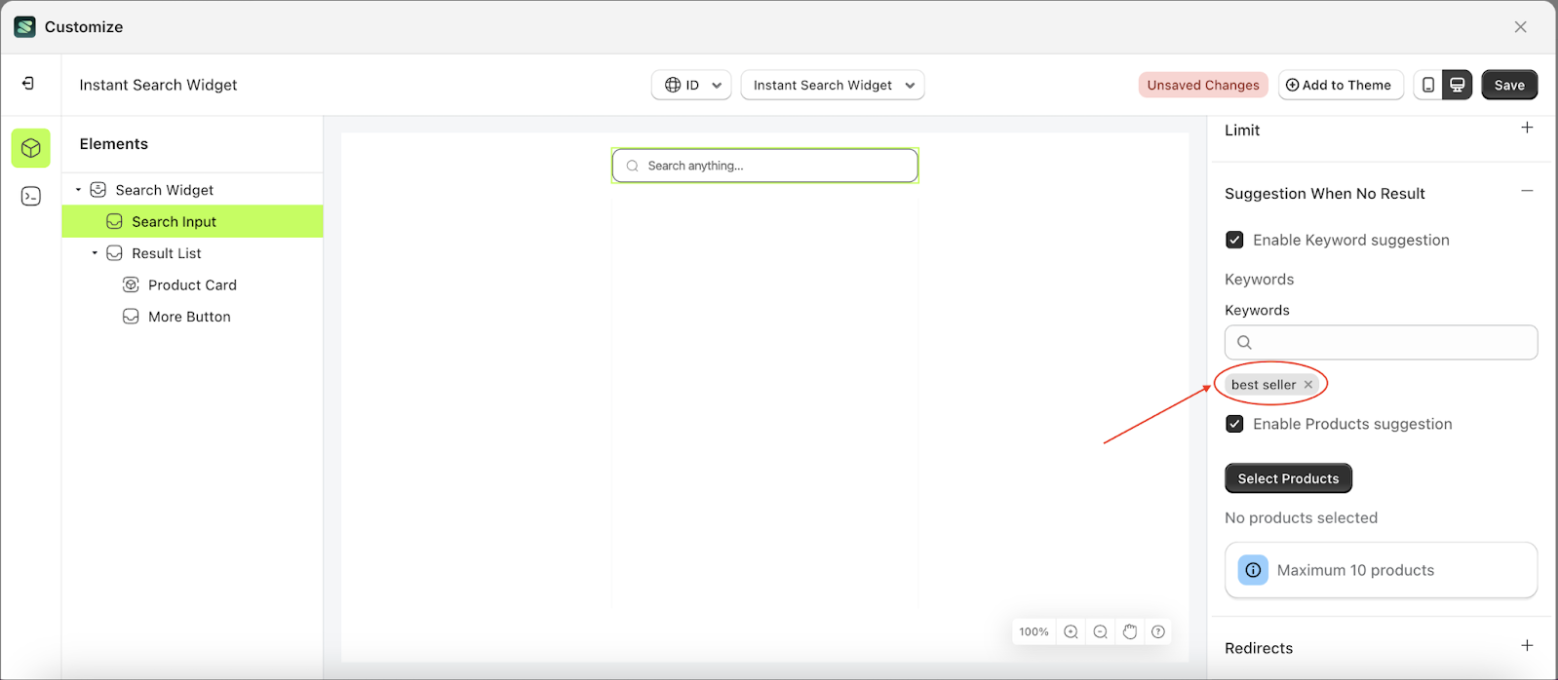
- Once clicked, the list of added keywords will appear below the input field.
- Check the Enable Products suggestion checkbox to activate the feature
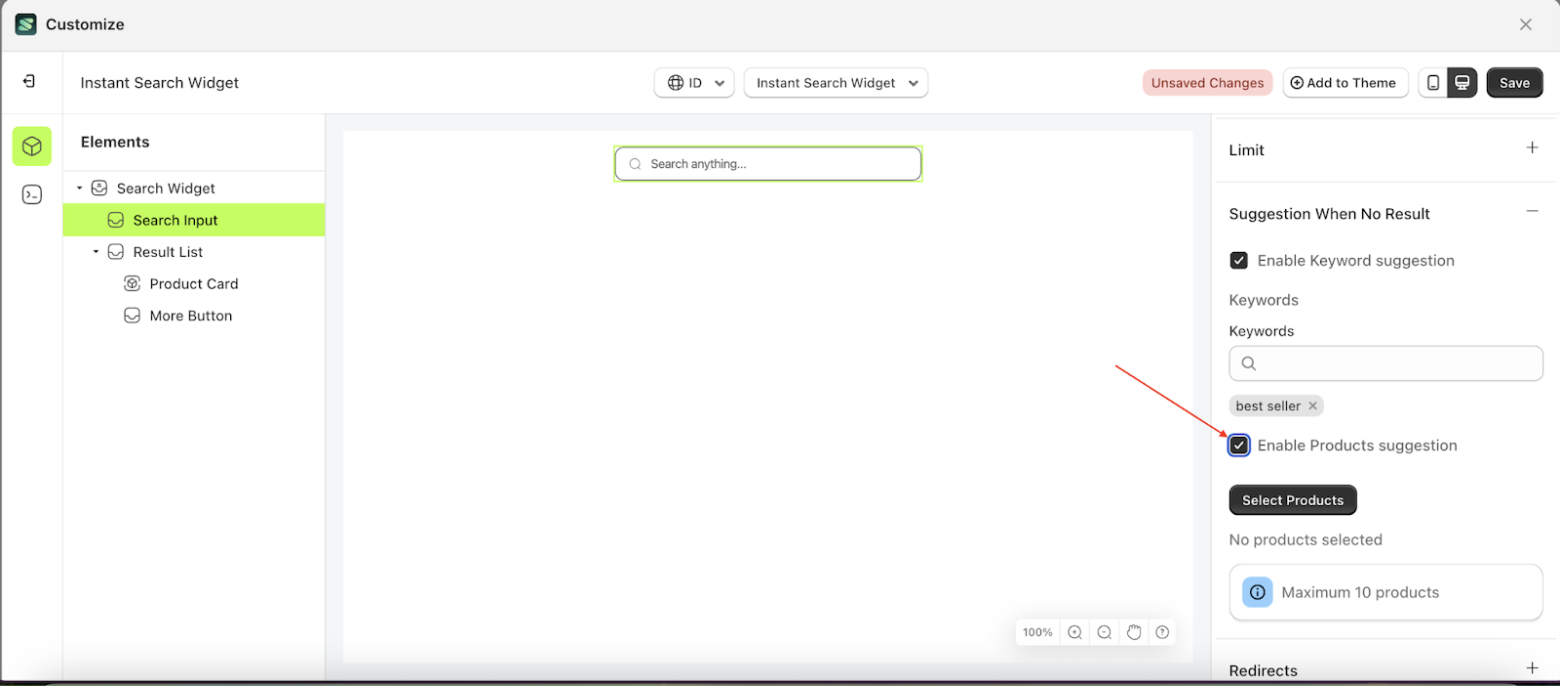
- Click the Select Products button to display the list of available products.
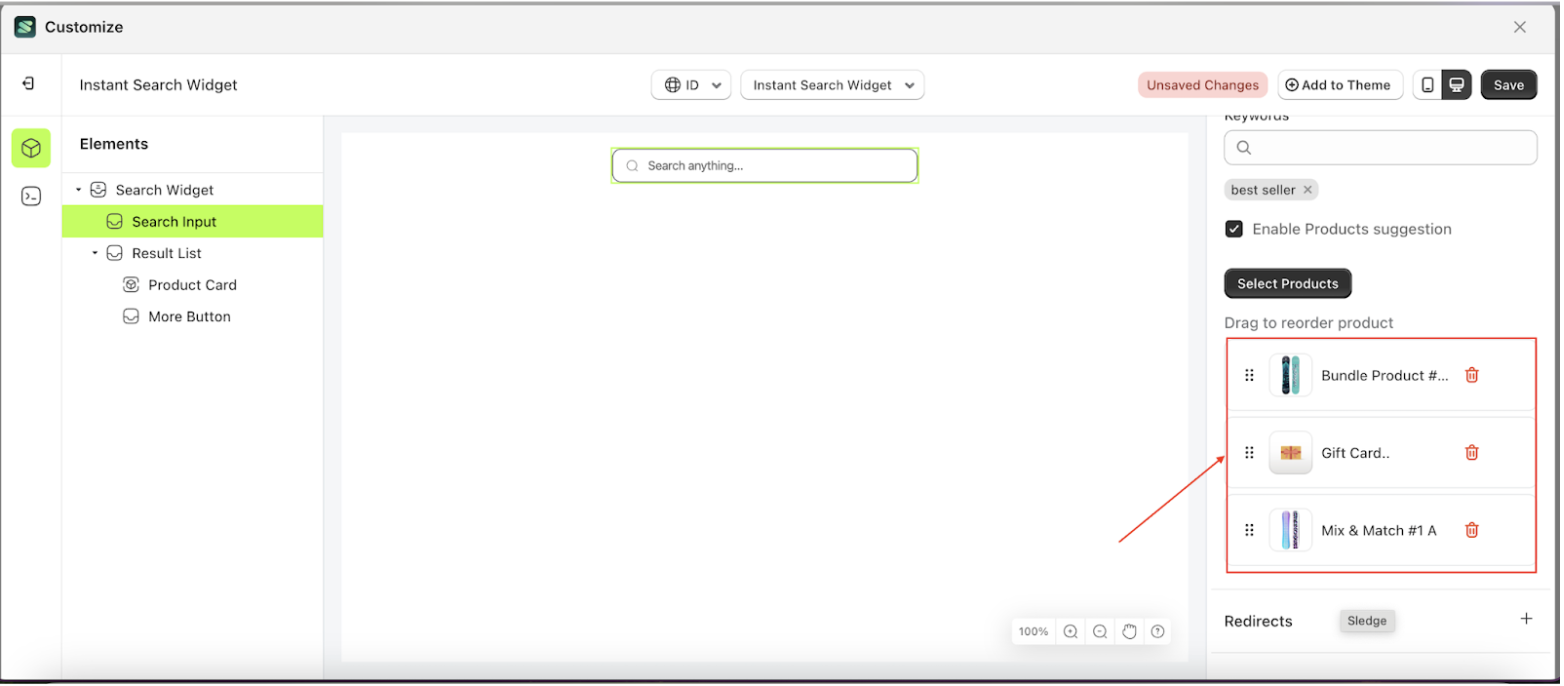
- Once the product list appears, select the products you want to display.
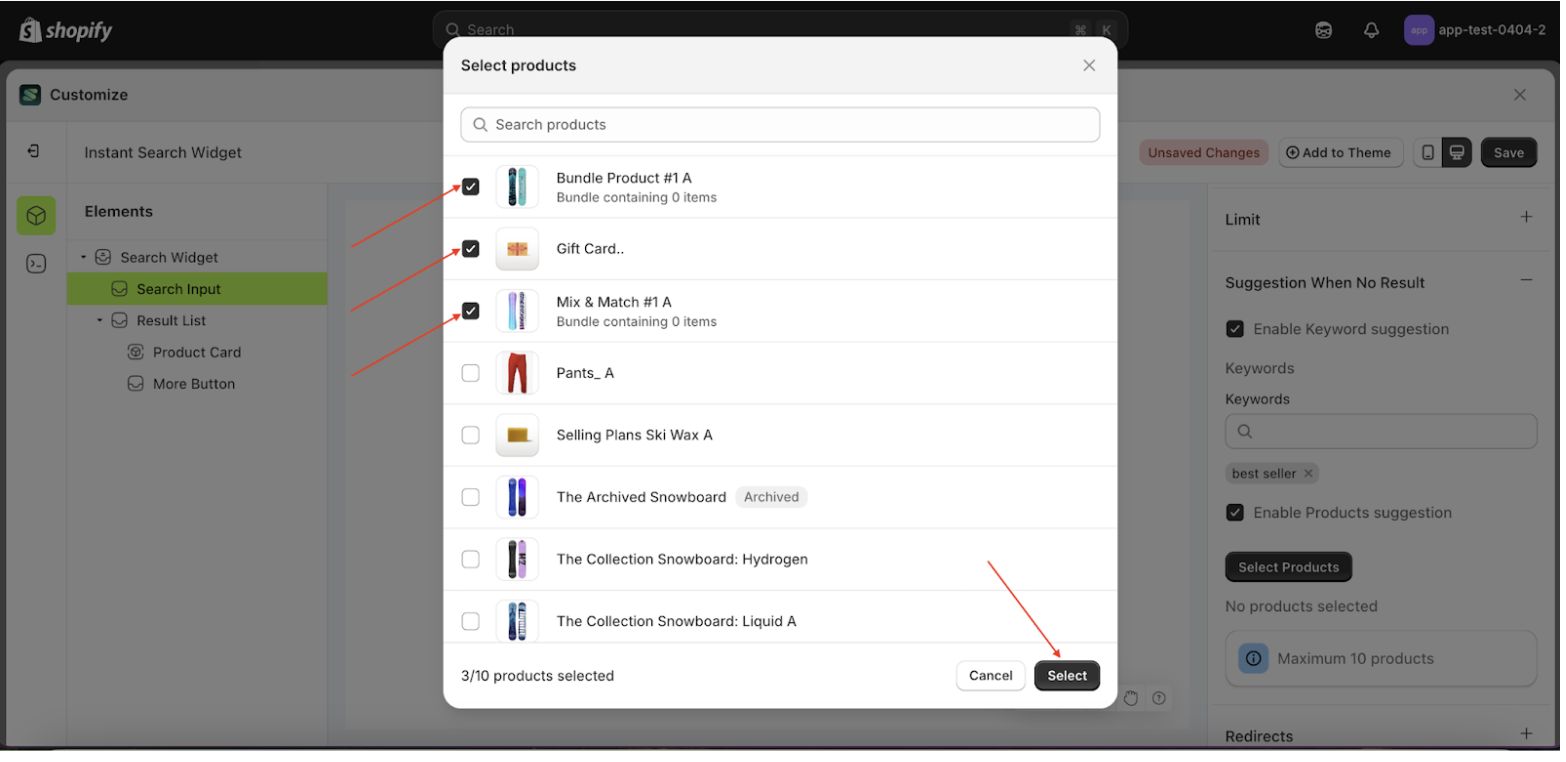
- The selected products will then be listed below this setting.
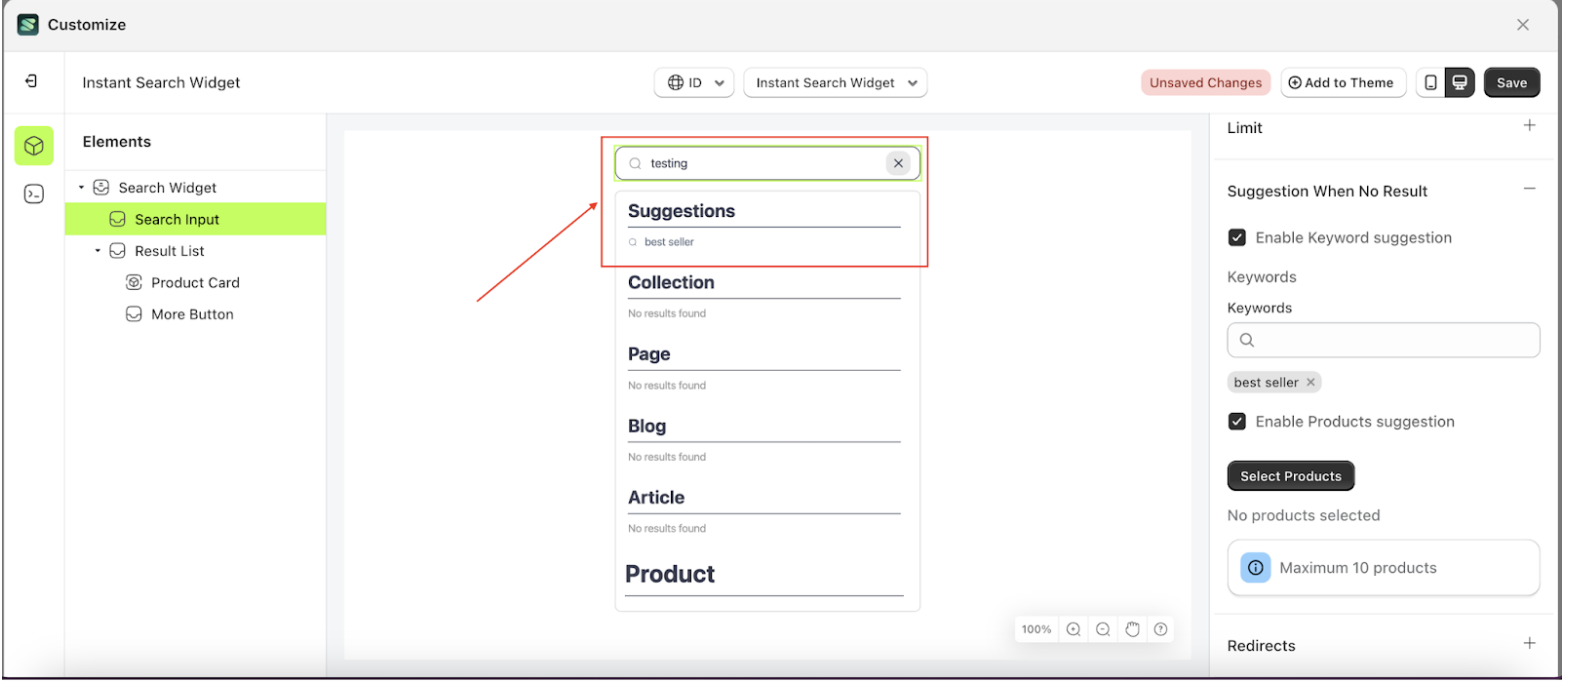
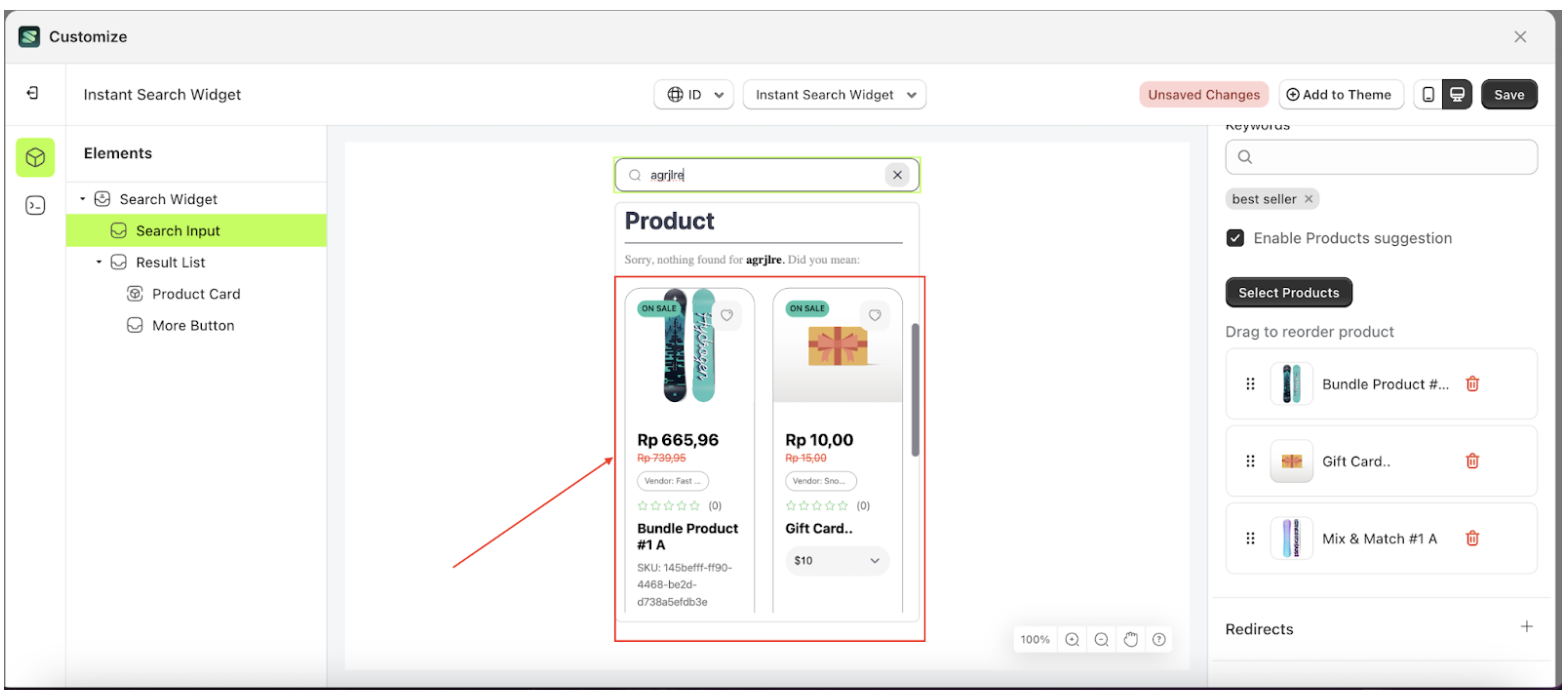
- Now, let's test by entering a keyword that will not return any product results—for example, agrjlre. The result of this input will be as follows:
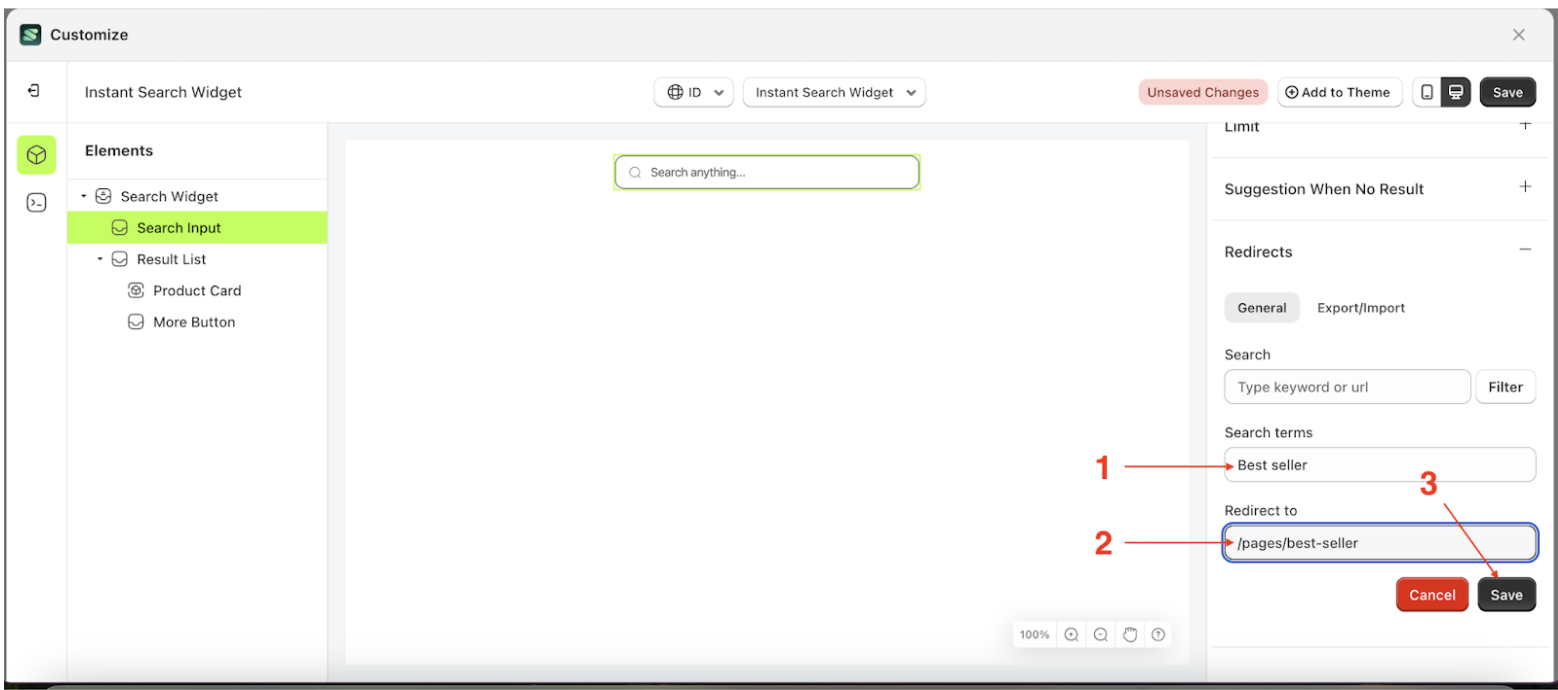
Redirect
Available settings:
Redirect
Once the redirect list is created, if the title matches—for example, "testing"—then searching for that keyword will automatically trigger the redirect.
- Select the Search Input element on the left side, then click the icon on the right side, marked with a red arrow, to access the Typo Tolerance settings.

- Click the Add button to display the input form for adding a keyword redirect.
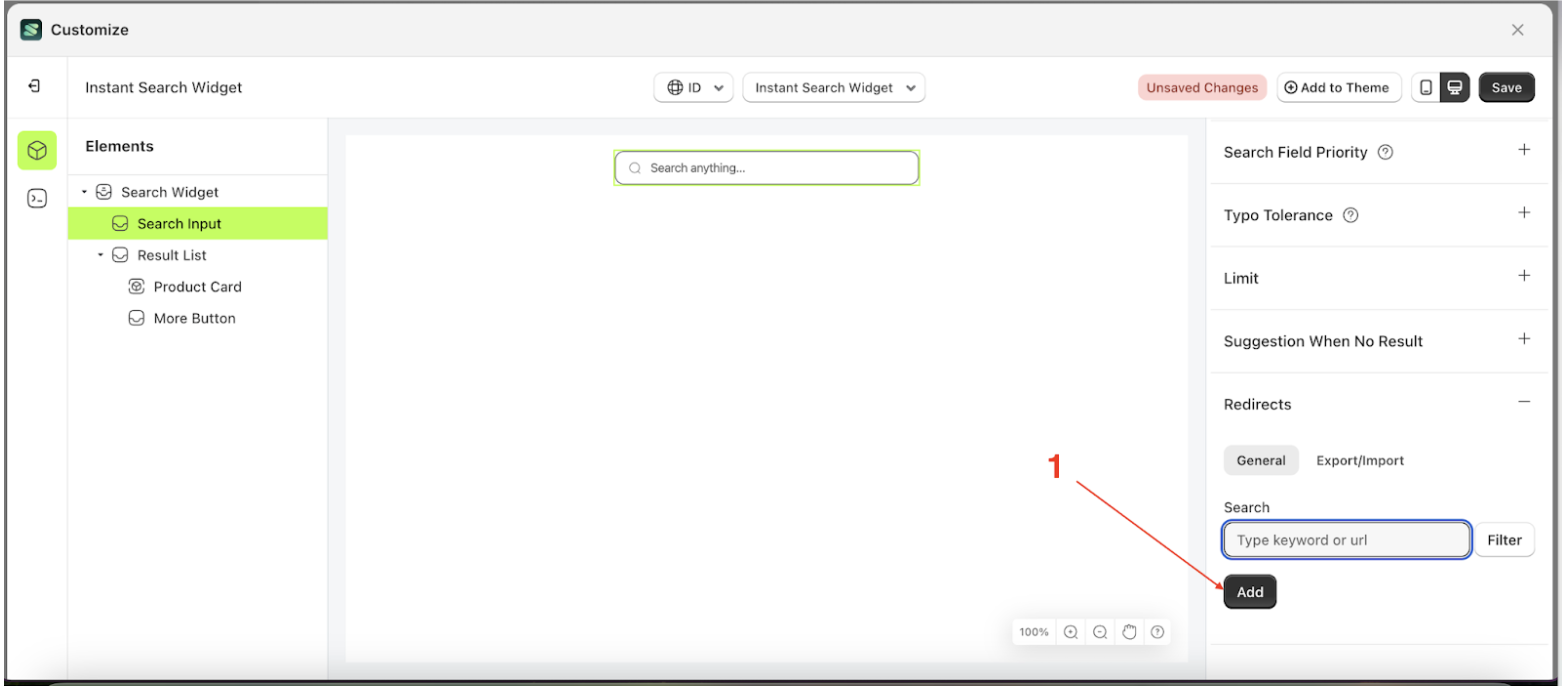
- Click the Add button to display the input form for adding a keyword redirect.
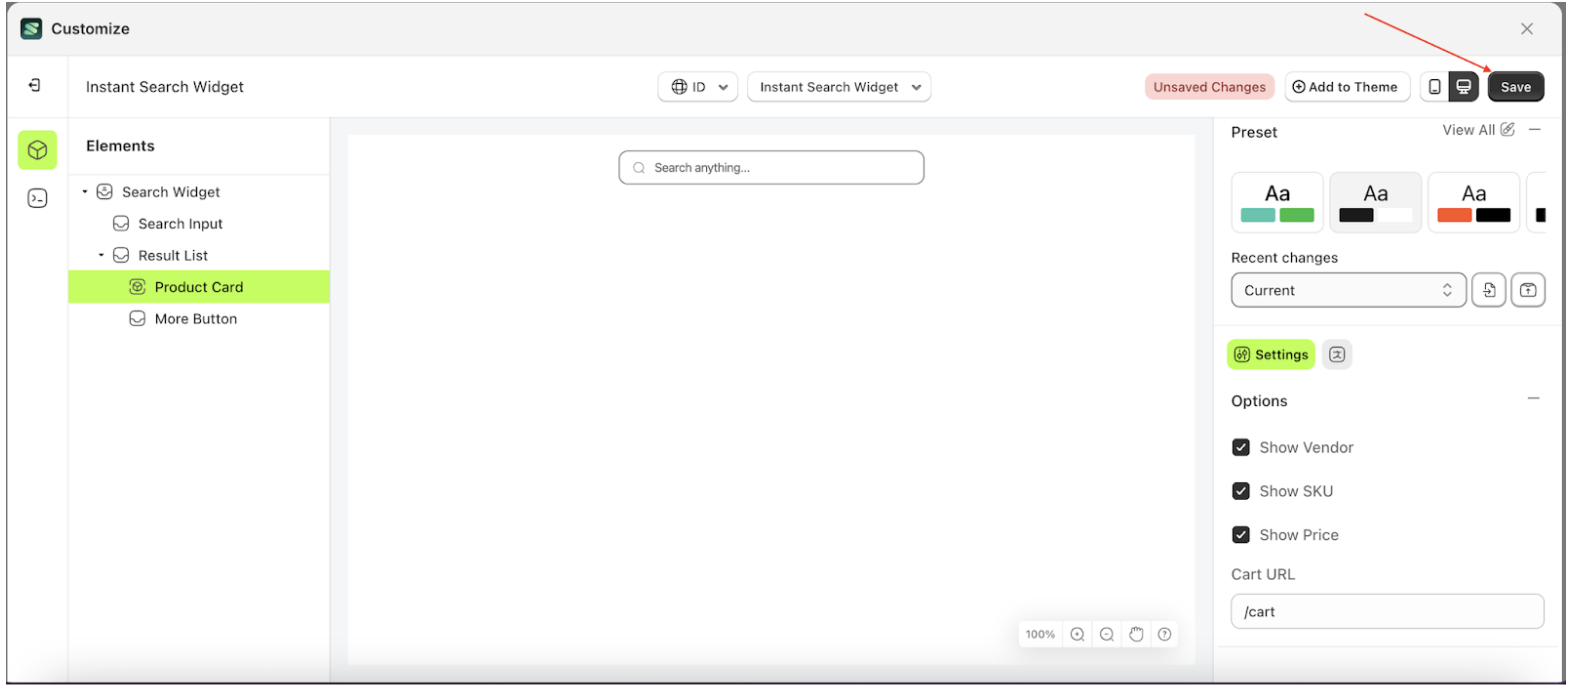
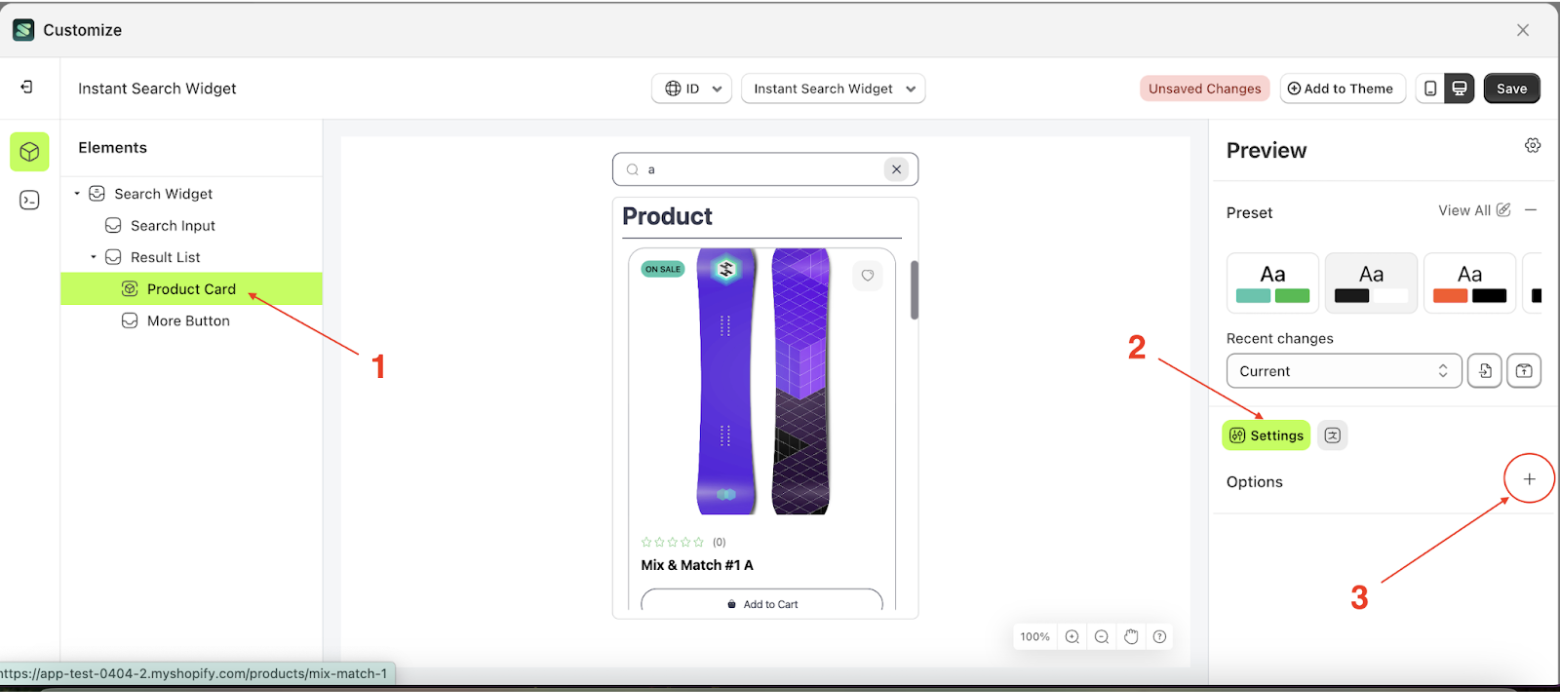
Product Option
Available settings:
Show Vendor
This feature is designed to show or hide vendor information on the product.
Follow the steps below:
- Select the Product Card element, then click the icon marked with a red arrow to open the menu within that item
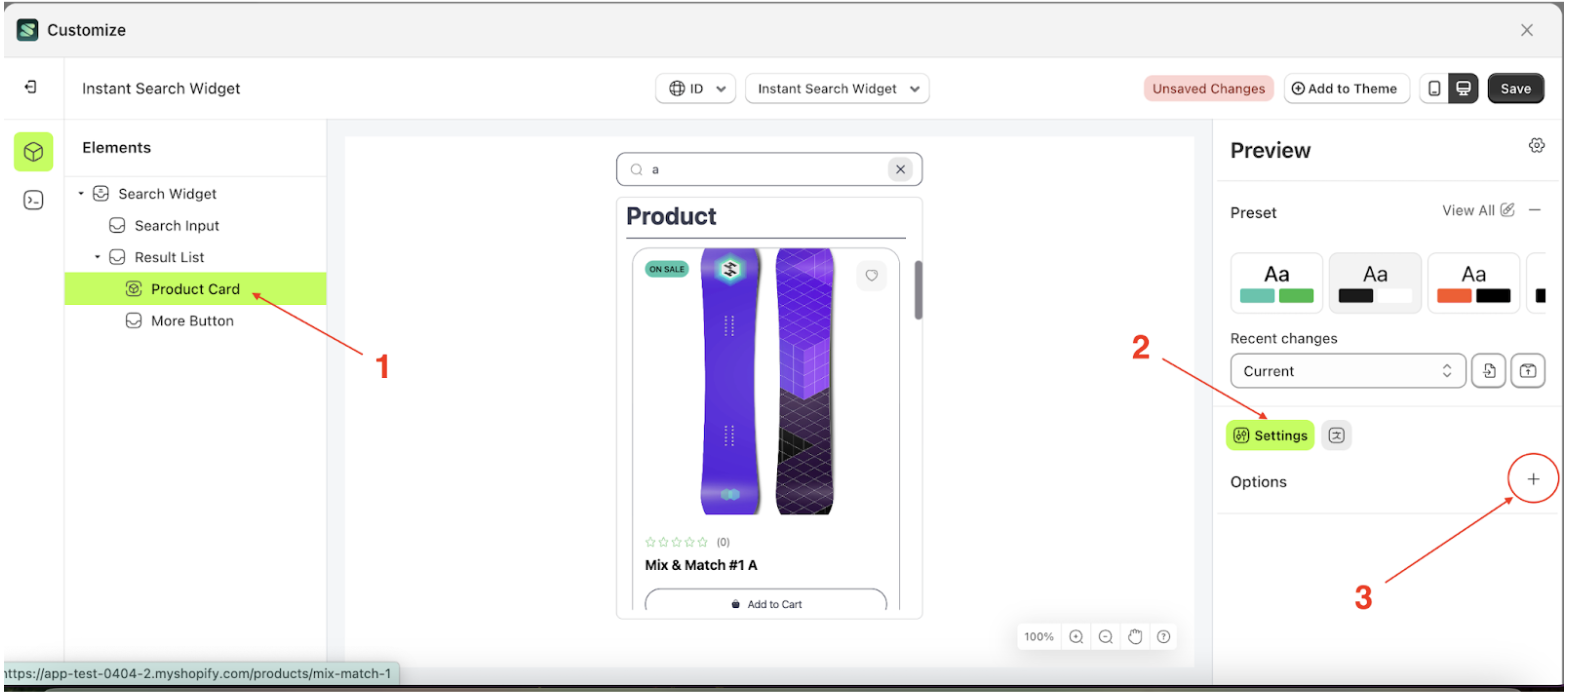
- Once the settings are open, enable the Show Vendor checkbox. This will display vendor information on the product card, highlighted in red
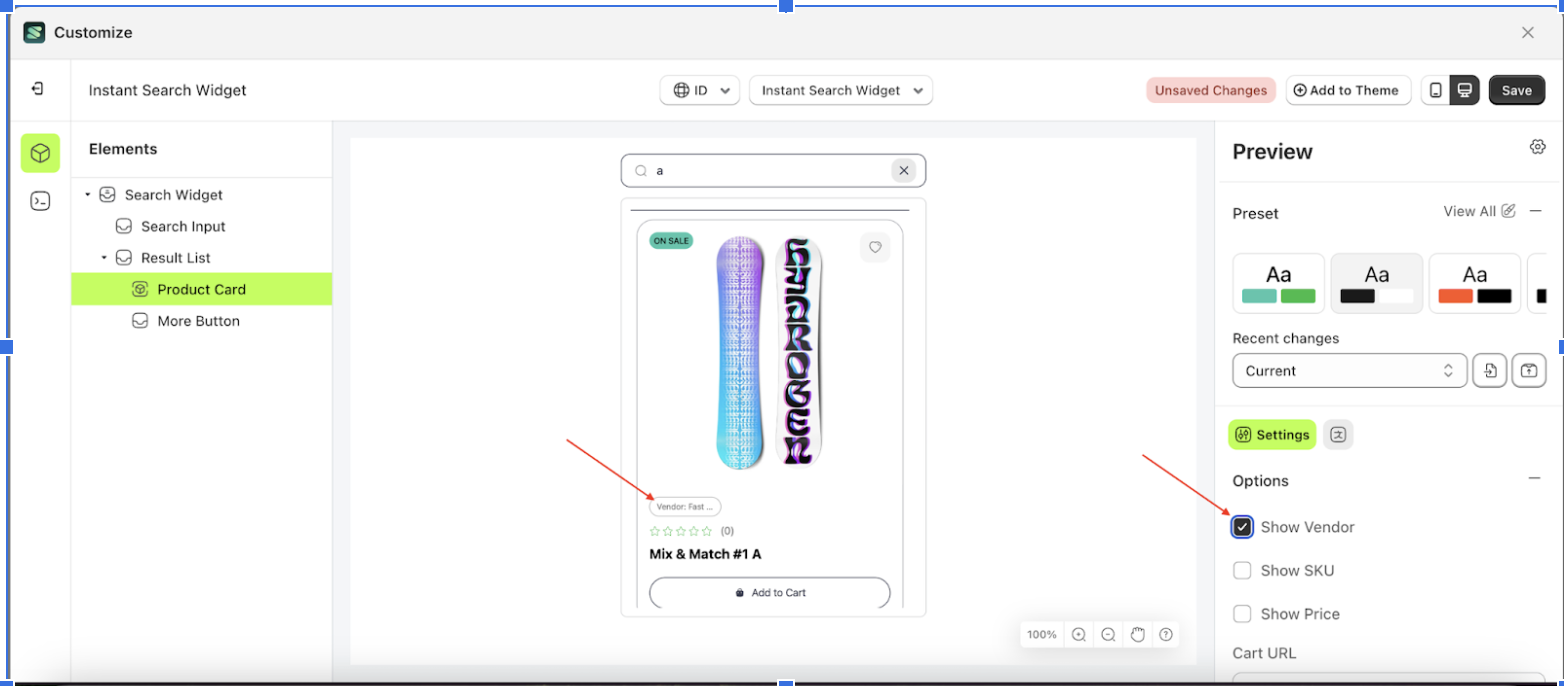
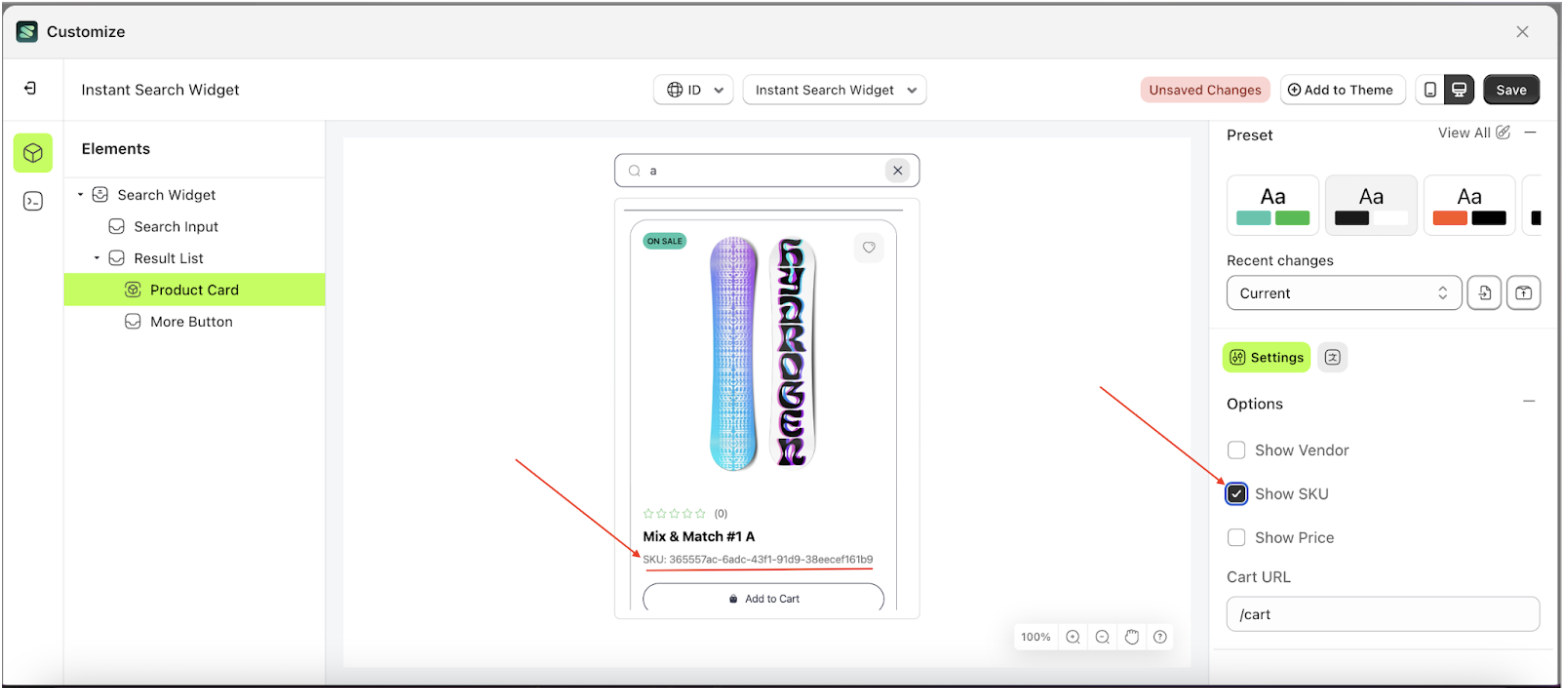
Show SKU
This feature is designed to show or hide SKU information on the product.
Follow the steps below:
- Select the Product Card element, then click the icon marked with a red arrow to open the menu within that item

- Once the settings are open, enable the Show SKU checkbox. This will display SKU information on the product card, highlighted in red
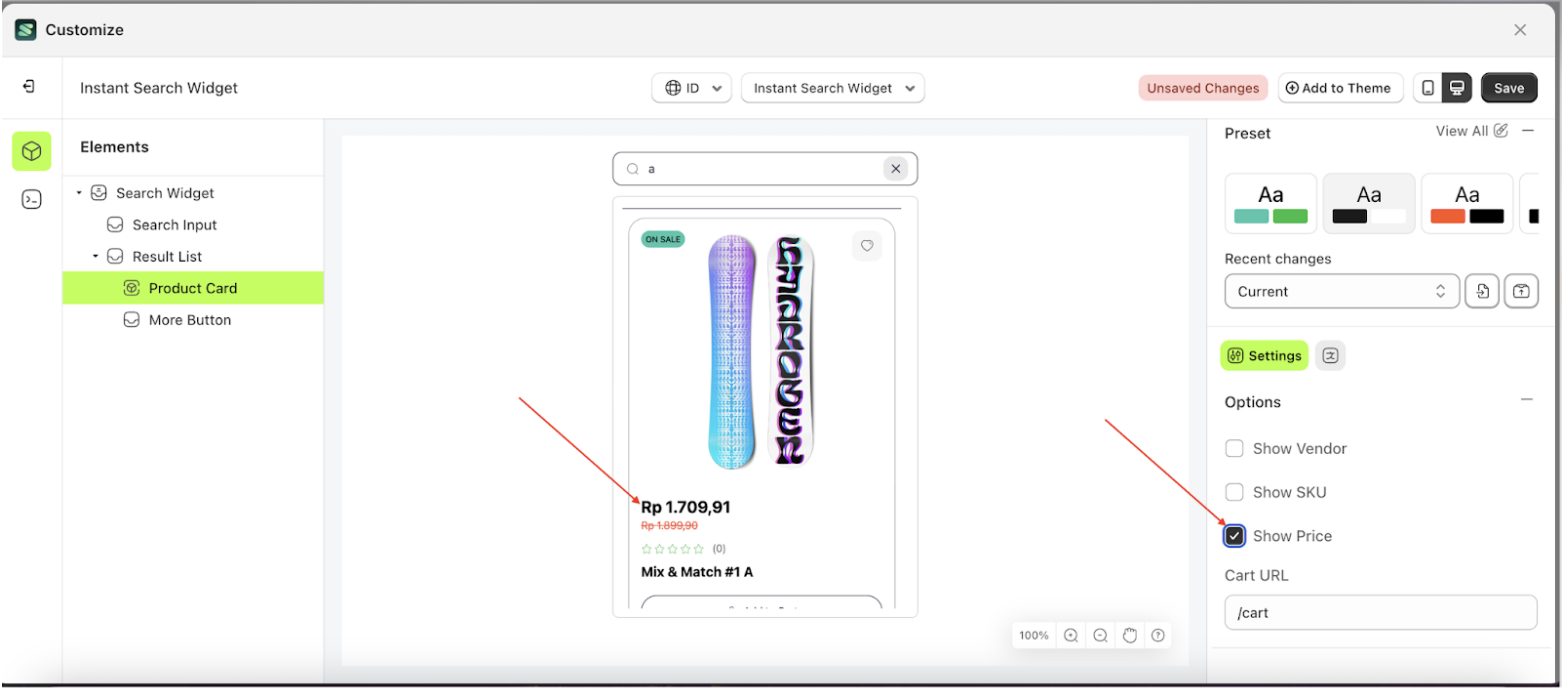
Show Price
This feature is designed to show or hide price information on the product.
Follow the steps below:
- Select the Product Card element, then click the icon marked with a red arrow to open the menu within that item
- Once the settings are open, enable the Show Price checkbox. This will display price information on the product card, highlighted in red.
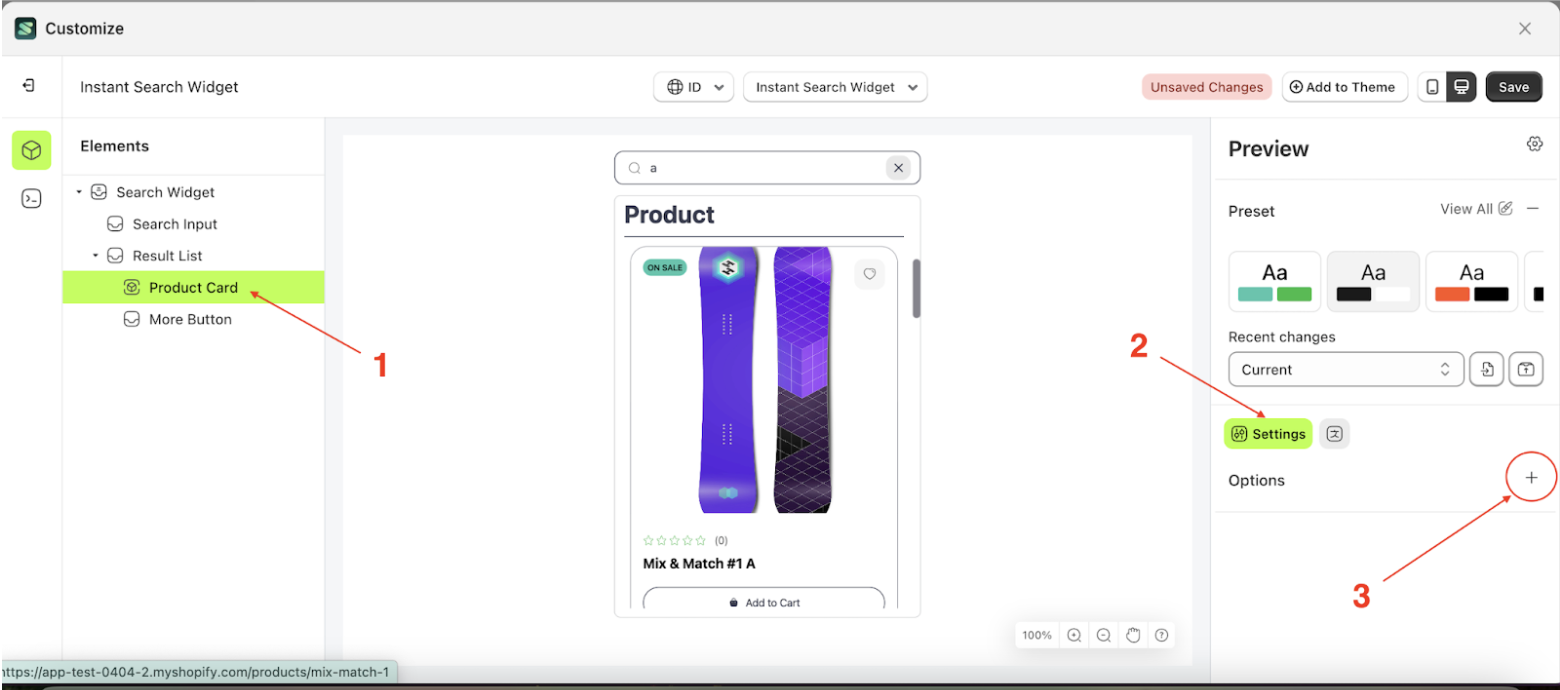
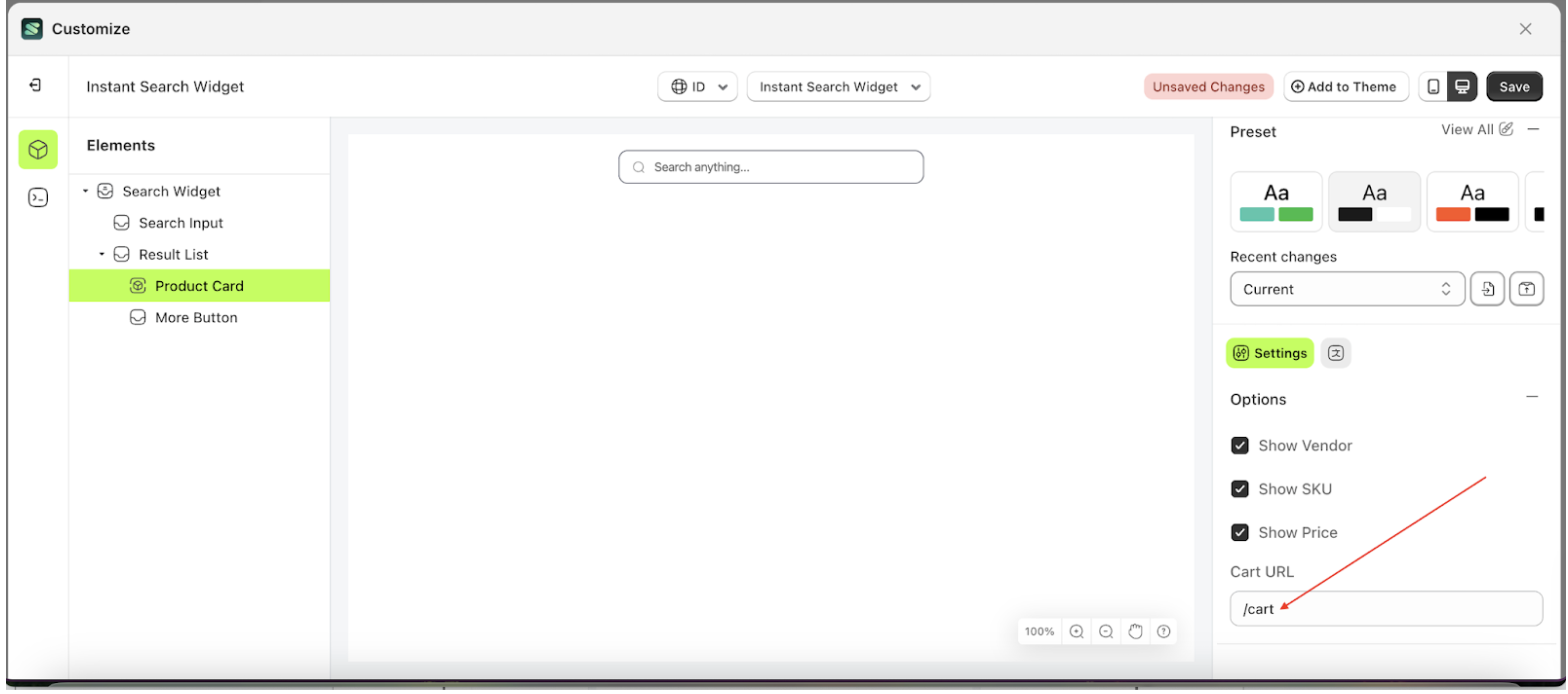
Cart Url
This feature is used to redirect to a specific page after the add-to-cart process has been successfully completed by the system.
Follow the steps below:
- Select the Product Card element, then click the icon marked with a red arrow to open the menu within that item
- Once the settings are open, enable the Show Price checkbox. This will display price information on the product card, highlighted in red.
- Then, click the Save button in the top right corner to apply the changes to the storefront.