Wishlist
Increase engagement and sales on your stores by allowing customers to save their desired products for later purchase.
Sledge provides several widgets you can use to integrate it with your store.
Available widgets :
If you're using Hydrogen or Next.js,
make sure to install the @sledge-app/react-wishlist package first.
npm i @sledge-app/react-wishlistBadge
Badge is a Wishlist's widget you can use to display your wishlist's total in a small text box or an icon.
Here is a step-by-step guide to adding this widget with block.
- In the Theme Installation, click
Integrate to my themeonWishlistoption.
- Then click
Add widget to my themeonAdd wishlist badgeoption.
- You will be directed to the Editor, and the Badge will have been added automatically.
- You can customize the Wishlist Badge by click the
Wishlist badgeBlock.
- When ready,
Saveyour changes.
Trigger
Trigger is a Wishlist's widget you can use to trigger add or remove a wishlist item in an icon.

Here is a step-by-step guide to adding this widget with block.
-
From your Shopify admin, navigate to
Online Store>Themes> click theCustomizebutton. -
Navigate to the drop-down menu at the top, select
Products> select a default product.
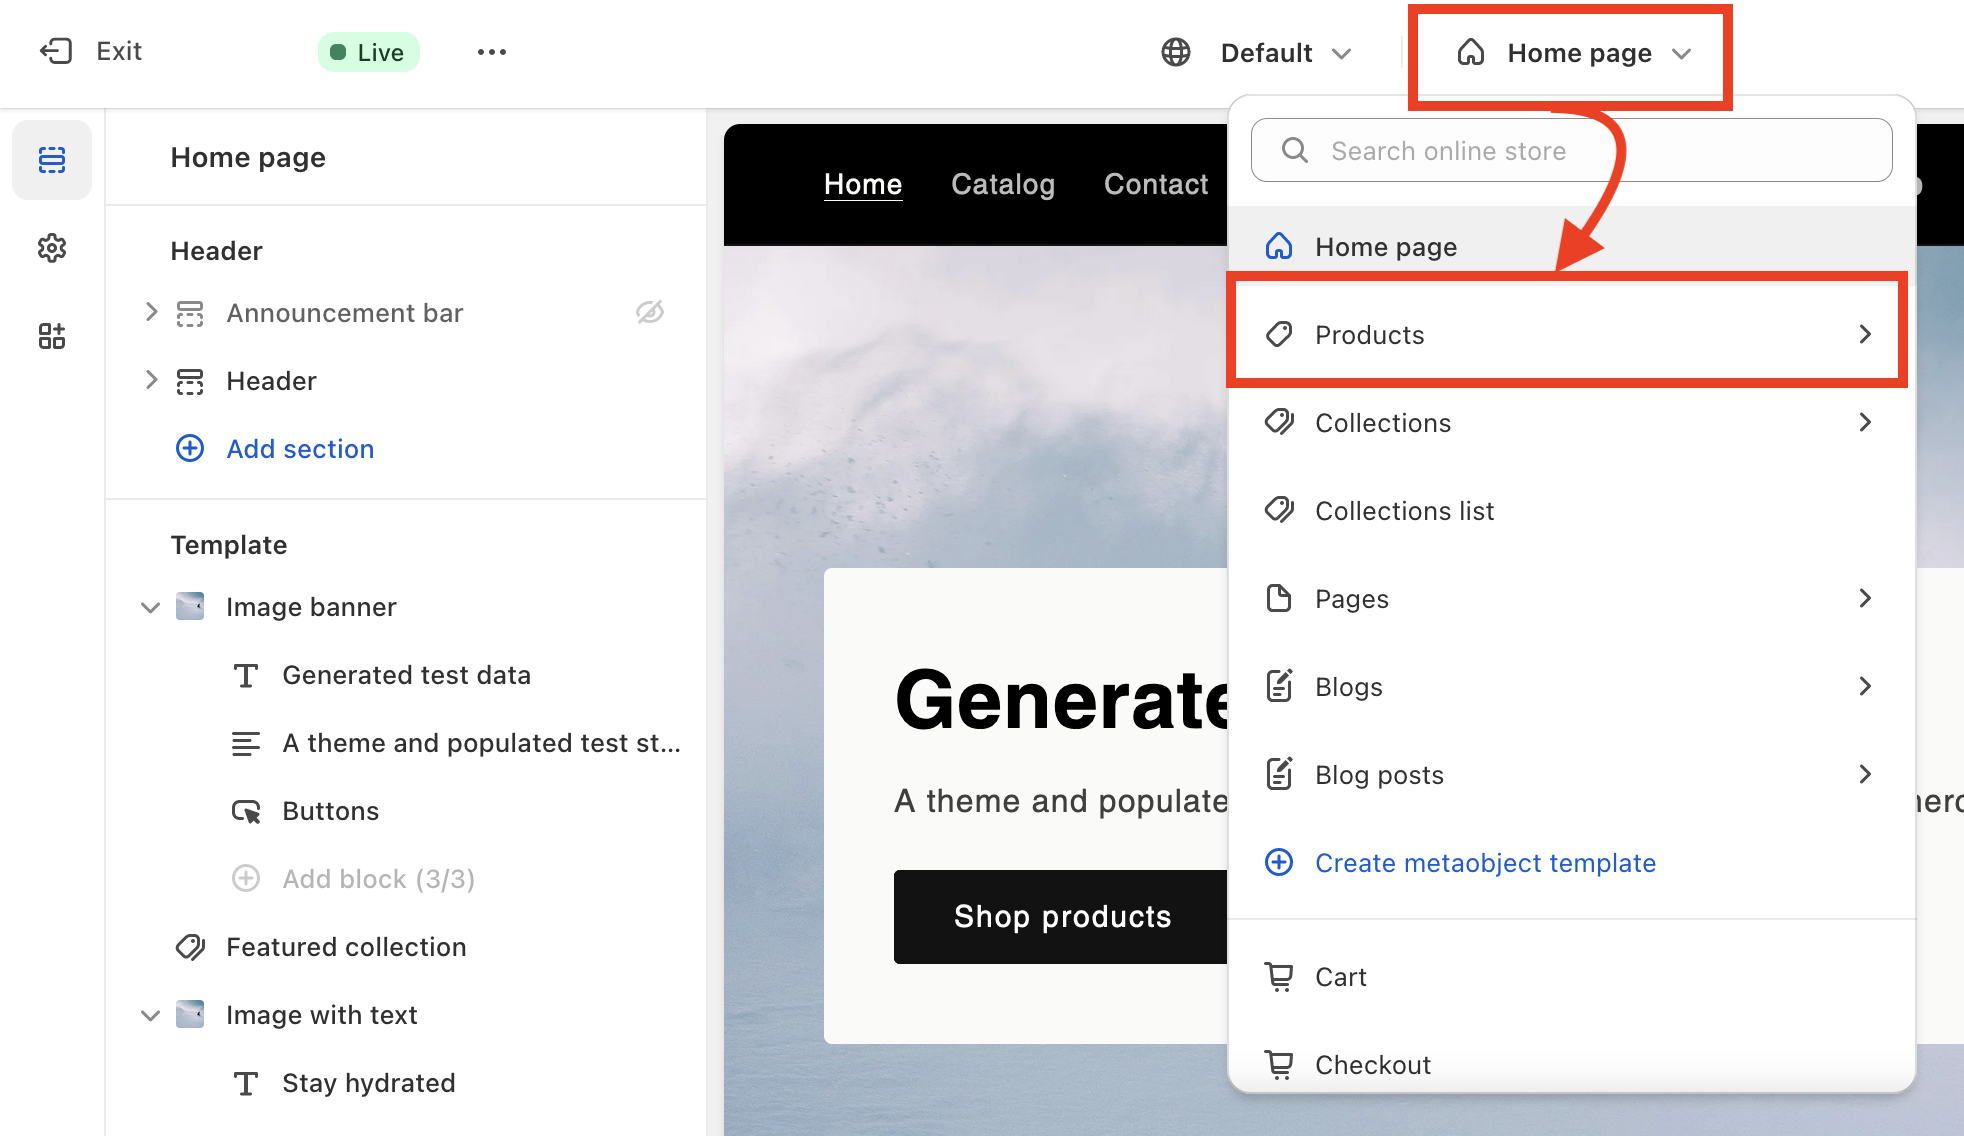
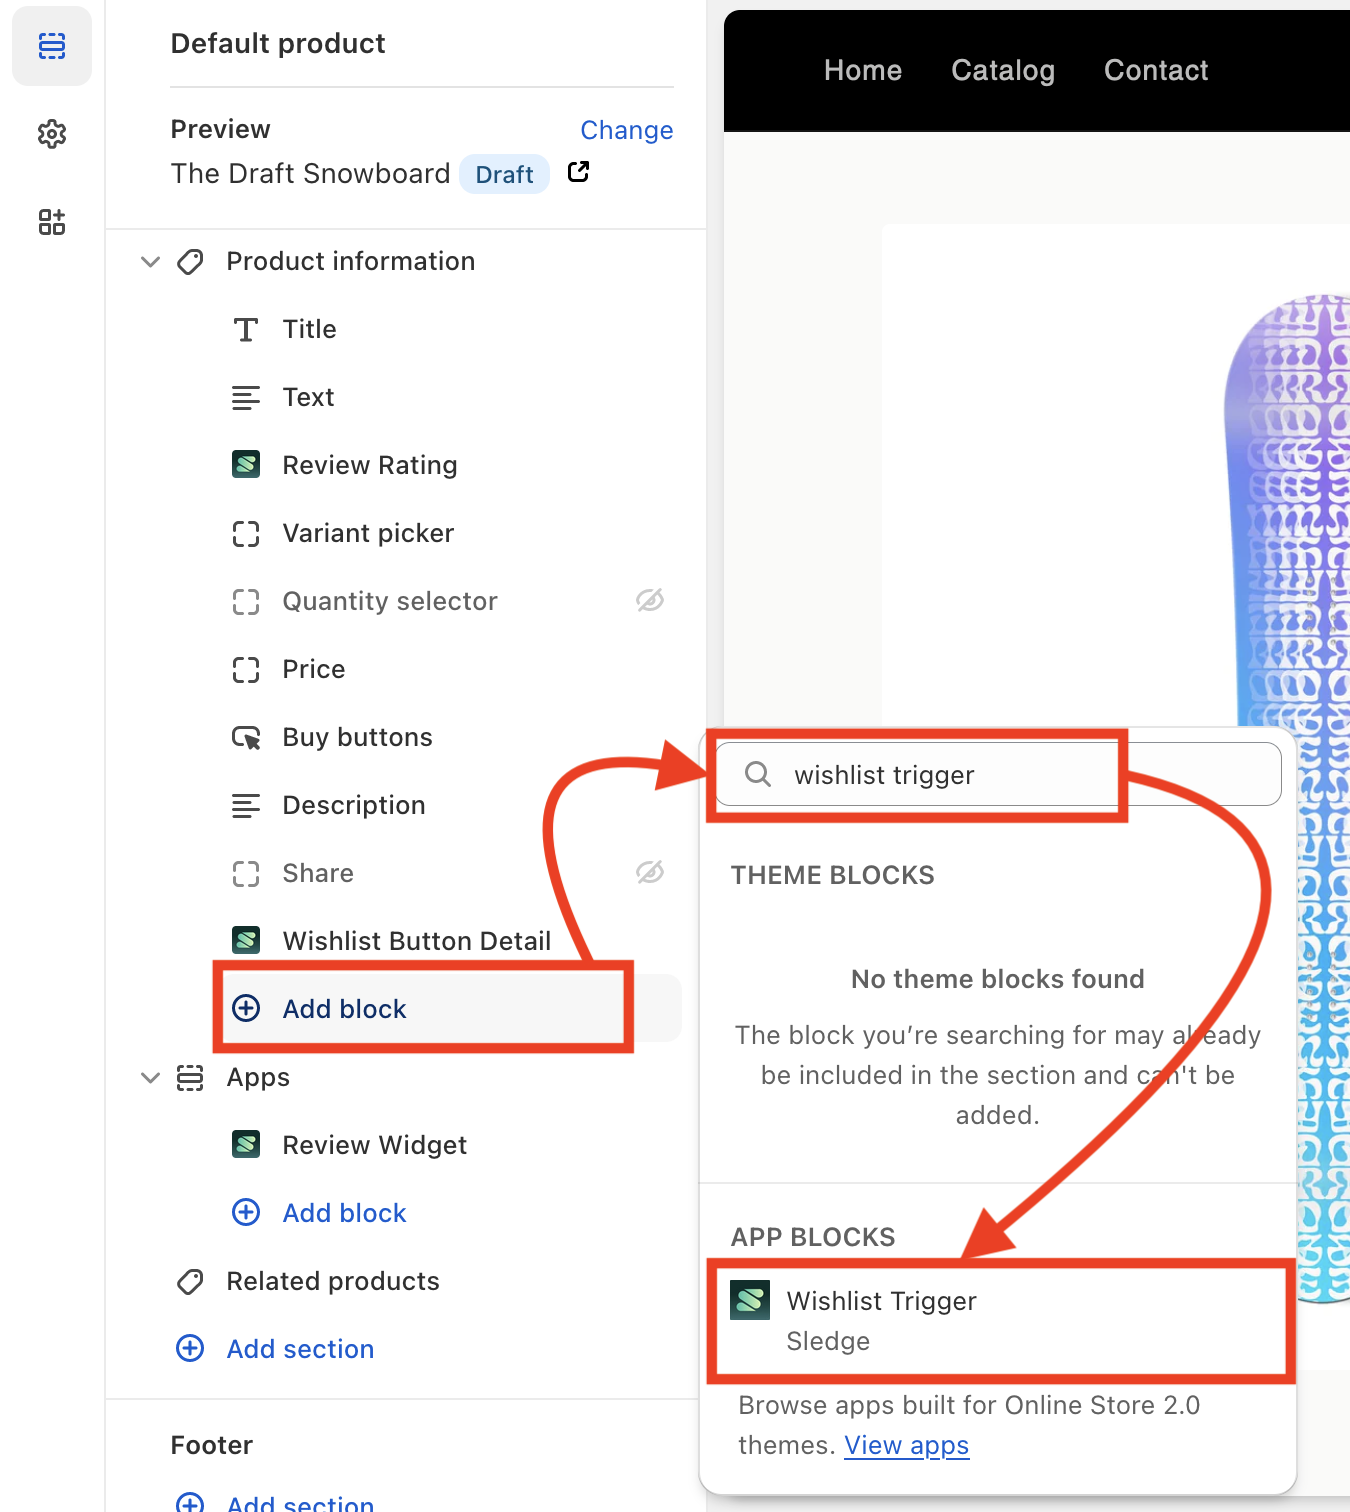
- Click
+ Add Block> Searchwishlist trigger> select theWishlist Triggersection.
-
You can rearrange Wishlist Trigger by Click and drag the
⋮⋮icon -
When ready,
Saveyour changes.
Button Detail
Button Detail is a Wishlist's widget you can use to trigger add or remove a wishlist item in a button form. Typically used on product detail page.

Here is a step-by-step guide to adding this widget with block.
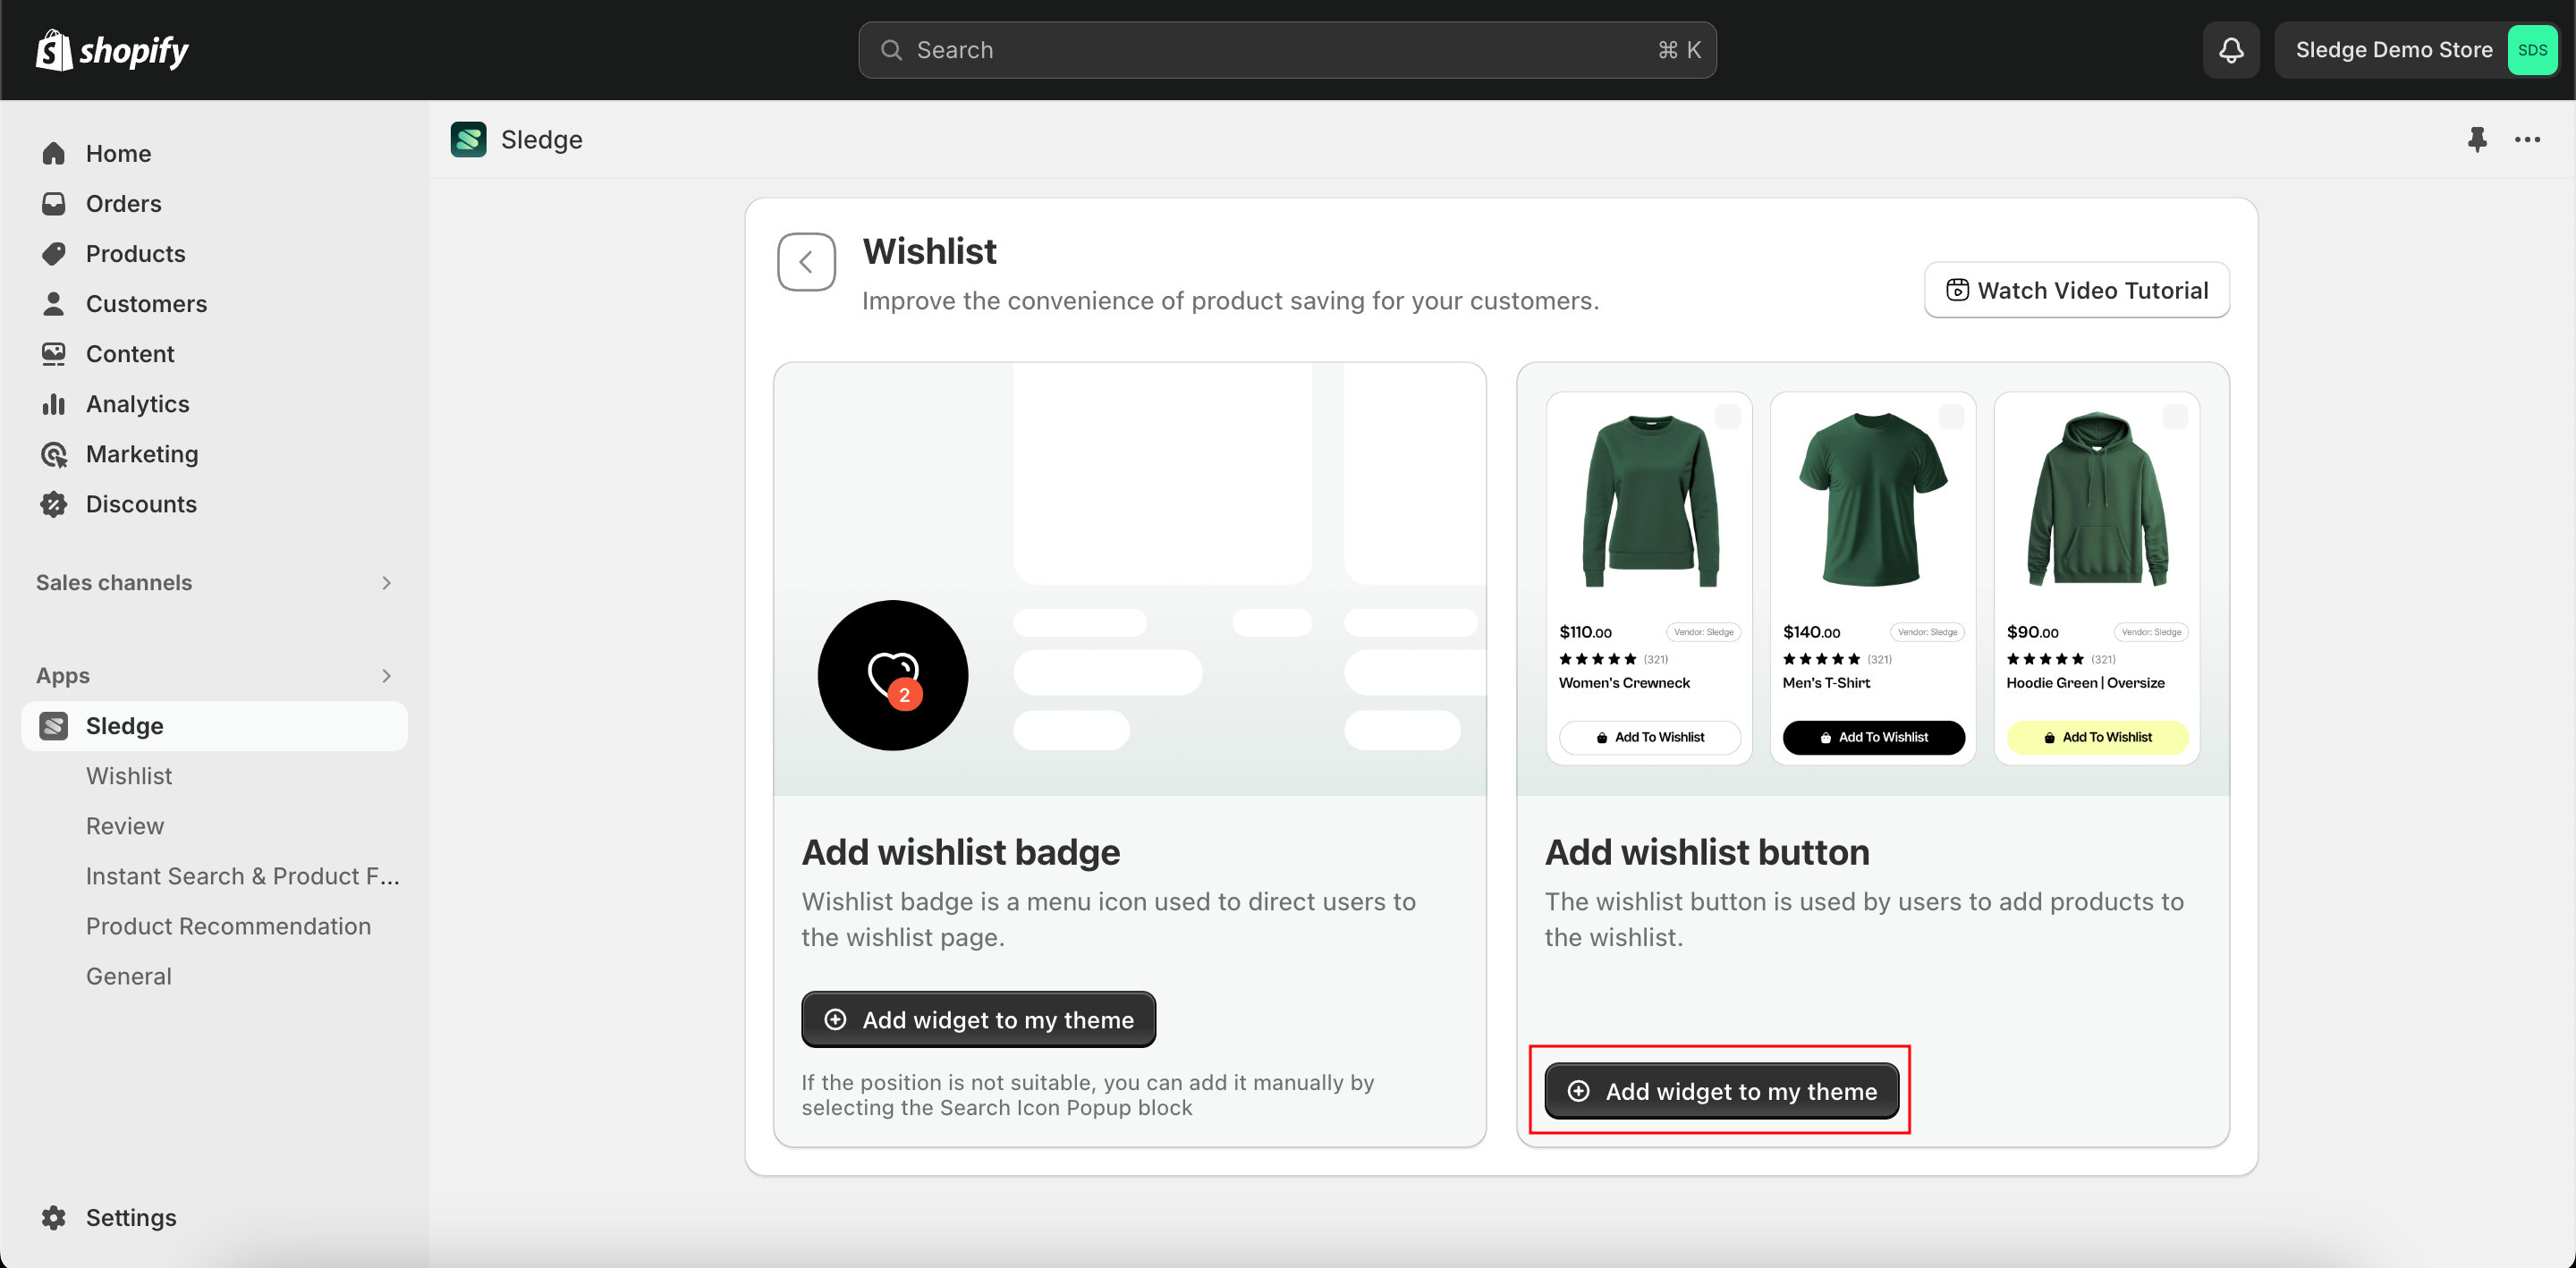
- In the Wishlist Theme Installation, click
Add widget to my themeonAdd wishlist buttonoption.
- You will be directed to the Editor, and the Button Detail will have been added automatically.
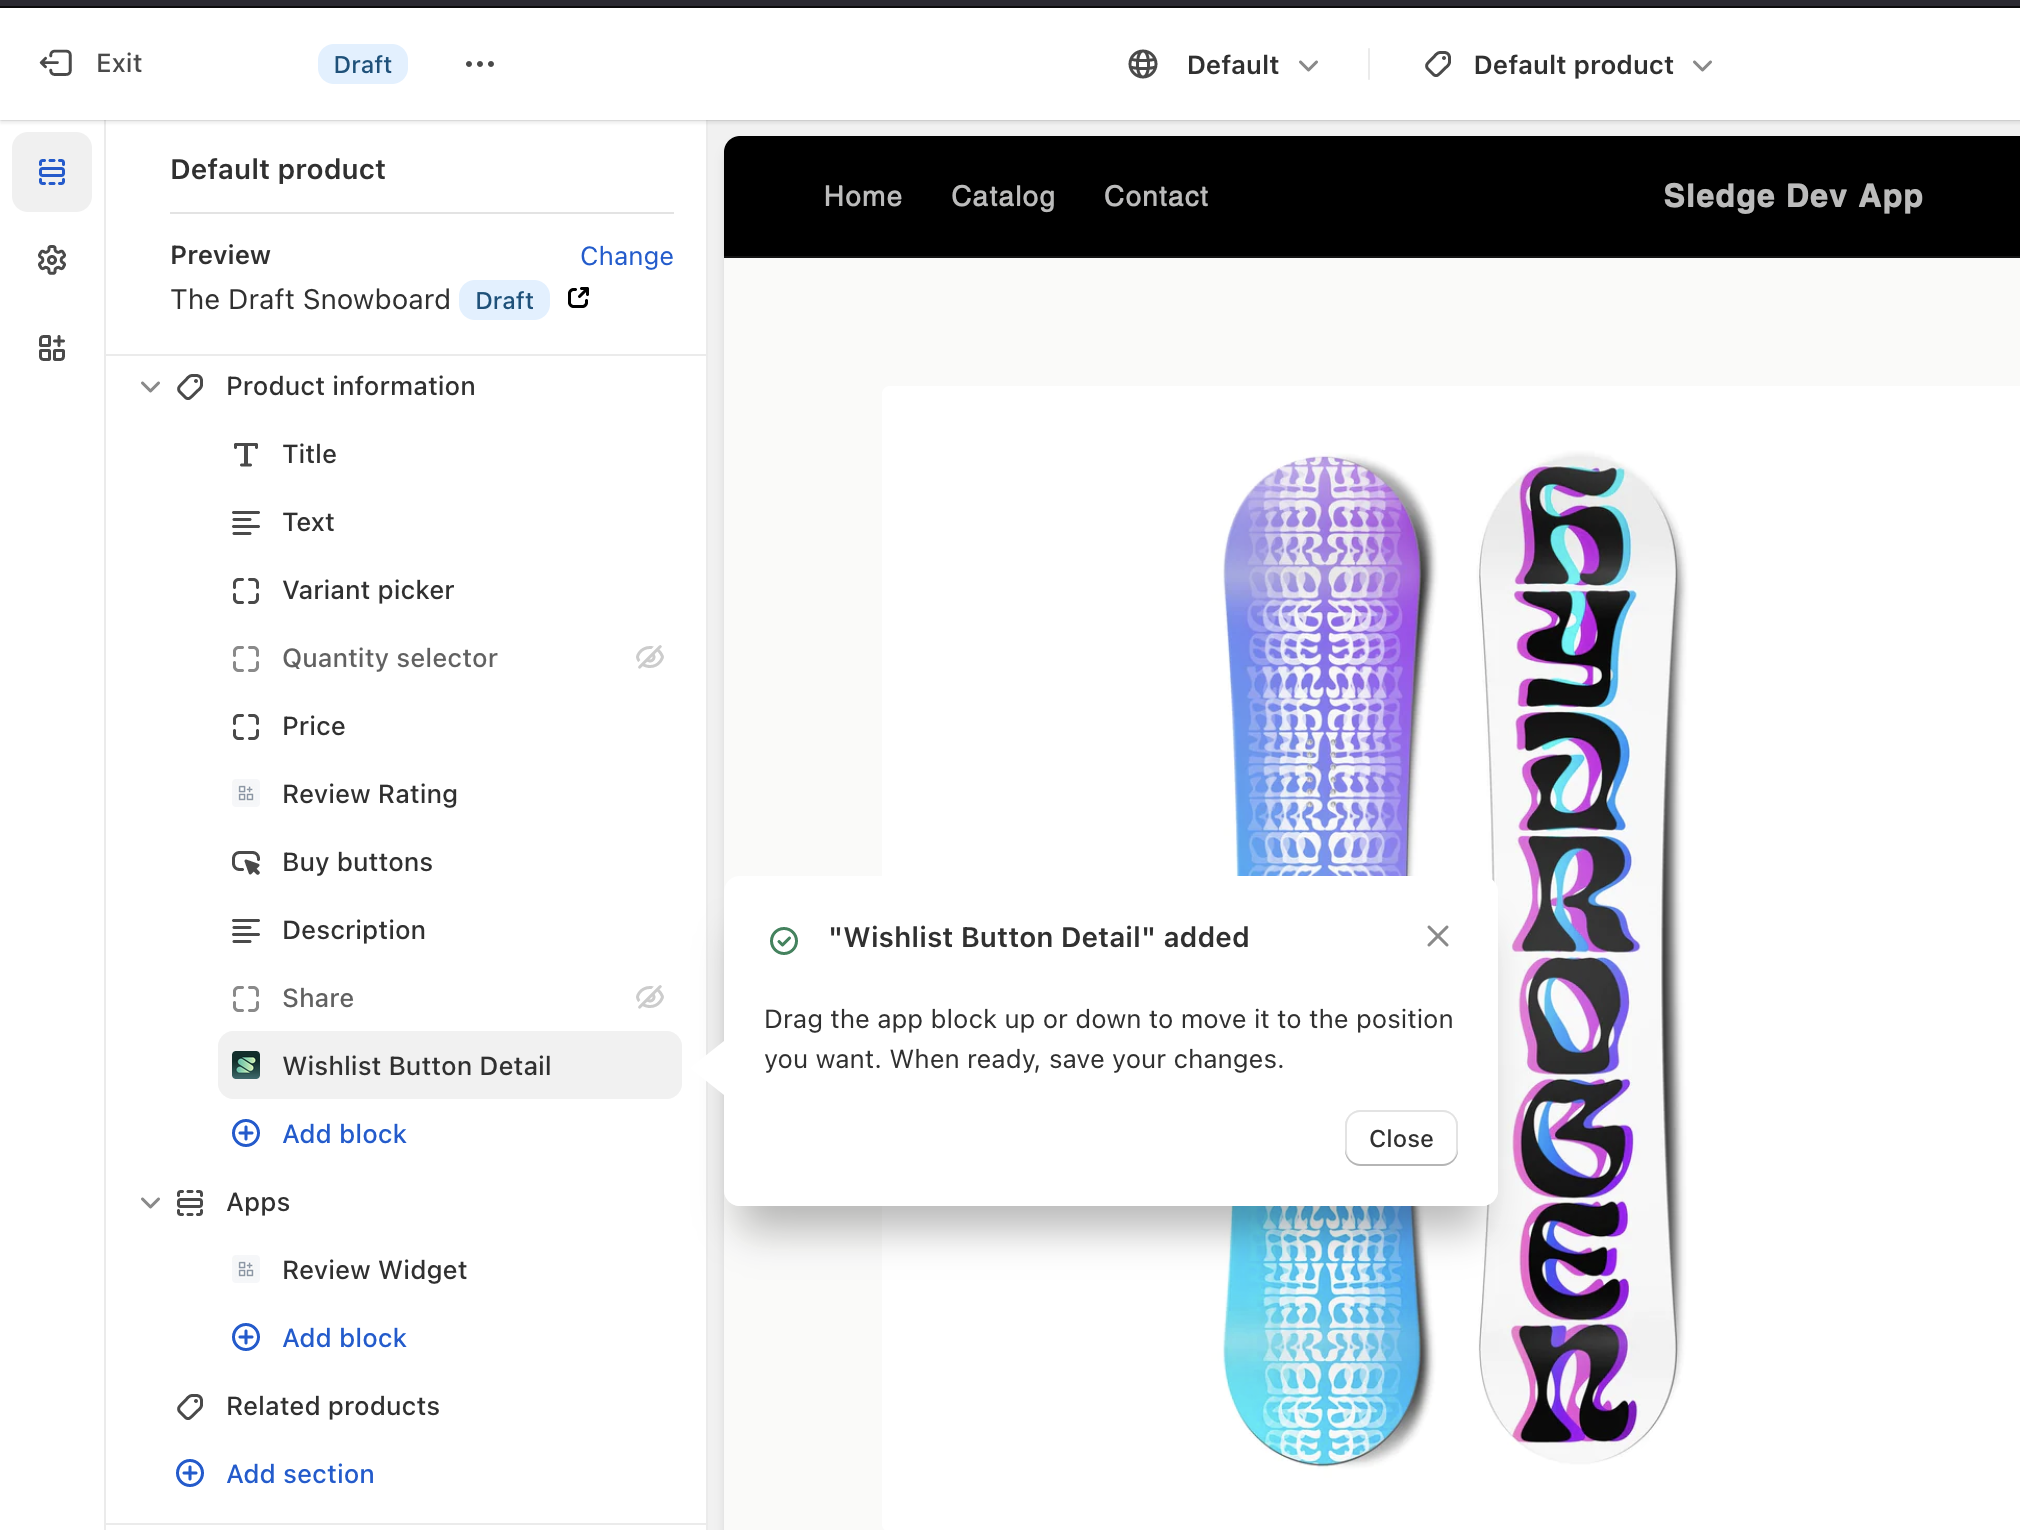
- When ready,
Saveyour changes.
Widget
Widget is a Wishlist's widget you can use to display list data of user's wishlist.
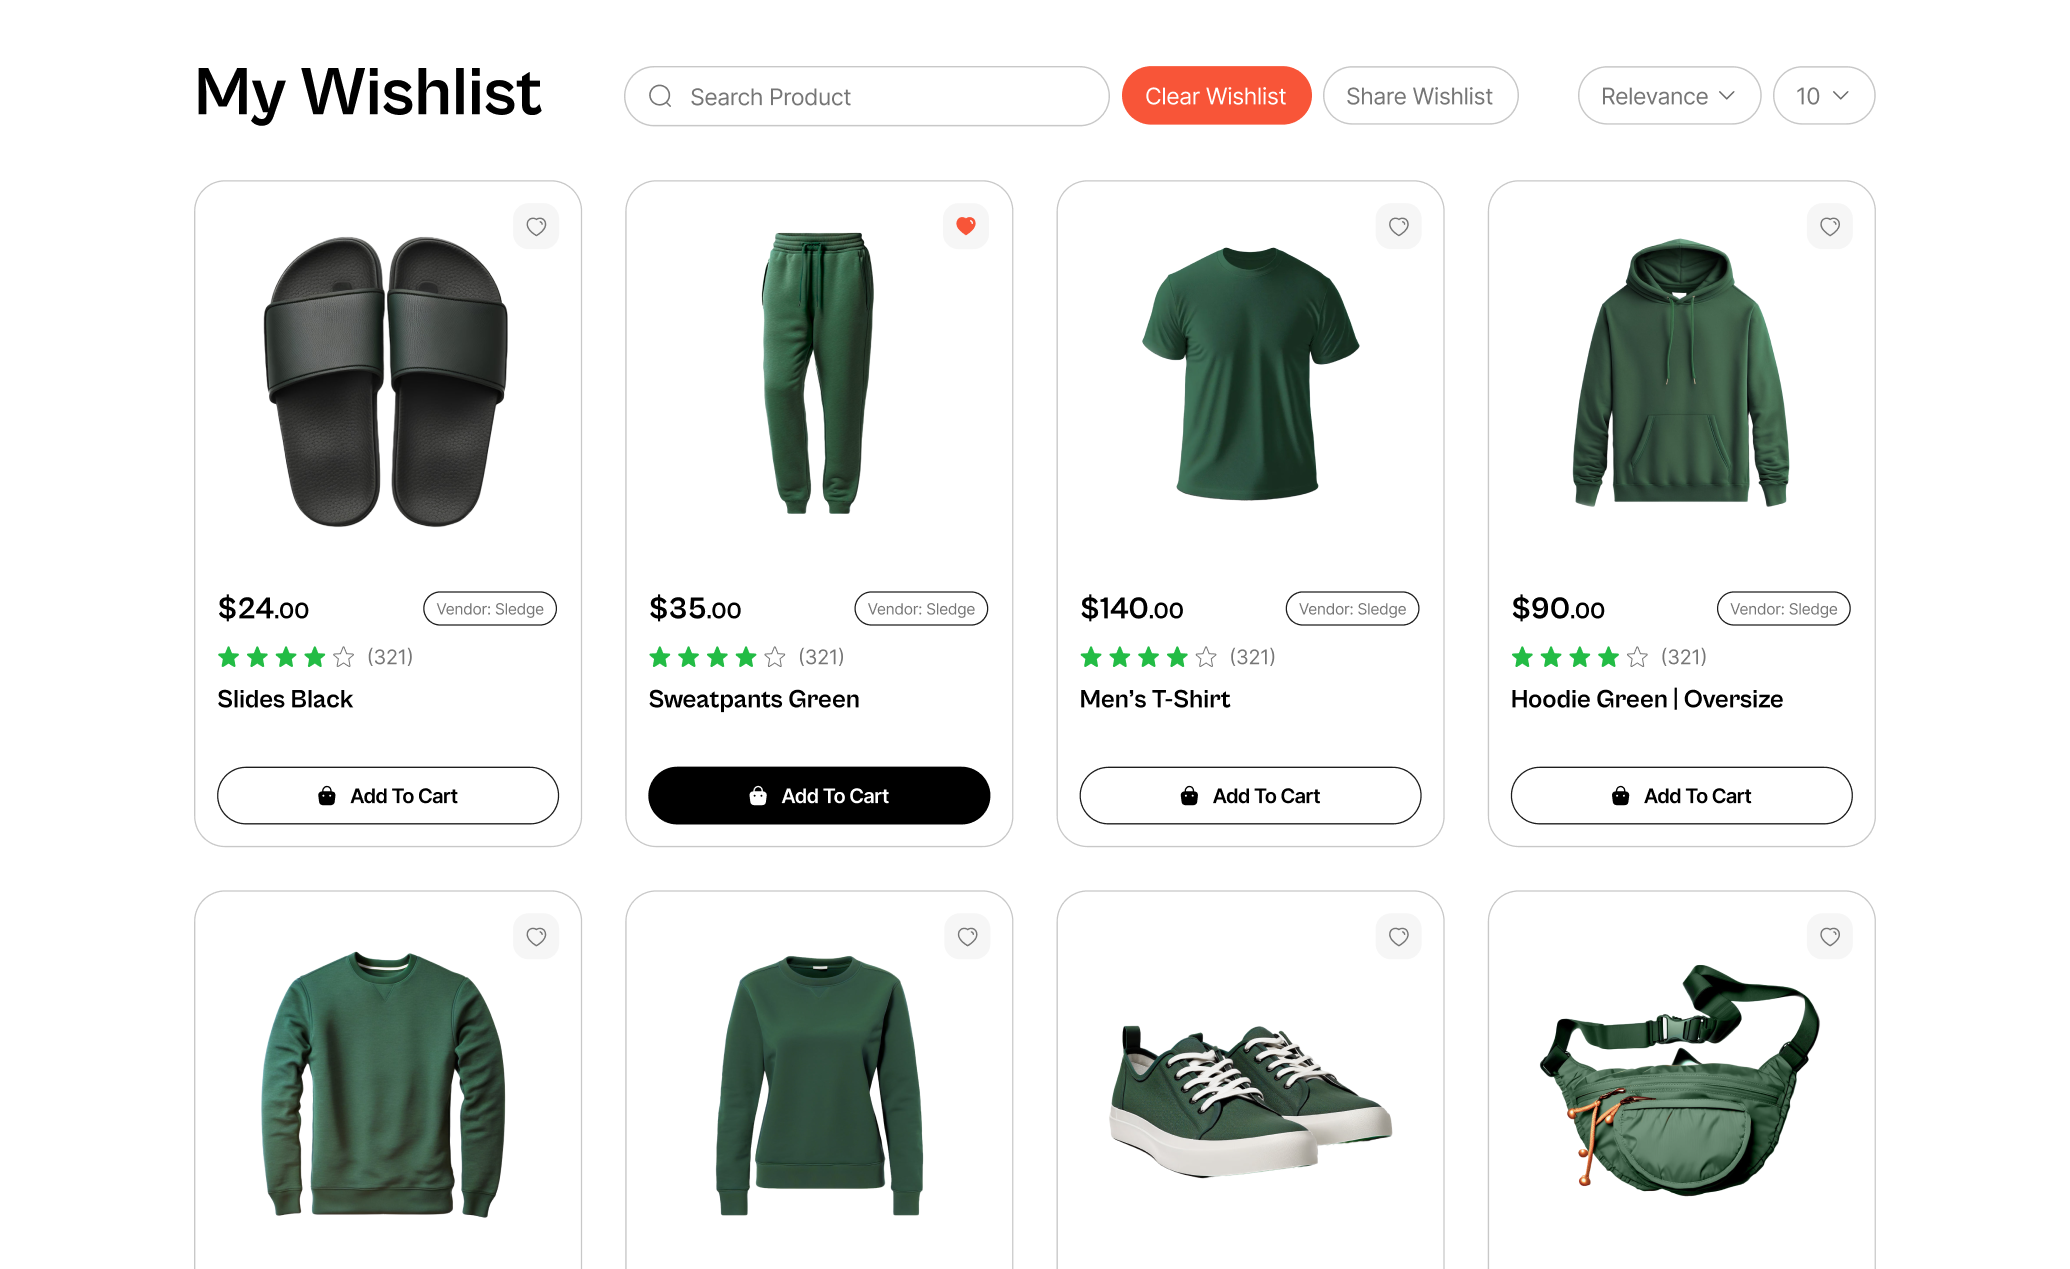
By default, Sledge provides you a proxy page that links to
https://YOUR-SHOPIFY-STORE.myshopify.com/apps/sledge/wishlist
If you want to create a custom URL for the Wishlist widget as you desire,
you can put a wishlist widget on the new page.
Here is a step-by-step guide to adding this widget to new page.
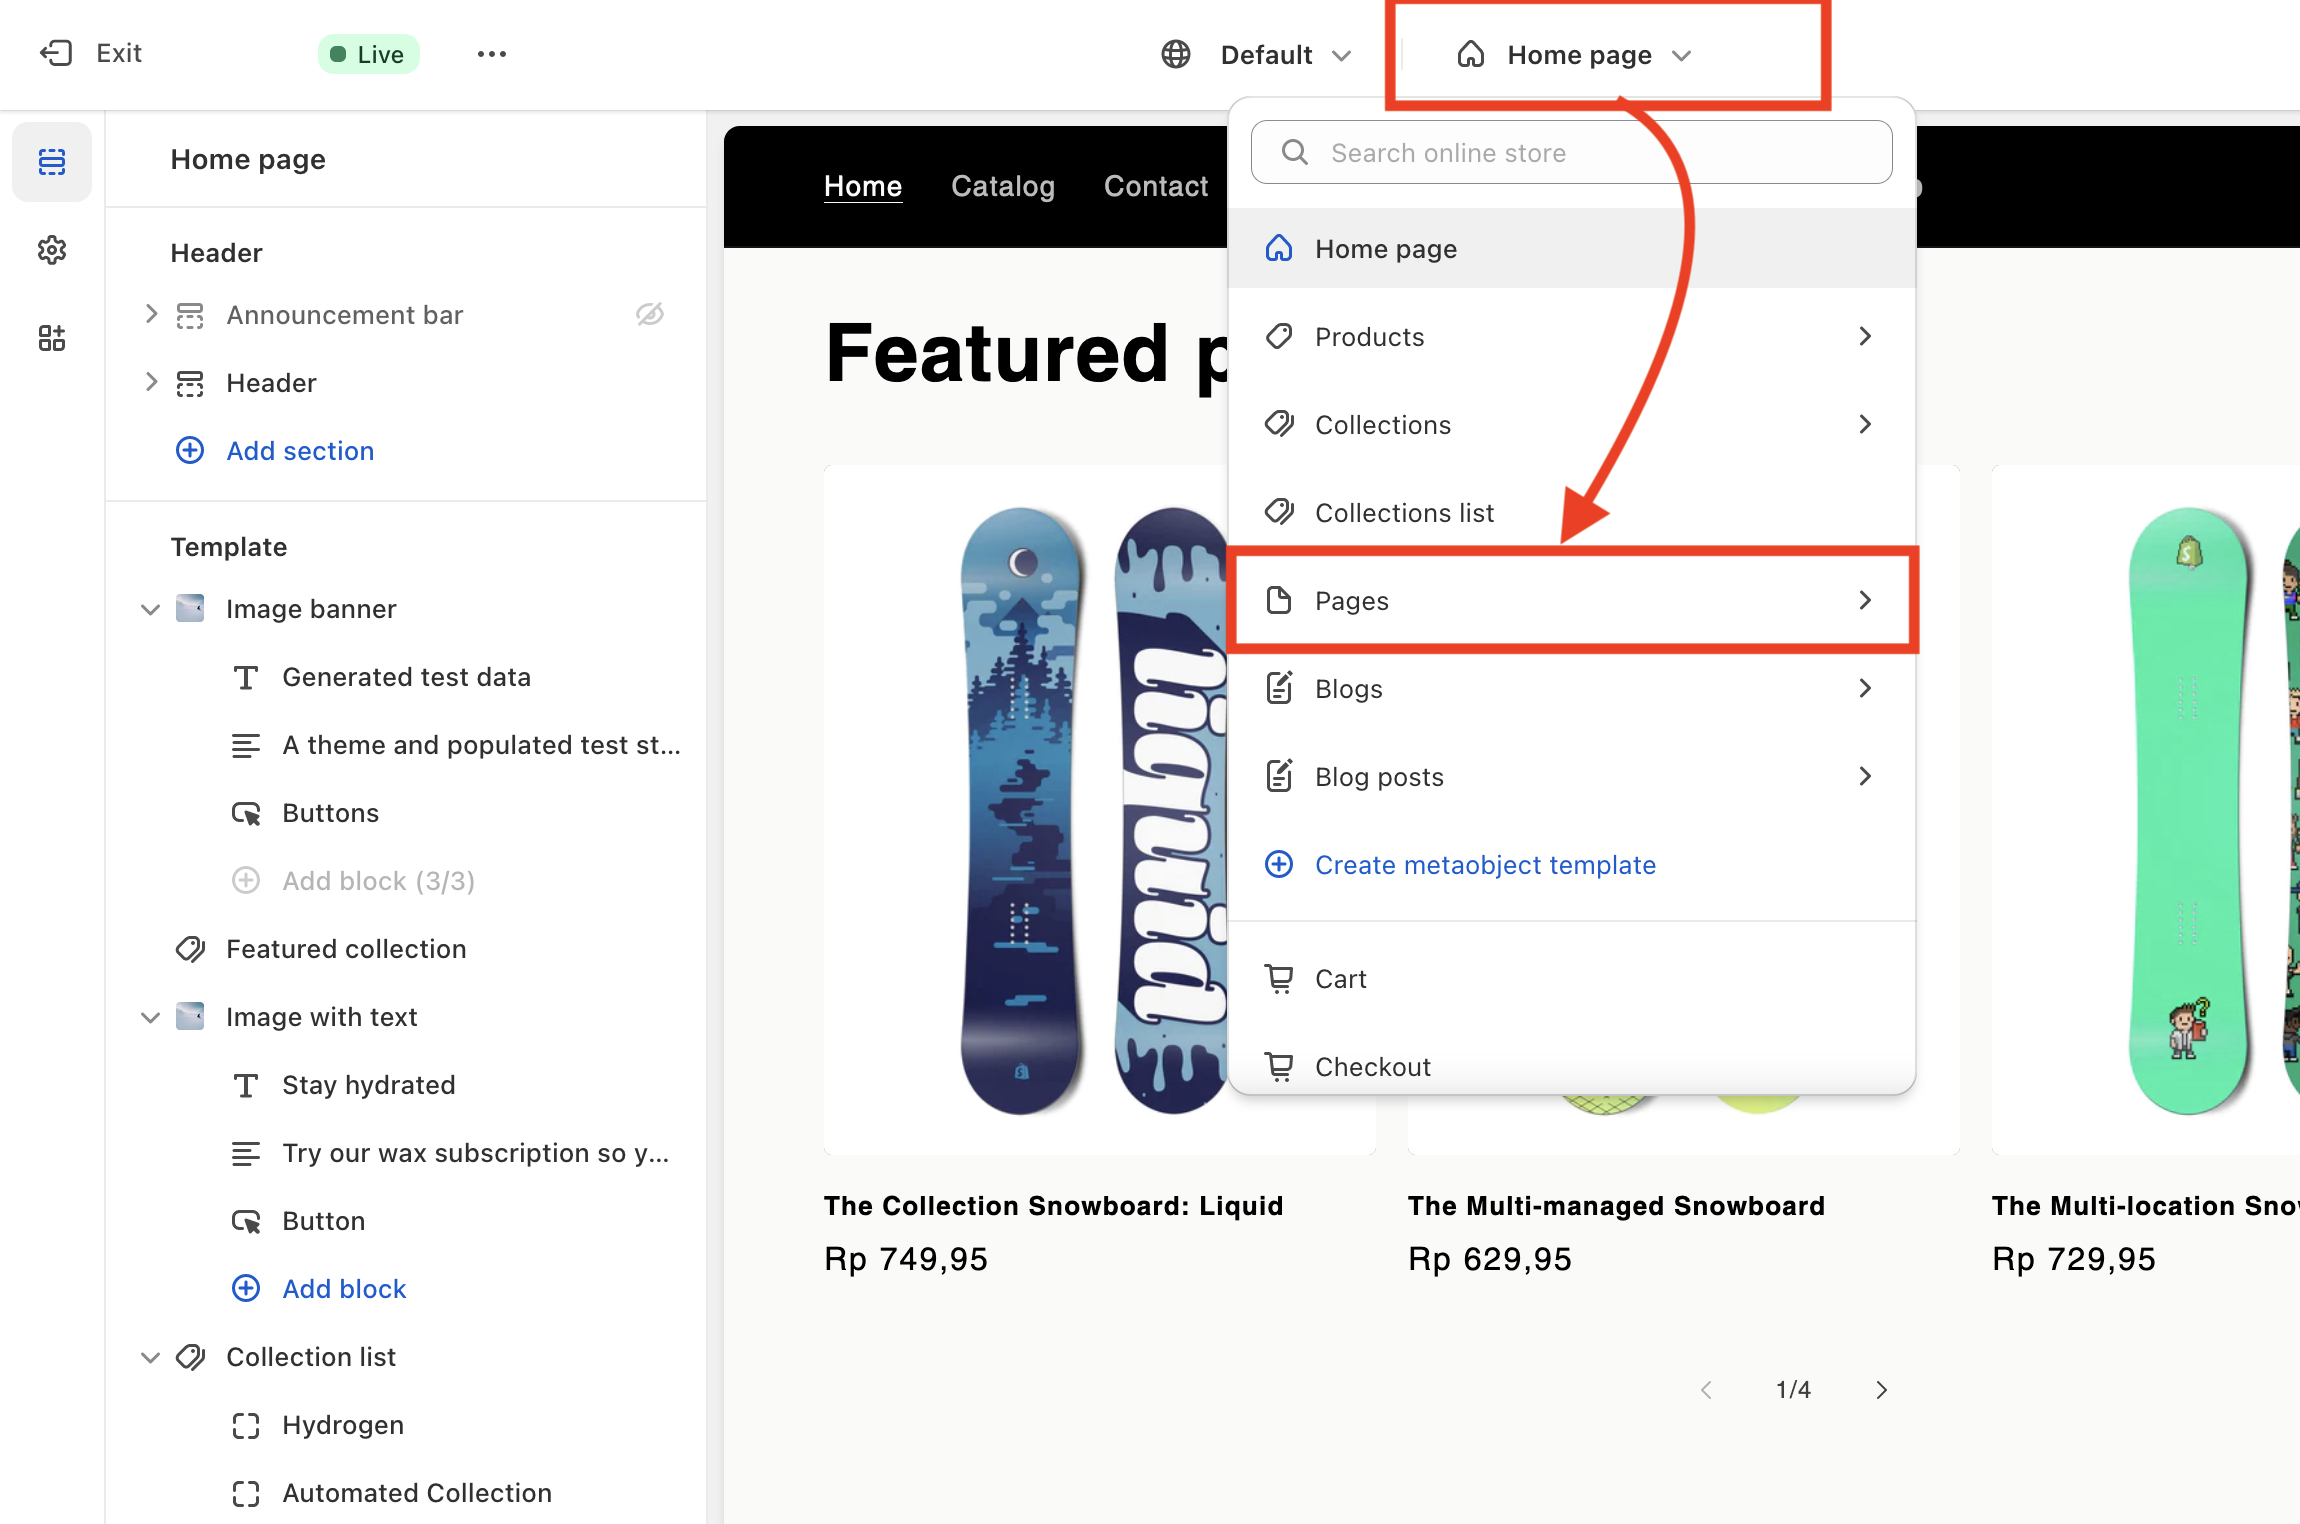
-
From your Shopify admin, navigate to
Online Store>Themes> click theCustomizebutton. -
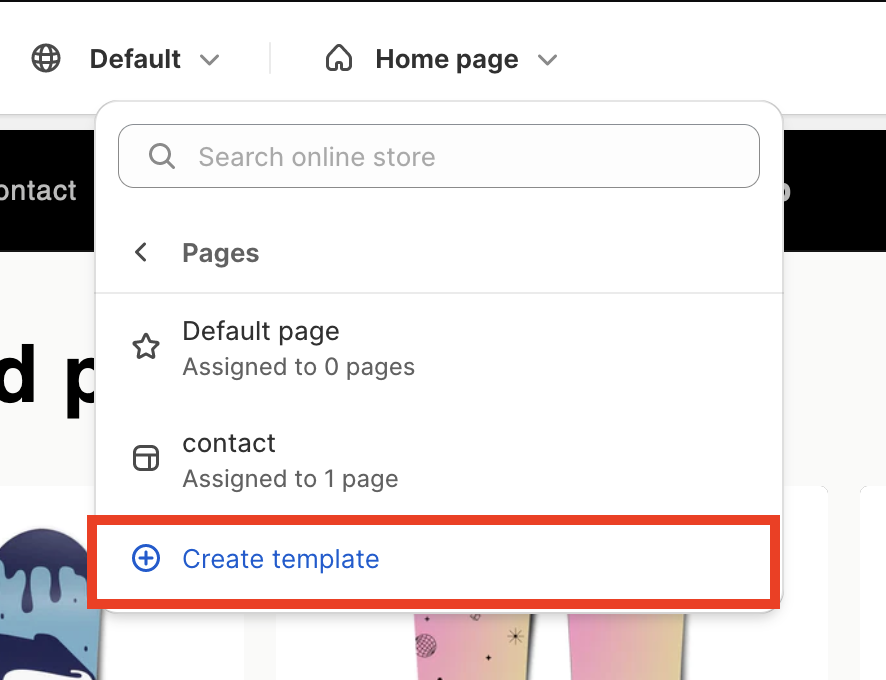
Navigate to the drop-down menu at the top, select
Pages>+ Create template.
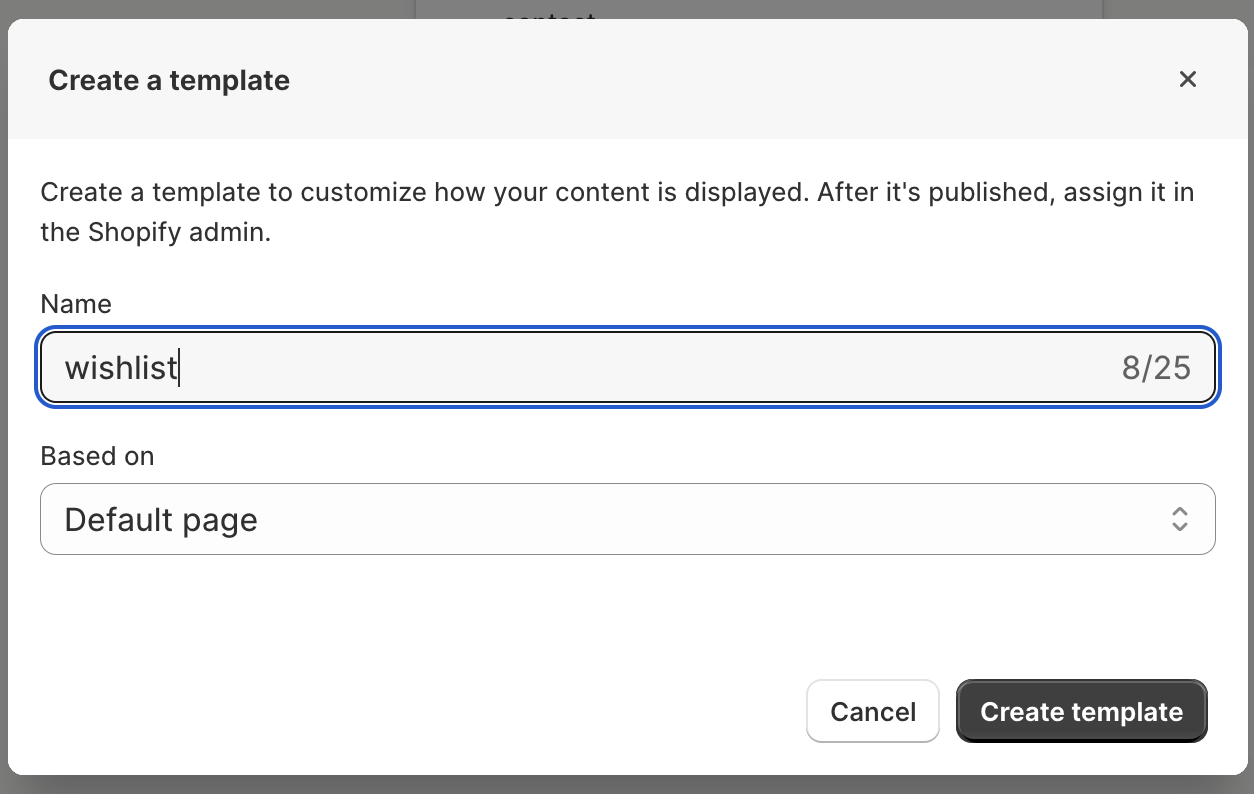
- For example, you can create a template named
wishlistand select Based onDefault page. When ready, you can save the template by clickCreate templatebutton.
-
Once you've
Created wishlisttemplate, You will be directed to the Wishlist page editor. -
Click
+ Add Section> Searchwishlist widget> Slides toApps> select theWishlist Widget.
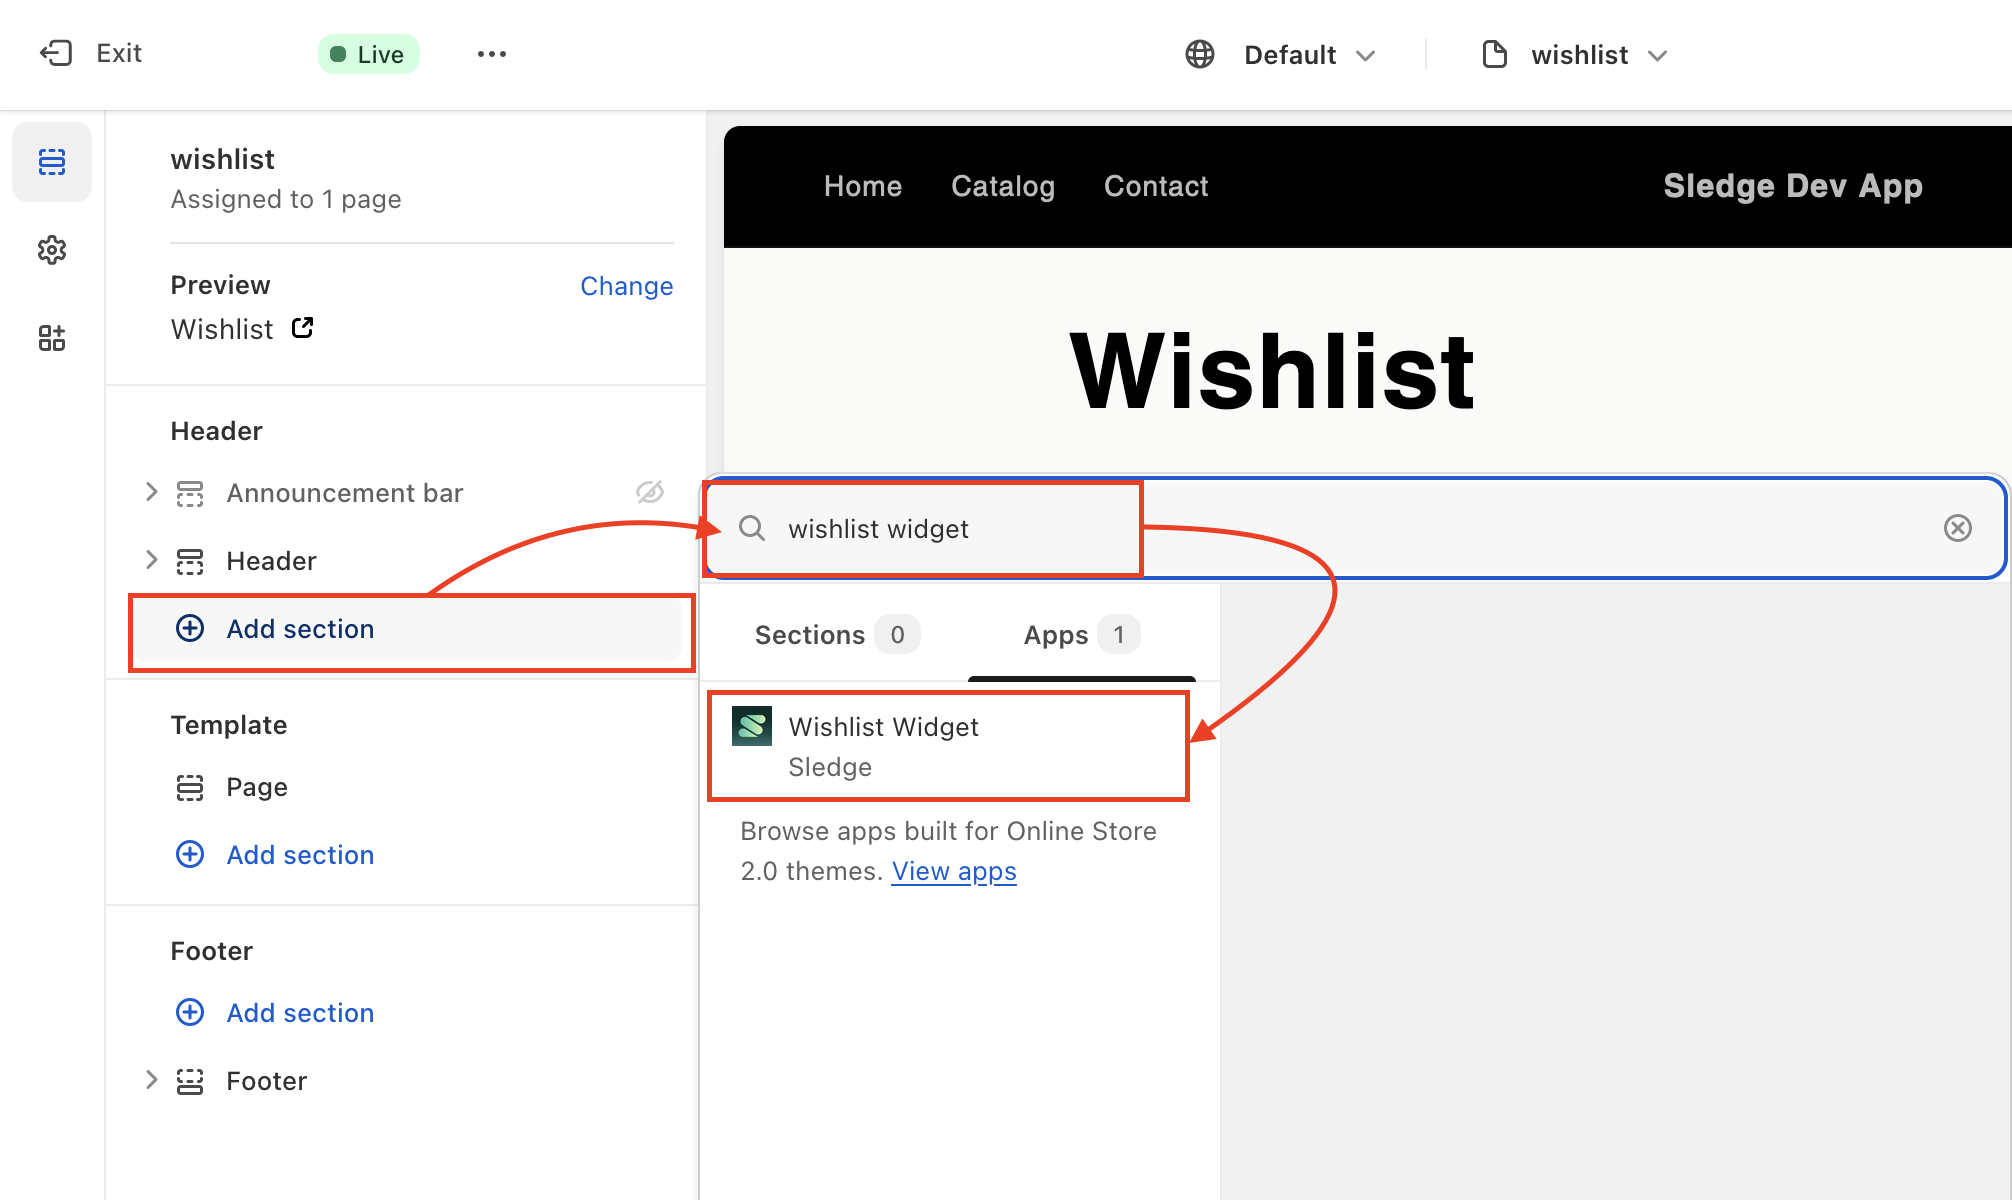
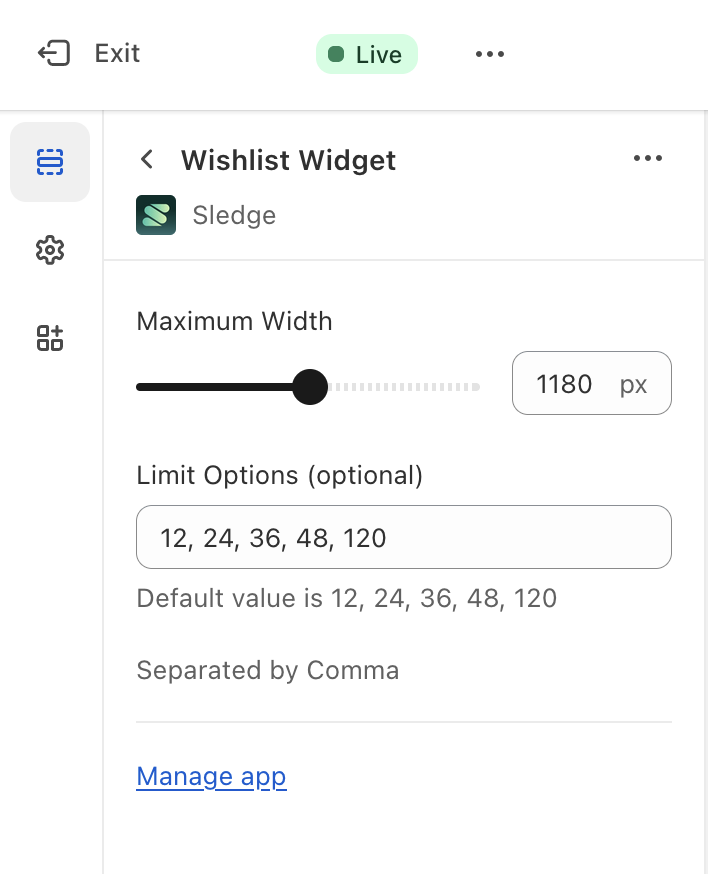
- You can customize the Wishlist widget by click the
Wishlist WidgetBlock.
-
Click
Savelocated in the upper-right corner. -
Once you've adding Wishlist Widget, now it's time to
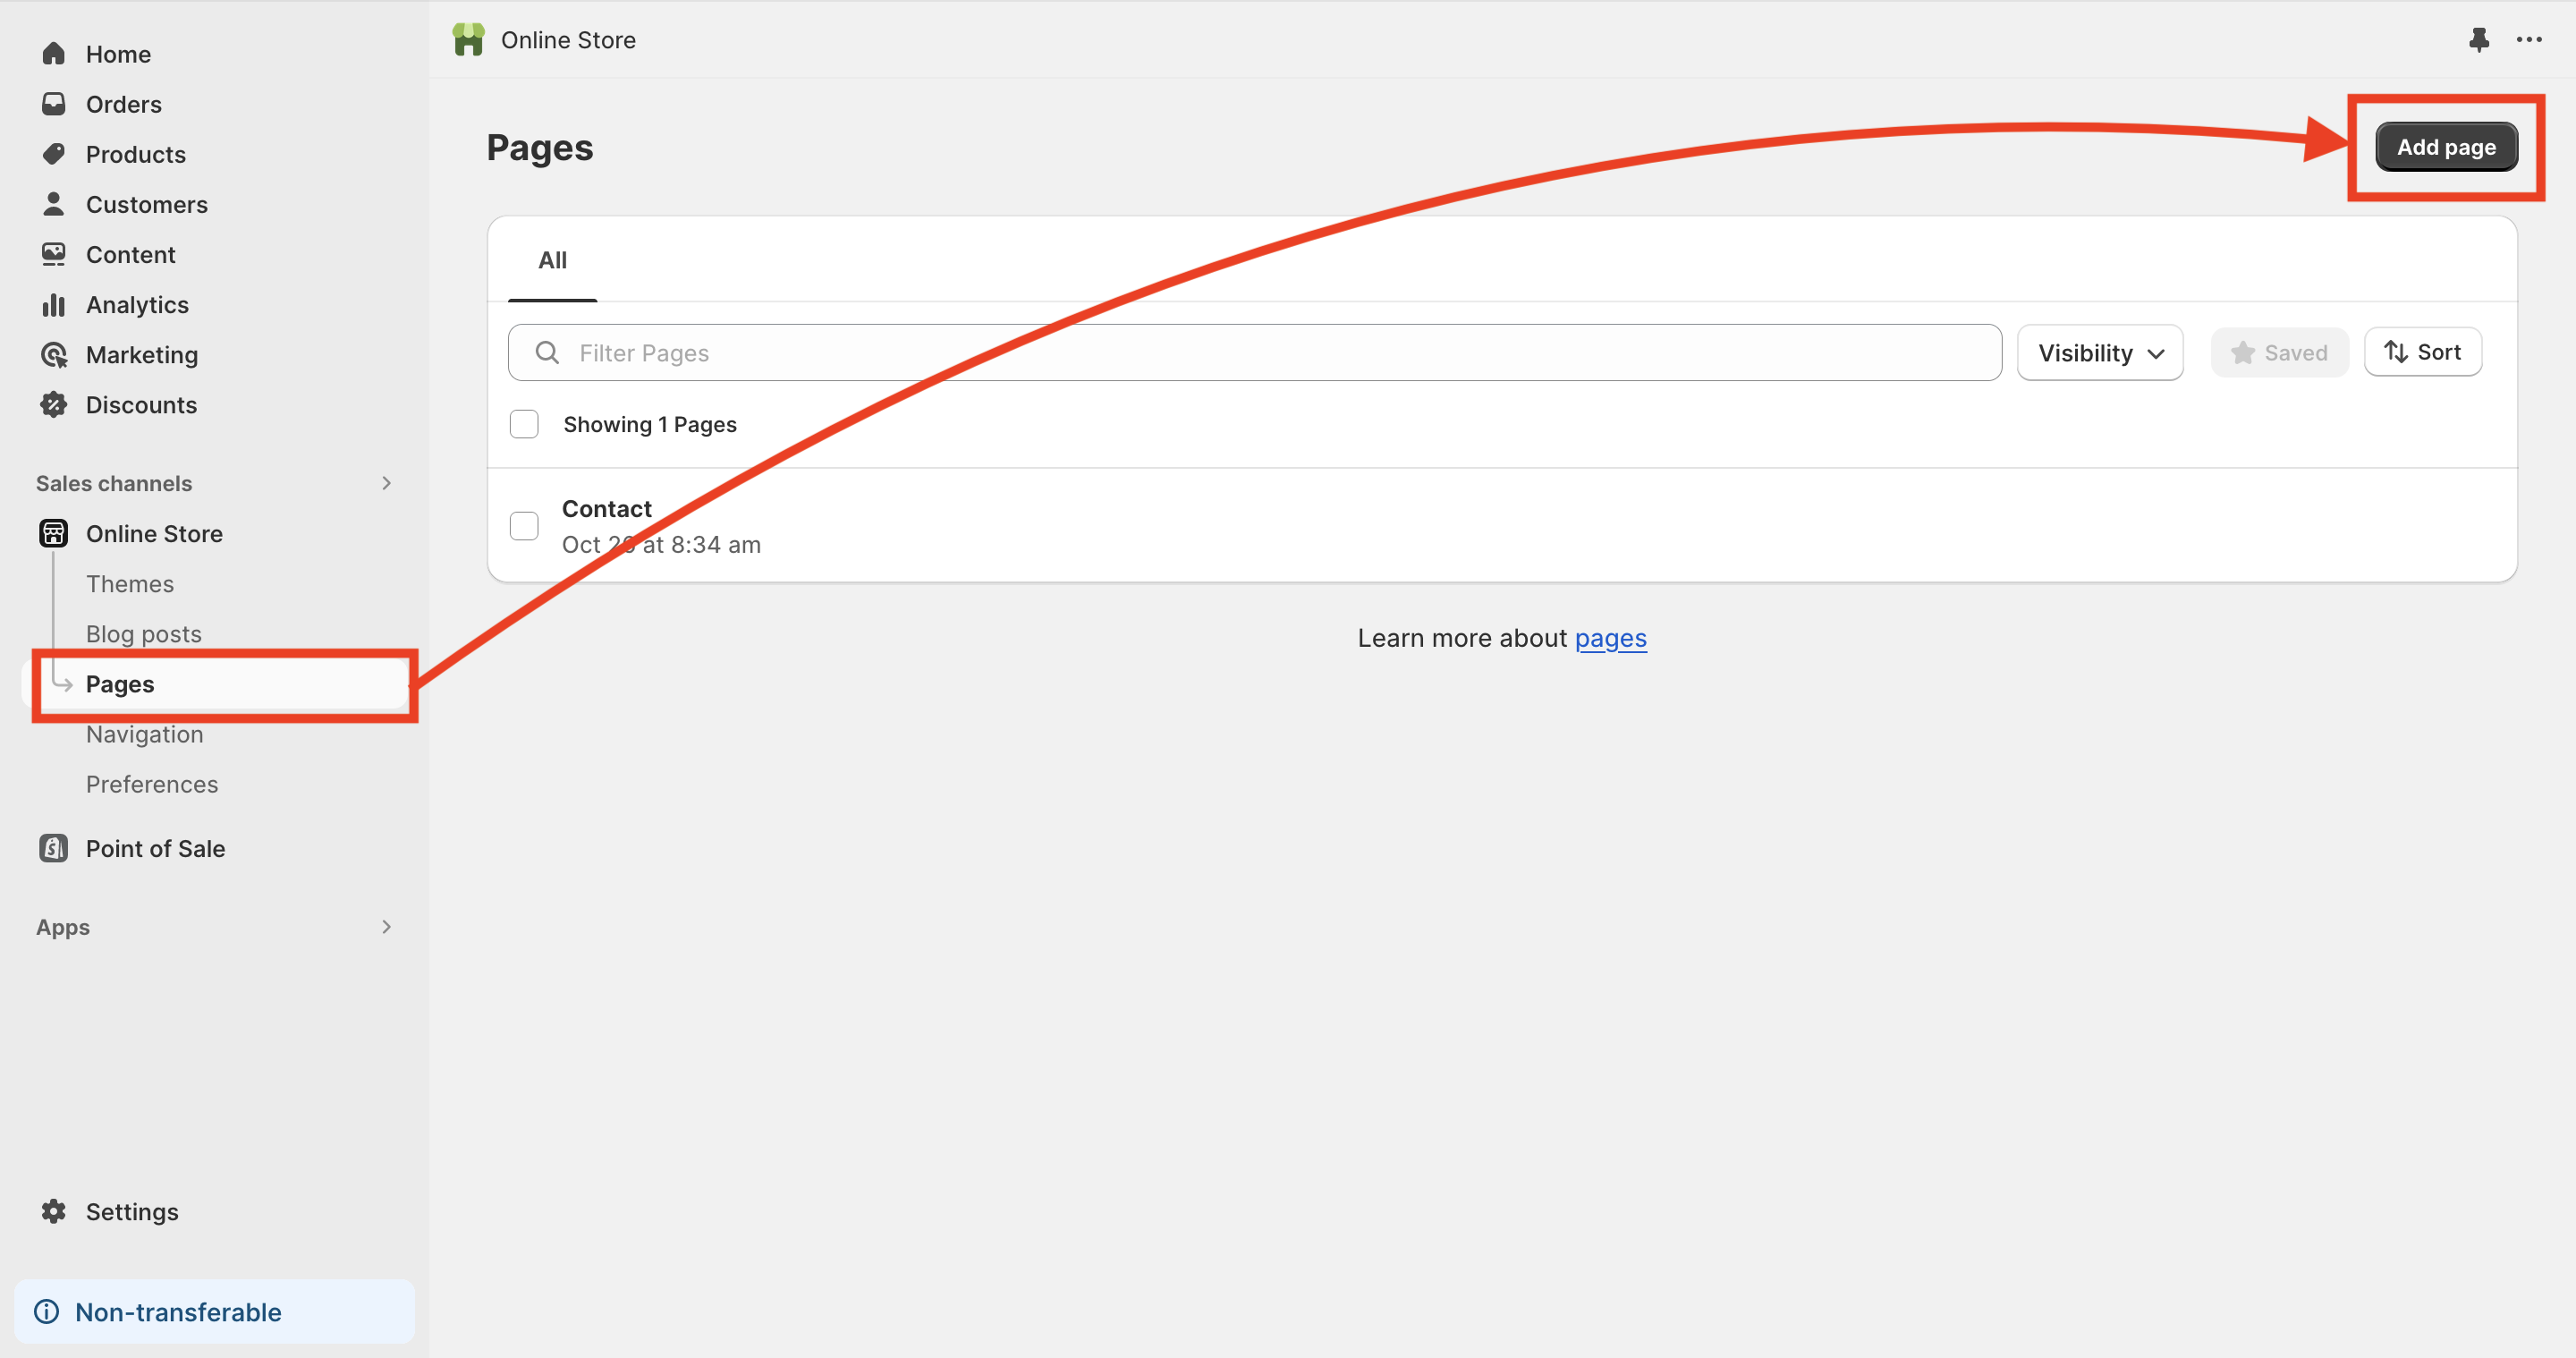
Create a Page. -
From your Shopify admin, navigate to
Online Store>Pages> click theAdd pagebutton.
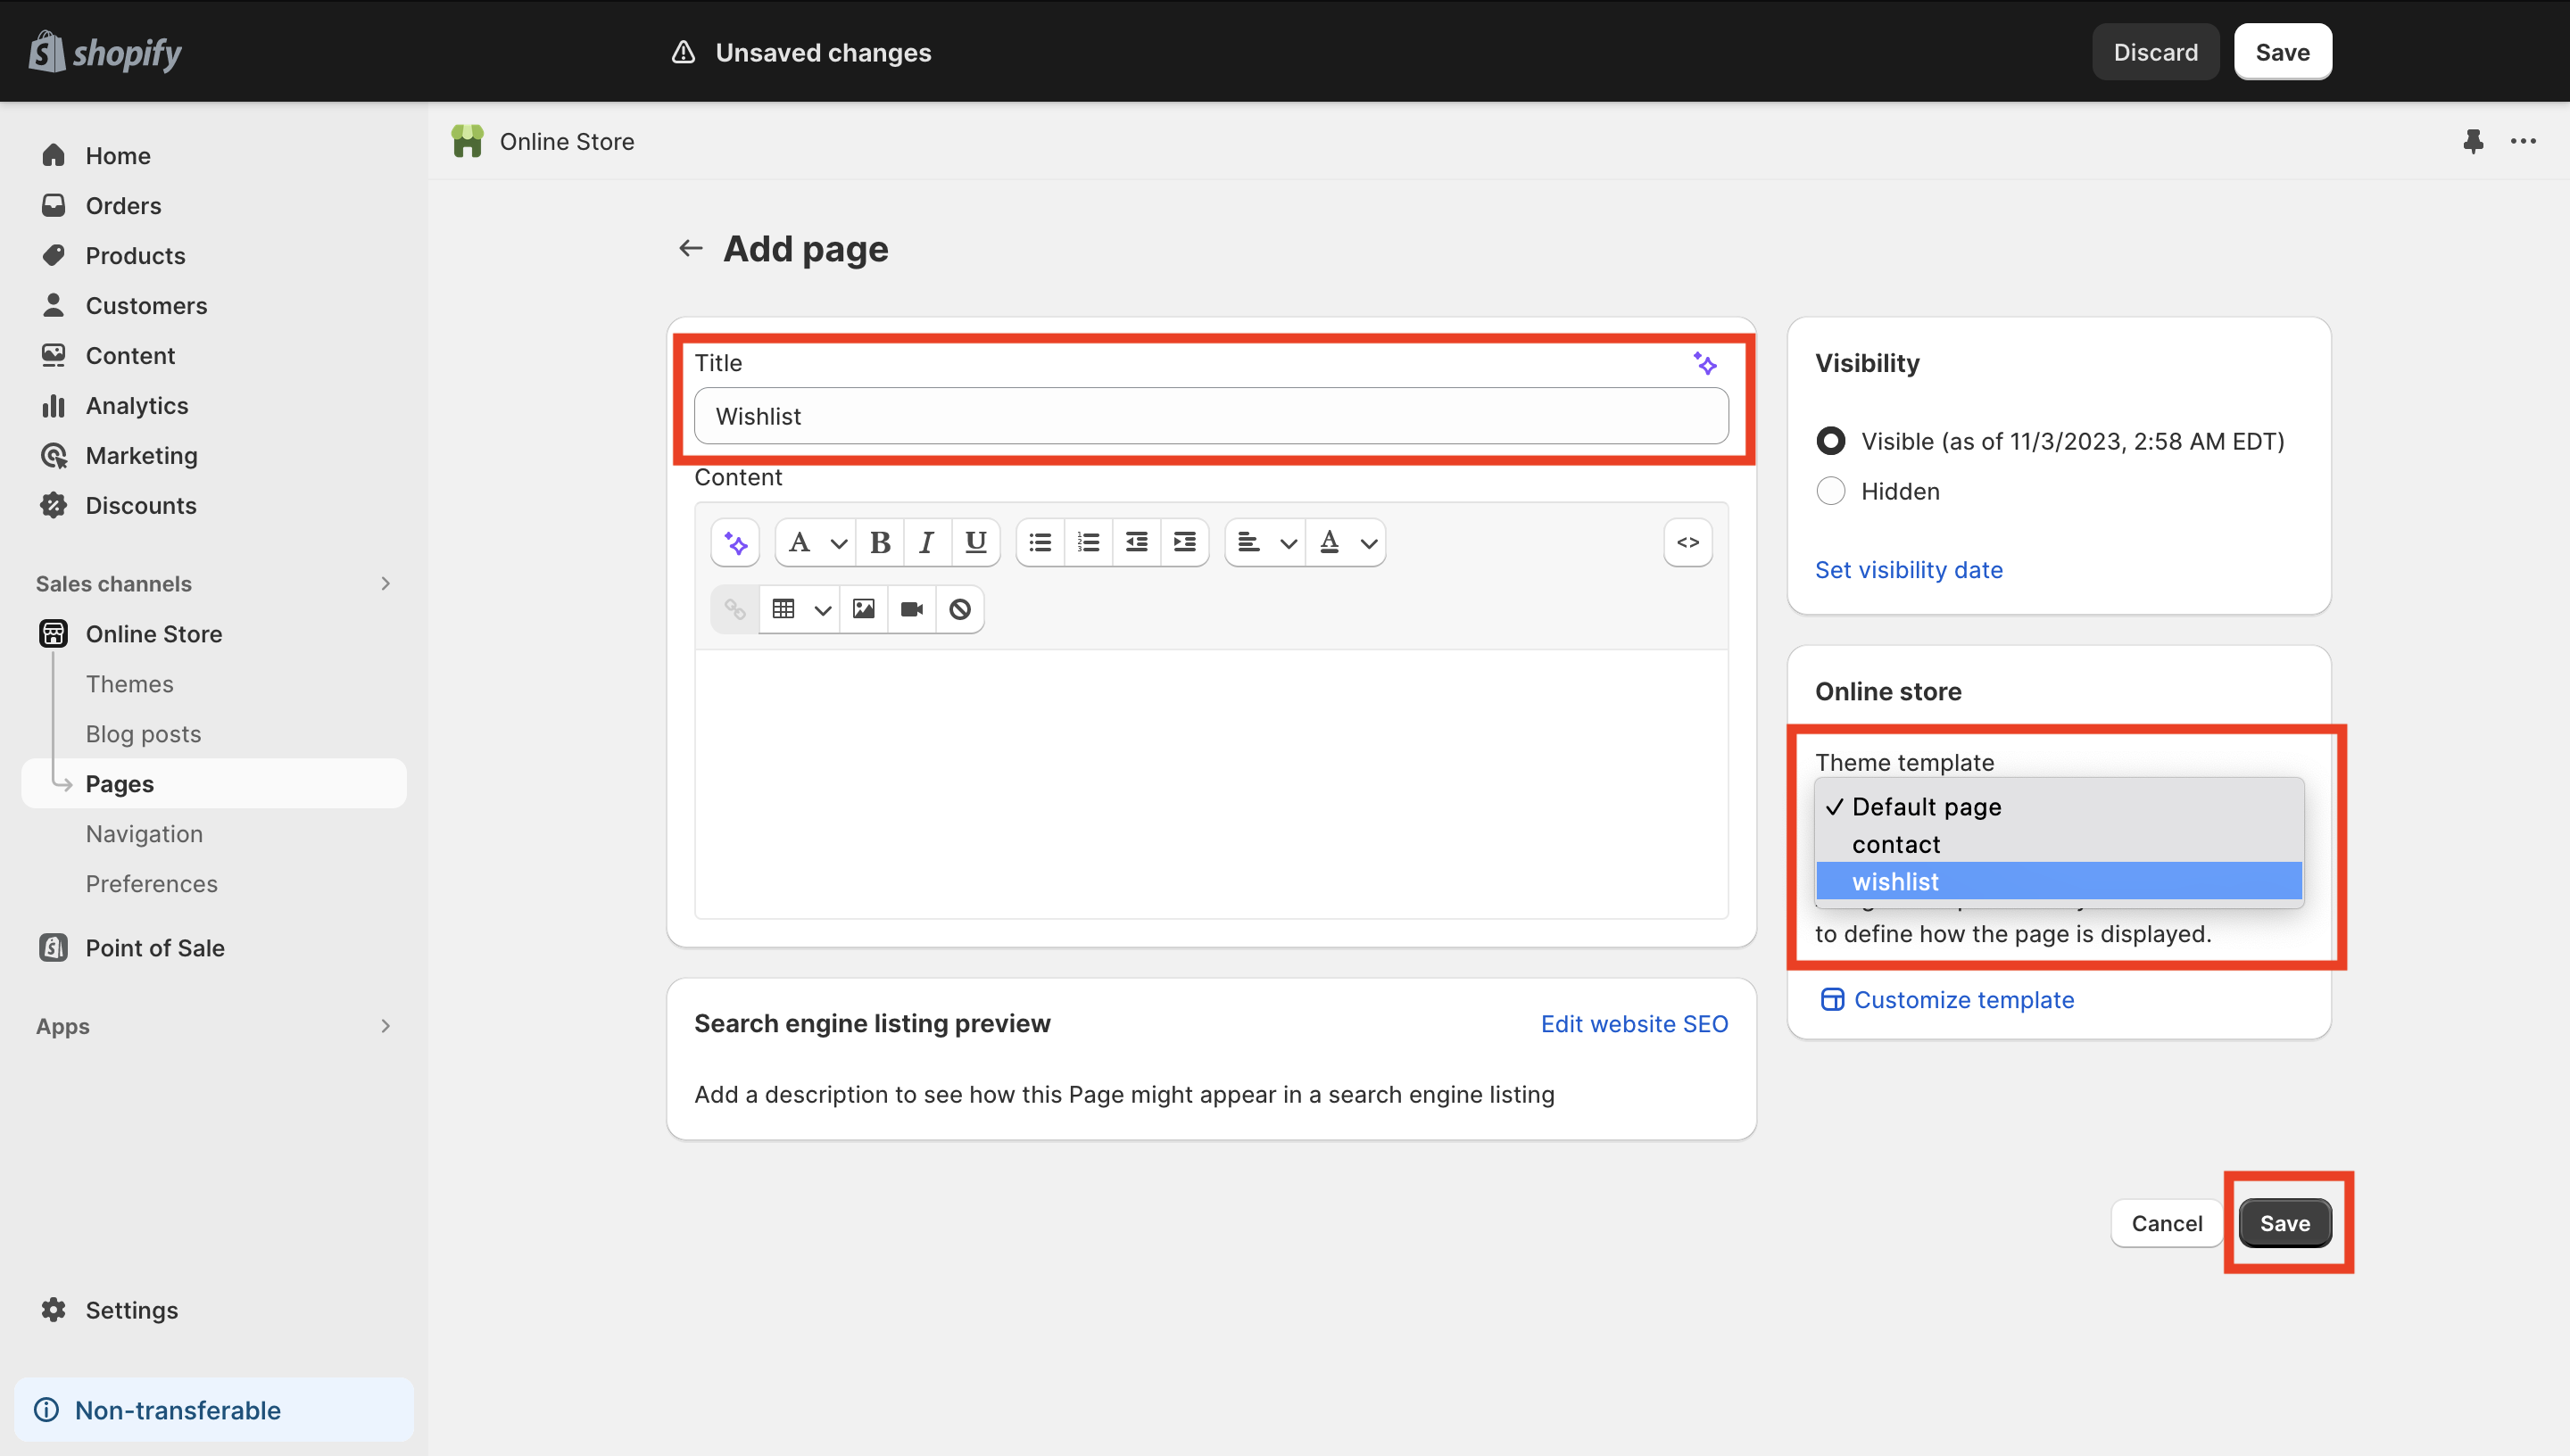
- Add a
title, and select Theme template you created earlier, for example:Wishlist,
When ready, clickSave.
- Once you've creating a Wishlist Page, Let's change URL on
Wishlist Badge.
If you haven't added a
Wishlist badgeyet, look here to see how to add the badge.
- From your Shopify admin, navigate to
Online Store>Themes> click theCustomizebutton. - Click on your
Wishlist Badge> ClickURL Wishlist Widget> SelectPages> SelectWishlist

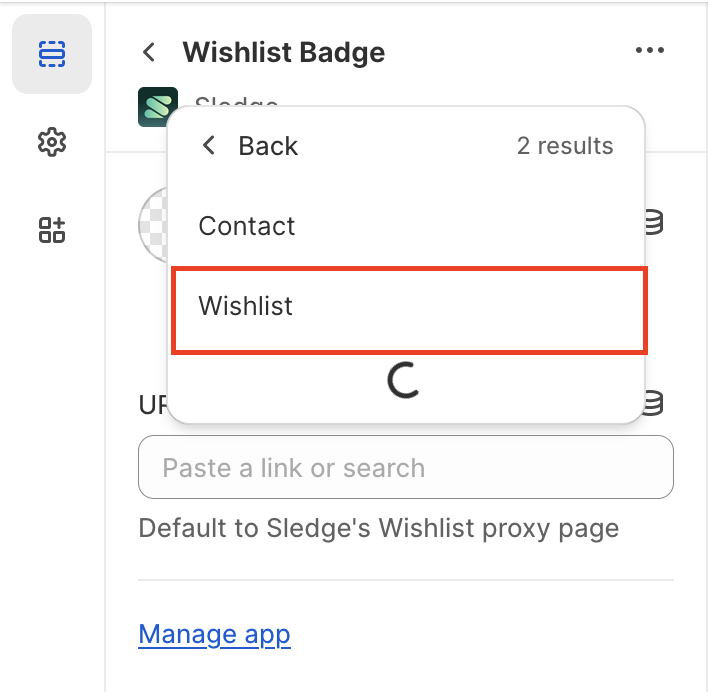
- After you've ready, you can simply click
Savelocated in the upper-right corner. - You can see the Wishlist page at
https://YOUR-SHOPIFY-STORE.myshopify.com/pages/wishlist
Flyout Widget
Flyout Widget is a Wishlist's widget you can use to display list data of user's wishlist in a flyout.
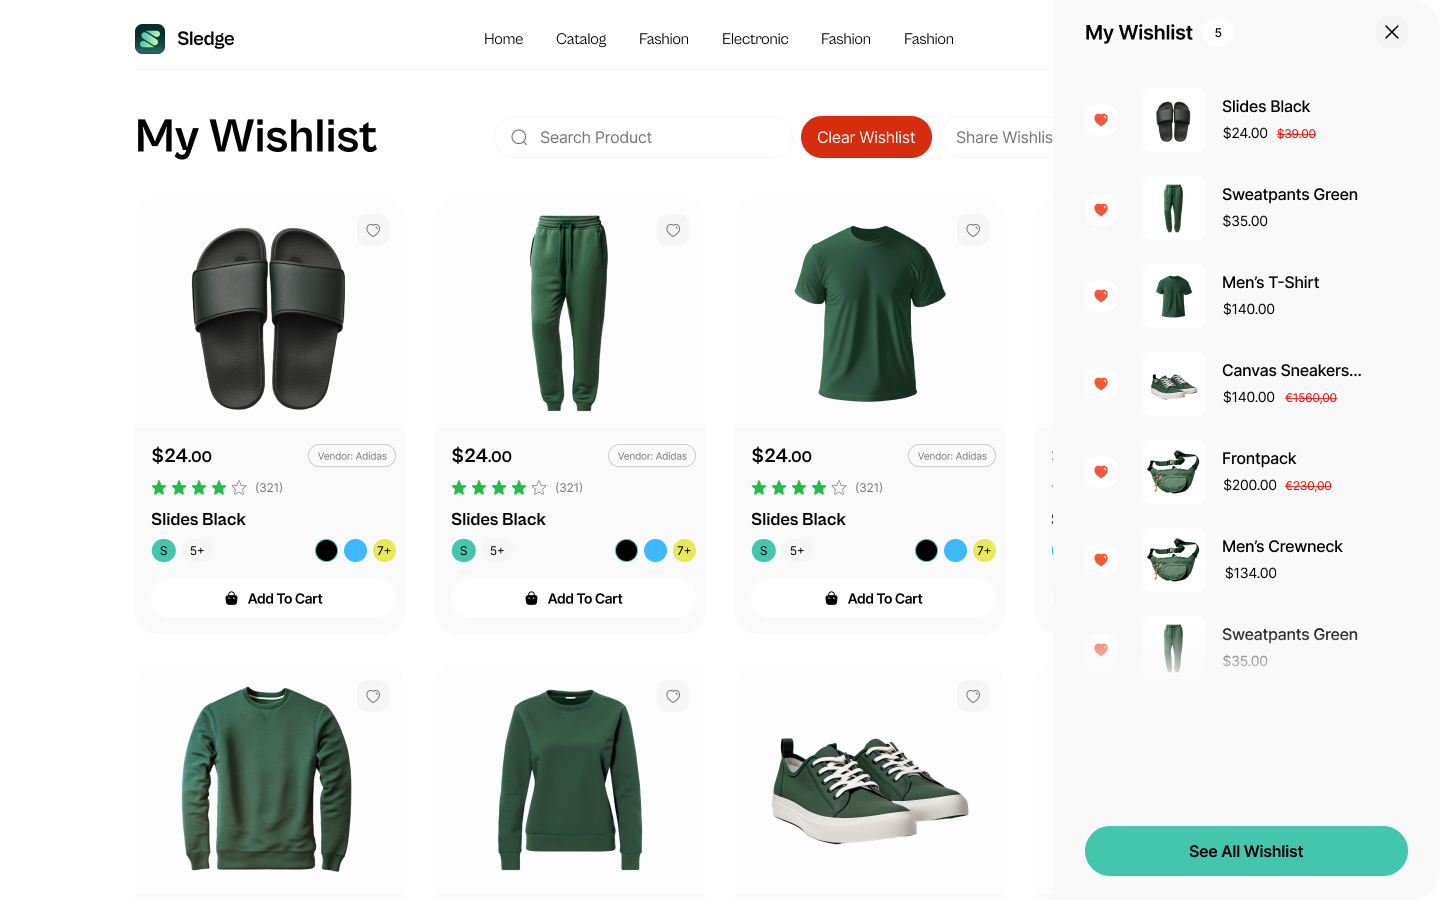
Here is a step-by-step guide to adding this widget with block.
- For adding this widget, first you need to
Add wishlist badgewidget to your theme. Follow the detailed steps here for adding wishlist badge.
- Once you've added the
Wishlist Badge, simply turn on theUse Wishlist Flyouttoggle switch here.

- When ready,
Saveyour changes.
Learn more
Congratulations! Now that you've learned usage of Wishlist widgets, you can start implementing Wishlist into your store.
If your store requires custom layout and custom callback for the widget, you can learn more on how to modify them based on your needs :